
Clutch assembly and release bearing - ’l’ series (page 2 of 3)
- Make
- Land Rover
- Model
- Freelander Workshop Manual
- Year
- 1998–2000
- Section
- Repairs
ClutchClutch assembly and release bearing - ’l’ series · page 2 of 3
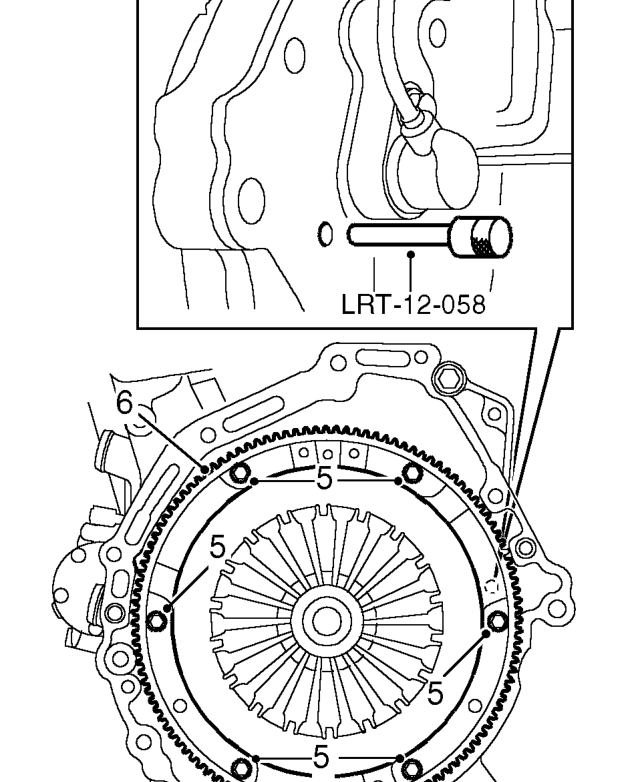
- Progressively loosen and then remove 6 bolts securing pressure plate to flywheel.
- Remove clutch pressure plate and collect drive plate.
- Inspect clutch drive plate for signs of wear or oil contamination. Check for broken or loose springs and signs of cracking at spring windows. Renew drive plate if necessary.
- Measure depth of rivets on drive plate, renew drive plate if less than service limit.
Drive plate rivet depth: new clutch plate = 1.0 mm minimum service limit = 0.2 mm
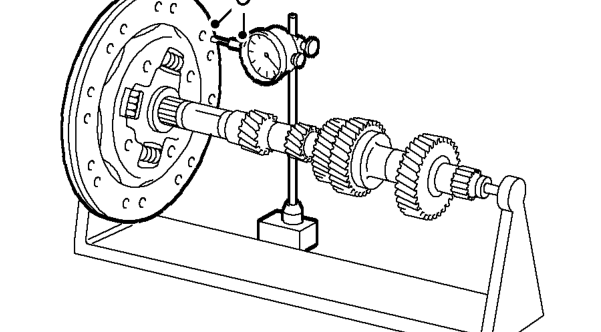
- Measure drive plate run-out by fitting drive plate to a gearbox mainshaft and use a dial gauge as drive plate is rotated. Renew drive plate if outside service limit.
Drive plate run-out: New clutch plate = 0.8 mm Service limit = 1.0 mm
- Check pressure plate for signs of wear or damage. Check for signs of overheating on drive straps (deep yellow to blue colour), renew pressure plate if necessary.
NOTE: Renew a pressure plate which has been accidentally dropped.
Parts & tools for this job For 1998 Land Rover Freelander
- PARTClutch kitSearch: Land Rover Freelander 1998 clutch kit
- TOOLClutch alignment toolSearch: clutch alignment tool
- FLUIDGear oilSearch: Land Rover Freelander manual gearbox oil
Links open Amazon search results in a new tab. As an Amazon Associate I earn from qualifying purchases.