
All models
- Make
- Land Rover
- Model
- Freelander Workshop Manual
- Year
- 1998–2000
- Section
- Repairs › All models
Heating & ventilationAll models
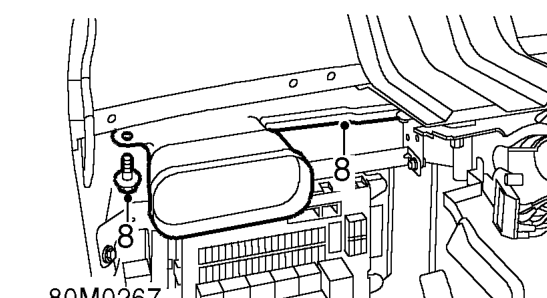
All models
- Remove bolt from duct of LH outer face level vent and remove duct.
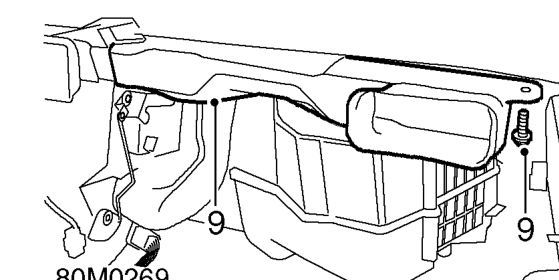
- Remove bolt from duct of RH outer face level vent and remove duct.
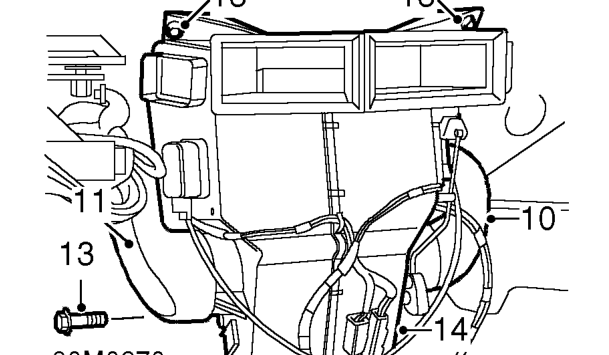
- Remove duct of RH demister vent.
- Remove duct of LH demister vent.
- Remove air inlet connector hose.
- Remove 2 nuts and 1 bolt from heater.
- Remove heater.
Do not carry out further dismantling if component is removed for access only.
- Release air blend cable from lever and abutment.
- Release air distribution cable from lever and abutment.
- Remove heater control.
- Position heater control to replacement heater.
- Connect air distribution cable to lever and abutment.
- Connect air blend cable to lever and abutment.
Refit
- Position heater. Fit and tighten nuts and bolt.
- Fit air inlet connector hose.
- Fit duct of RH demister vent.
- Fit duct of RH outer face level vent. Fit and tighten bolt.
- Fit duct of LH demister vent.
- Fit duct of LH outer face level vent. Fit and tighten bolt.
Models with A/C
- Connect multiplug to evaporator.
All models
- Connect multiplug to heater and secure diagnostic socket.
- Connect multiplugs to heater control switch pack.
- Fit console support bracket. Fit and tighten bolts.
- Fit fascia assembly. See BODY, Interior trim components.
- Connect hoses to heater pipes and secure clips.
- Refill cooling system. See COOLING SYSTEM, Adjustments.
Parts & tools for this job For 1998 Land Rover Freelander
- TOOLA/C manifold gauge setSearch: AC manifold gauge set
- TOOLUV leak detection kitSearch: AC UV leak detection kit
- PARTCabin filterSearch: Land Rover Freelander 1998 cabin filter
Links open Amazon search results in a new tab. As an Amazon Associate I earn from qualifying purchases.