
OVERHAUL (page 3 of 14)
- Make
- Land Rover
- Model
- Range Rover Classic
BORG WARNER
9
OVERHAUL
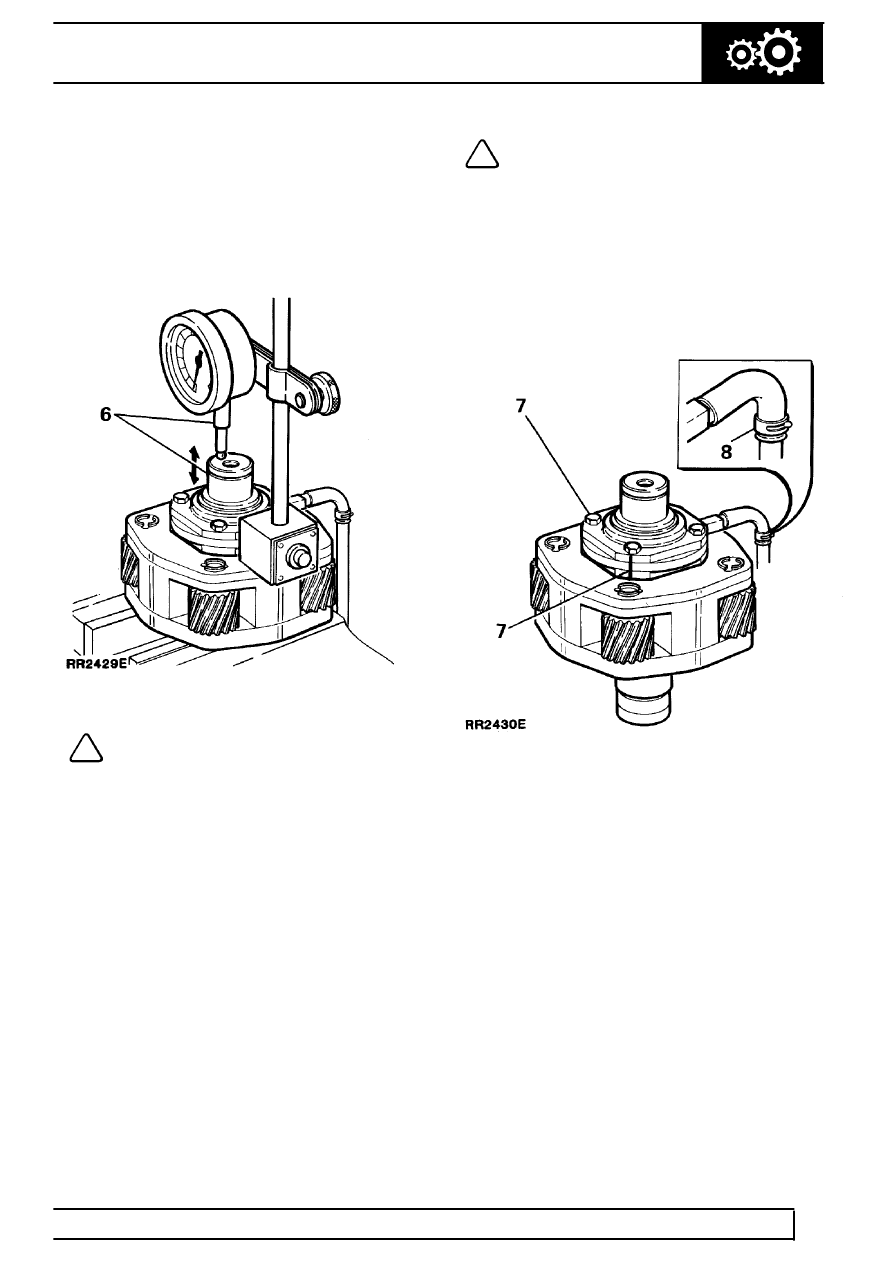
6. Check the end float of the sun gear to the
planetary set carrier by supporting the body of
the assembly on the top of a vice. Using a dial
test indicator attached to a magnetic base,
position the base on top of the assembly and
zero the indicator on the end of the sun gear
shaft, lift the shaft and check the end float. End
float should not exceed 0.83 mm (0.033 in). Fit a
new planetary set assembly if out of limits.
NOTE: If the previous inspection
instructions prove the assembly to be in
an acceptable condition carry out the
following examination of the oil pump.
Oil pump and filter
- Dismantle and inspection
7. To aid re - assembly mark an identification line
on the edges of the oil pump plates. Remove the
four bolts securing the pump front and rear
plates, separate the pump by removing the
plungers, spring and bearing plate.
NOTE: The front plate of the oil pump is
stamped ’TOP’, the centre bearing plate is
stamped ’REAR’ and the rear plate is
stamped ’TOP REAR’. The fixing holes of the
plates and body are also offset to ensure correct
re - assembly of the pump.
8. Depress the retaining clips, remove the oil pick -
up pipe and rubber connection tubes. Examine
the tubes and pipe for damage or fractures,
renew as necessary.
9. Clean the pump components and check for
damage and wear, ie: blueing of the pump
plungers, scoring of the centre bearing plate, if
any wear is evident a new planetary set must be
fitted, as the pump is part of the complete
assembly.
10. Thoroughly clean the oil pick - up filter, examine
the filter screen for damage and blockage, renew
or clean the filter as necessary.
Parts & tools for this job For Land Rover Range Rover
- TOOLTorque wrenchSearch: 3/8 inch torque wrench
- TOOLSocket setSearch: socket set metric
- BOOKHaynes manualSearch: Haynes manual Land Rover Range Rover
Links open Amazon search results in a new tab. As an Amazon Associate I earn from qualifying purchases.