
OVERHAUL (page 4 of 9)
- Make
- Land Rover
- Model
- Range Rover Classic
57
STEERING
4
OVERHAUL
Sector shaft cover assembly
31. Inspect cover and bearing. If worn or damaged,
replacement parts are not available, fit a new
steering box.
Sector shaft adjuster locknut
32. The locknut is also a fluid seal. Fit new nut at
overhaul.
Valve and worm assembly
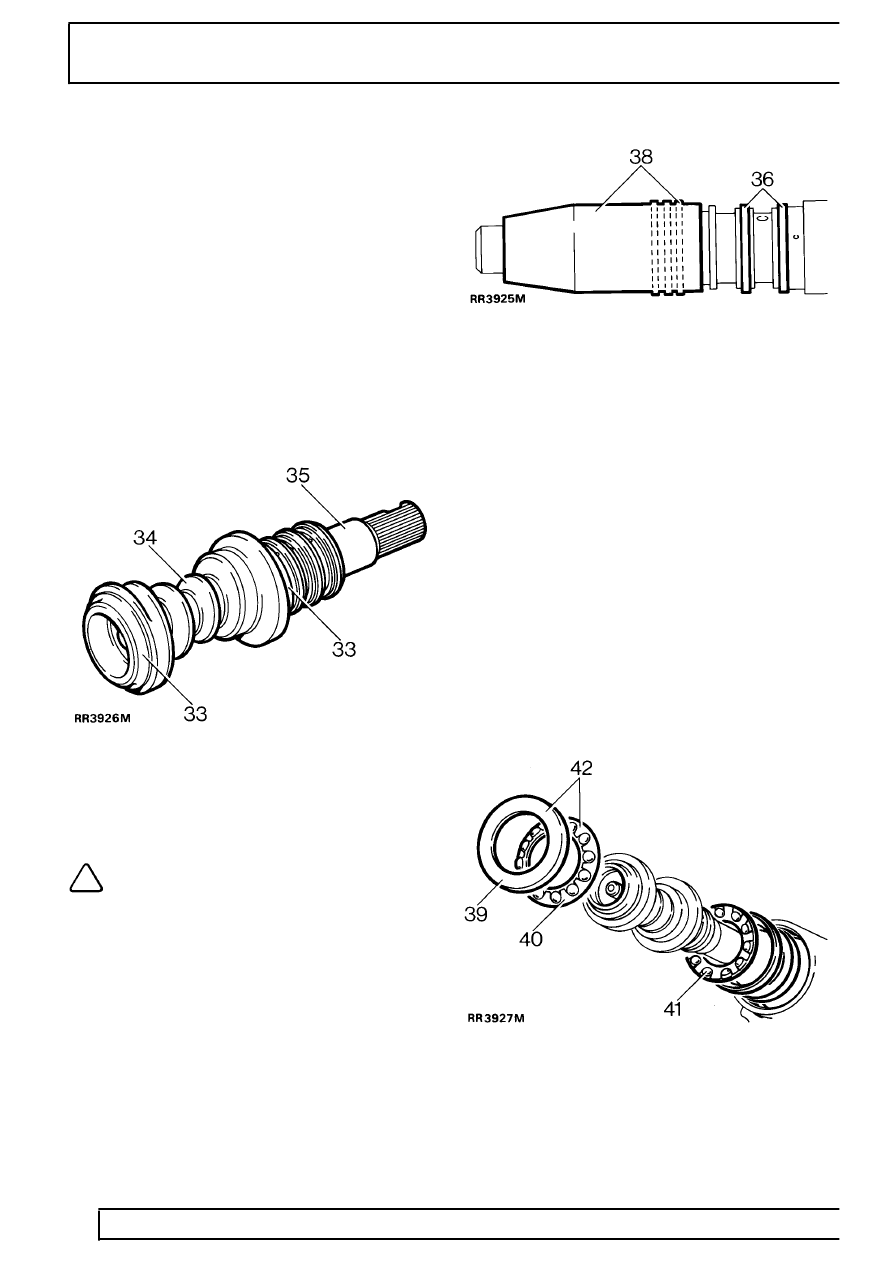
33. Examine bearing areas for wear. The areas must
be smooth and not indented.
34. Examine worm track which must be smooth and
not indented.
35. Check for wear on torsion bar assembly pin. No
free movement should exist between input shaft
and torsion bar or between torsion bar and
worm.
NOTE: Any sign of wear makes it essential
to fit new valve and worm assembly.
36. Examine valve rings for cuts, scratches and
grooves. The valve rings should be free to rotate
in grooves.
37. If required, replace all three rings, using ring
expander LRT-57-019. The expander will not
pass over rings already fitted. Remove rings to
allow access without damaging seal grooves.
38. Warm rings and expander tool to aid assembly.
Fit rings to expander, slide expander over valve
and worm assembly. In turn fit rings to their
grooves. Remove expander, slide valve and
worm assembly into ring compressor
LRT-57-020 and allow to cool.
Ball bearing and cage assemblies
39. Examine ball races and cups for wear and
general condition.
40. If ball cage has worn against bearing cup, fit
replacements.
41. Bearing balls must be retained by cage.
42. Bearing and cage repair is carried out by
complete replacement of assembly.
Parts & tools for this job For Land Rover Range Rover
- TOOLTie rod end toolSearch: tie rod end puller
- TOOLBall joint separatorSearch: ball joint separator
- FLUIDPower steering fluidSearch: Land Rover power steering fluid
Links open Amazon search results in a new tab. As an Amazon Associate I earn from qualifying purchases.