
UPPER STEERING COLUMN (page 2 of 3)
- Make
- Land Rover
- Model
- Range Rover Classic
- Section
- REPAIR
STEERING
13
REPAIR
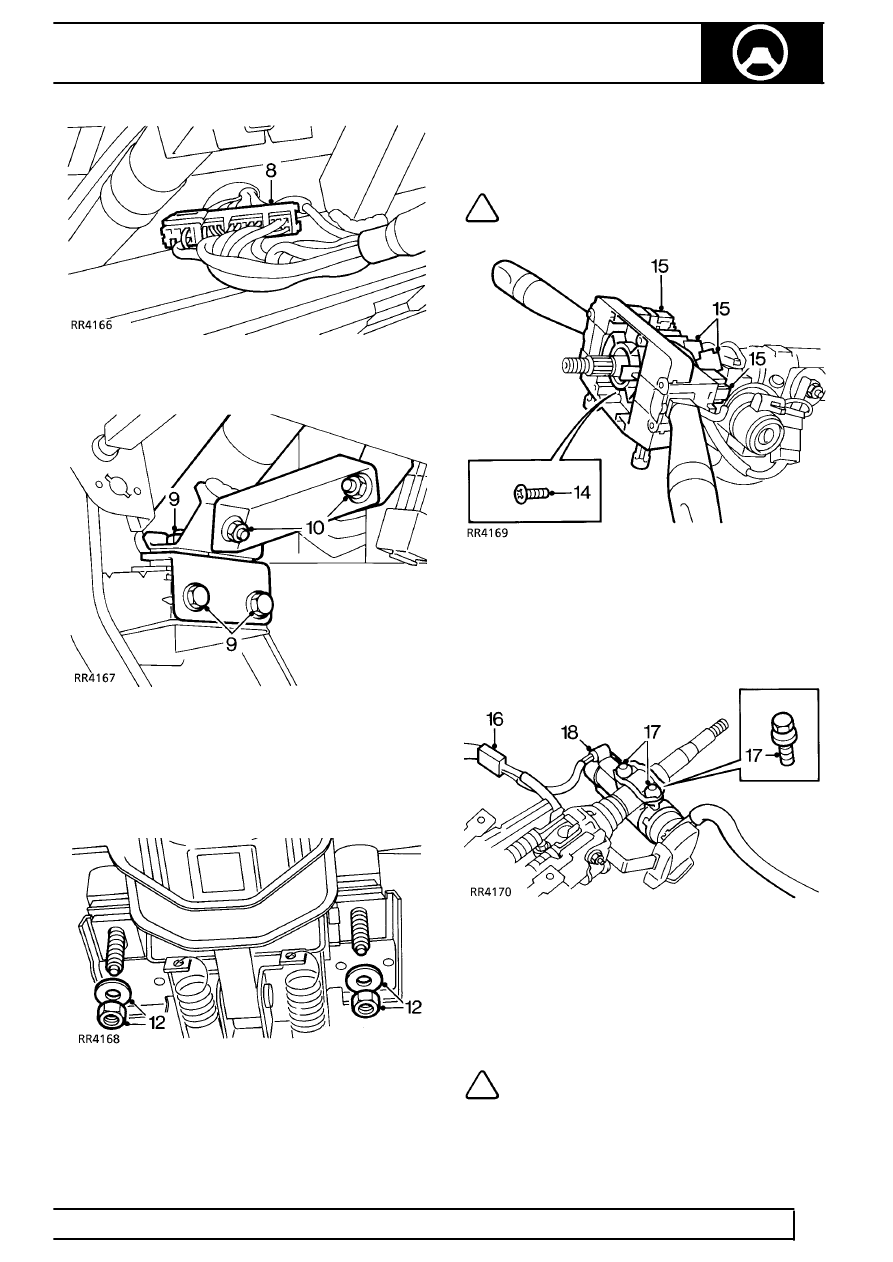
8. Disconnect ignition switch main feed multiplug.
9. Remove 4 nuts securing upper column to lower
mounting.
10. Remove 2 nuts securing lower mounting steady
bracket, remove bracket.
11. Remove pinch bolt securing upper column to
universal joint.
12. Remove 2 nuts and washes securing upper
column to upper mounting bracket.
13. Carefully manoeuvre upper column out of
footwell, recover rubber boot.
NOTE: Do not carry out further
dismantling if upper column is removed
for access only.
14. Loosen but, do not remove screw securing
column switch assembly, withdraw assembly to
gain access to multiplugs.
15. Disconnect column switch multiplugs, remove
column switch assembly.
16. Disconnect ignition switch multiplug.
17. Remove shear bolts securing steering column
lock, remove lock and saddle; discard shear
bolts.
18. Withdraw bulb holder from column lock shroud.
19. Transfer components to new upper column,
connect multiplug.
NOTE: Do not shear column lock bolts at
this stage.
Parts & tools for this job For Land Rover Range Rover
- TOOLTie rod end toolSearch: tie rod end puller
- TOOLBall joint separatorSearch: ball joint separator
- FLUIDPower steering fluidSearch: Land Rover power steering fluid
Links open Amazon search results in a new tab. As an Amazon Associate I earn from qualifying purchases.