
LH side only
- Make
- Mini
- Model
- Mini Workshop Manual
- Year
- 1996–2000
- Section
- Exterior fittings › LH side only
BodyLH side only
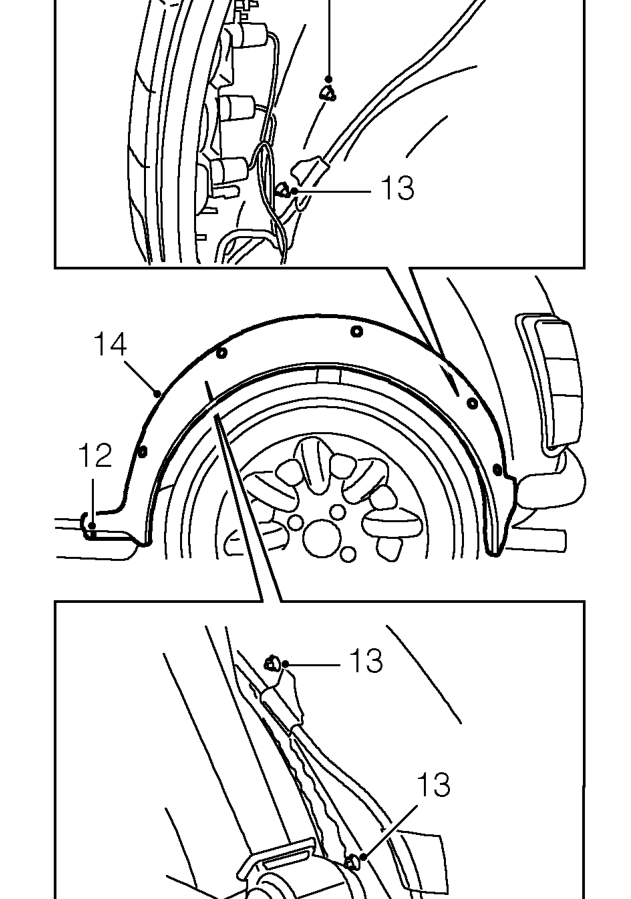
- Using a 5mm drill, drill out rivet securing wheel arch extension to sill panel.
- Remove 5 nuts securing wheel arch extension to body.
- Remove wheel arch extension.
Refit
- Clean mating faces of wheel arch extension and body.
- Fit wheel arch extension to body ensuring sealing rubber is correctly seated.
- Fit nuts securing wheel arch extension to body and tighten to 9 Nm.
- Rivet wheel arch extension to sill panel.
- Fit rear quarter trim pad. See Interior trim components.
LH side only
- Manoeuvre fuel tank into position and position restraining strap.
- Fit and tighten strap retaining bolt.
- Connect Lucars to sender unit.
- Fit fuel tank side cover and secure with studs.
- Fit spare wheel.
- Refill fuel tank with fuel.
- Connect battery earth lead.
RH side only
- Secure washer reservoir to mounting bracket.
Parts & tools for this job For 1996 Mini Mini
- TOOLTrim removal tool kitSearch: trim removal tool kit
- PARTTouch-up paintSearch: Mini touch up paint
- PARTPanel clip assortmentSearch: Mini panel clips assortment
Links open Amazon search results in a new tab. As an Amazon Associate I earn from qualifying purchases.