
Renold Chain Tensioner (page 2 of 3)
- Make
- Peugeot
- Model
- J5 Pocket Mechanic, 1.8 and 2.0 petrol
- Year
- 1987–1994
- Section
- Engine assembly
EngineRenold Chain Tensioner · page 2 of 3
- Refer to Fig. 1.39 and remove the lock washer (1) or the wire (2) and push the chain from the inside towards the outside in order to push the glide shoe/plunger into the tensioner body. After releasing the timing chain the tensioner will be in the operating position.
Never pre-tension the chain tensioner by moving the glide shoe/plunger to and fro. This warning is valid for both types.
- Refit the timing cover with a new gasket. The cover must be centred to fit the front oil seal. A piece of tube is used to drive the oil seal in position. Insert the oil seal into the timing cover, place the tube over the oil seal and use the large crankshaft pulley nut to draw the seal in position. Insert and tighten the cover screws to 1.3 kgm (9.5 ft.lb.). Fig. 1.40 shows the operation.
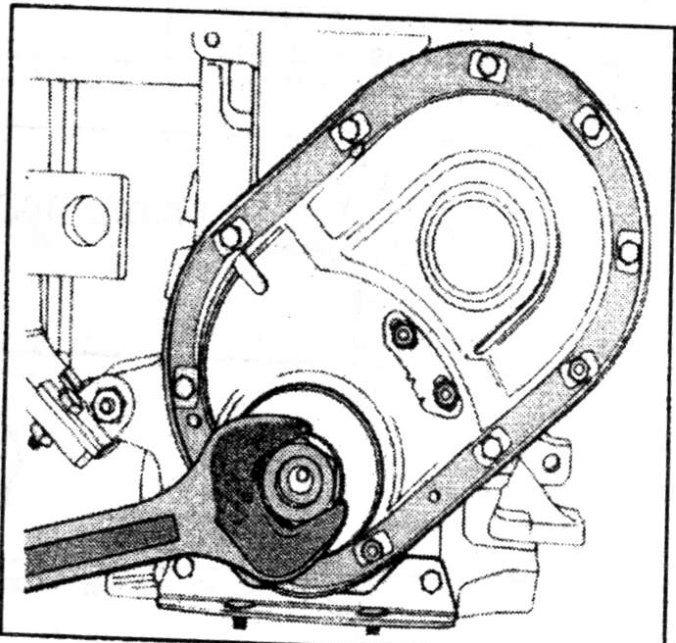
- Knock the Woodruff key into the crankshaft and slide the pulley over the key and onto the crankshaft. Block the crankshaft against rotation and tighten the pulley nut to 17.0 kgm (122.5 ft.lb.). A piece of hardwood can be jammed between crankshaft and crankcase to jam the crankshaft.
If the timing plate has been removed it will have to be readjusted to establish the top dead centre:
- Rotate the crankshaft until the pistons of No. 1 and No. 4 cylinder are at top dead centre.
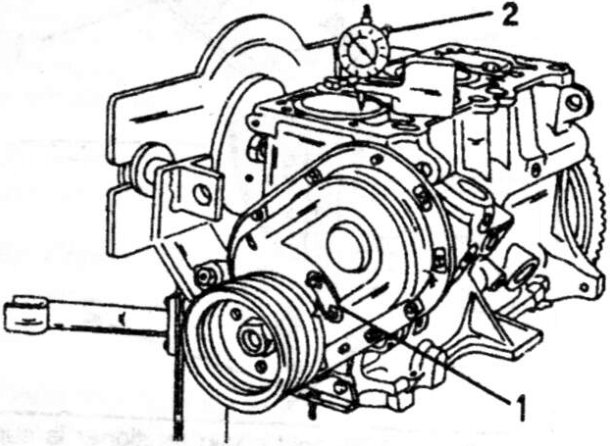
The valves of No. 4 cylinder must be “rocking”, i.e. one valve must be opening and the other one closing. The exact TDC point should, however, be set with a dial gauge, applied as shown in Fig. 1.41. Rotate the crankshaft until the dial gauge needle shows that TDC is obtained.
- Fit the timing plate and rotate it until the “Zero” in the plate is opposite the timing mark on the pulley. Tighten the two nuts. One of the nuts and the plate should be marked with paint for future use of the timing plate.
Parts & tools for this job For 1987 Peugeot J5
- PARTEngine gasket setSearch: Peugeot J5 1987 engine gasket set
- TOOLTorque wrenchSearch: 3/8 inch torque wrench
- TOOLFeeler gauge setSearch: feeler gauge set
Links open Amazon search results in a new tab. As an Amazon Associate I earn from qualifying purchases.