
Evaporator (page 3 of 3)
- Make
- Rover
- Model
- 200 Workshop Manual
- Year
- 1995–1999
- Section
- Repairs
Air conditioningEvaporator · page 3 of 3
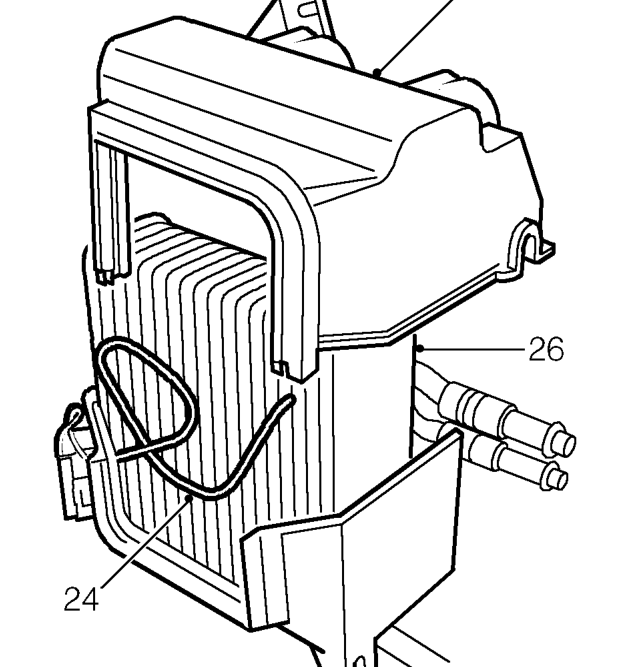
- Withdraw temperature sensor probe from evaporator.
- Remove upper casing from evaporator.
- Remove evaporator assembly from lower casing.
- Clean air conditioning pipe connections.
- Remove caps from new evaporator.
- Locate evaporator in lower casing.
- Insert temperature sensor probe 30 mm into vanes at centre of evaporator.
- Fit upper casing and secure with clips and screws.
- Insert air filter into casing.
- Fit air filter cover.
Refit
- Manoeuvre evaporator into position between heater and blower assemblies.
- Feed drain tube through bulkhead and locate grommet.
- Fit nuts securing evaporator casing to bulkhead and tighten to 10 Nm.
- Fit strap securing evaporator to heater and tighten screw.
- Fit strap securing evaporator to blower and tighten screw.
- Connect Lucars to evaporator thermostat.
- Position fascia rail, fit and tighten bolts to; M6 bolt to 10 Nm. M8 bolt to 20 Nm.
- Fit glove box. See BODY, Interior trim components.
- Fit expansion valve clamping bracket to evaporator pipes.
- Fit thermostatic expansion valve to evaporator pipes and tighten Allen screws to 10 Nm.
- Lubricate new ’O’ rings with refrigerant oil and fit to air conditioning pipes.
- Fit air conditioning pipes to valve and tighten bolt to 6 Nm.
- Position expansion tank to bulkhead and tighten bolts to 5 Nm.
- Replace receiver/dryer. See this section.
- Recharge air conditioning system. See Adjustments.
Parts & tools for this job For 1995 Rover 200
- TOOLA/C manifold gauge setSearch: AC manifold gauge set
- TOOLUV leak detection kitSearch: AC UV leak detection kit
- PARTCabin filterSearch: Rover 200 1995 cabin filter
Links open Amazon search results in a new tab. As an Amazon Associate I earn from qualifying purchases.