
Remove (page 6 of 7)
- Make
- Rover
- Model
- 600 Rover 600 Repair Manual - Volumes 1 and 2 - 2nd Edition
- Section
- Engine remove: repairs
EngineRemove · page 6 of 7
- Loosen the adjusting bolt and mounting bolt/nut from the alternator, then remove the alternator belt.
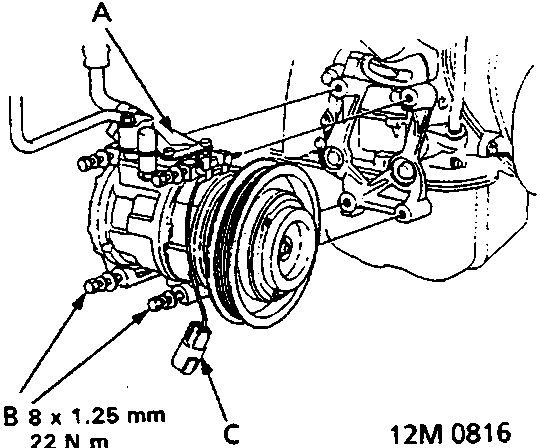
- A A/C compressor
- B Mounting bolts
- C (Remove the connector)
- Loosen the mounting bolt, then remove the air conditioning (A/C) compressor.
Note:
- Do not disconnect the A/C hose.
- Disconnect the connector.
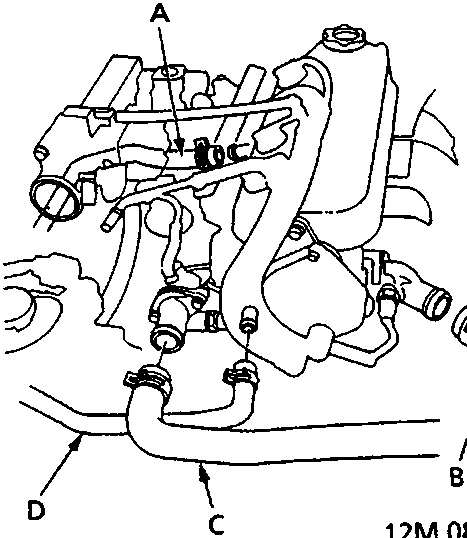
- A Heater outlet hose
- B Upper radiator hose
- C Lower radiator hose
- D Heater inlet hose
- Remove the upper and lower radiator hoses and the heater hoses.
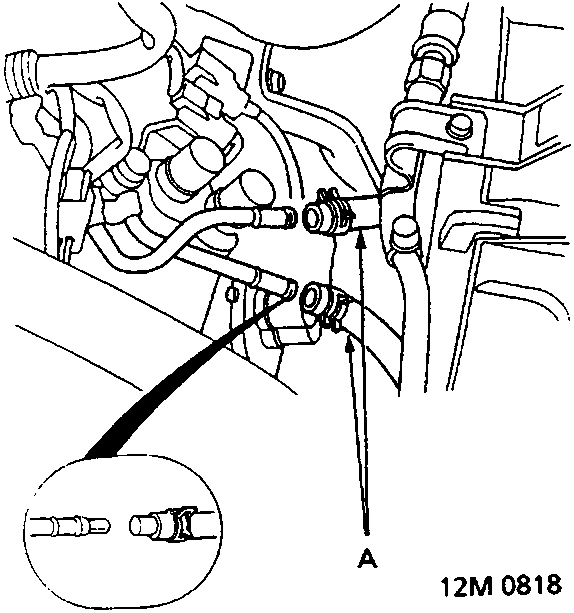
- A Automatic gearbox fluid cooler hoses
- Remove the automatic gearbox fluid (ATF) cooler hoses (A/T).
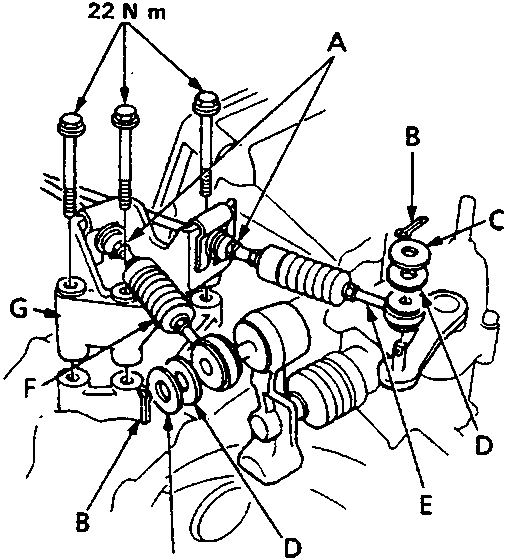
- A (Do not remove)
- B Cotter pin (replace)
- C Steel washer
- D Plastic washer
- E Selector cable
- F Shift cable
- G Bracket
Parts & tools for this job For Rover 600
- PARTEngine gasket setSearch: Rover 600 engine gasket set
- TOOLTorque wrenchSearch: 3/8 inch torque wrench
- TOOLFeeler gauge setSearch: feeler gauge set
Links open Amazon search results in a new tab. As an Amazon Associate I earn from qualifying purchases.