
Flow Chart – Blower Motor (page 3 of 5)
- Make
- Rover
- Model
- 600 Rover 600 Repair Manual - Volumes 1 and 2 - 2nd Edition
- Section
- Information
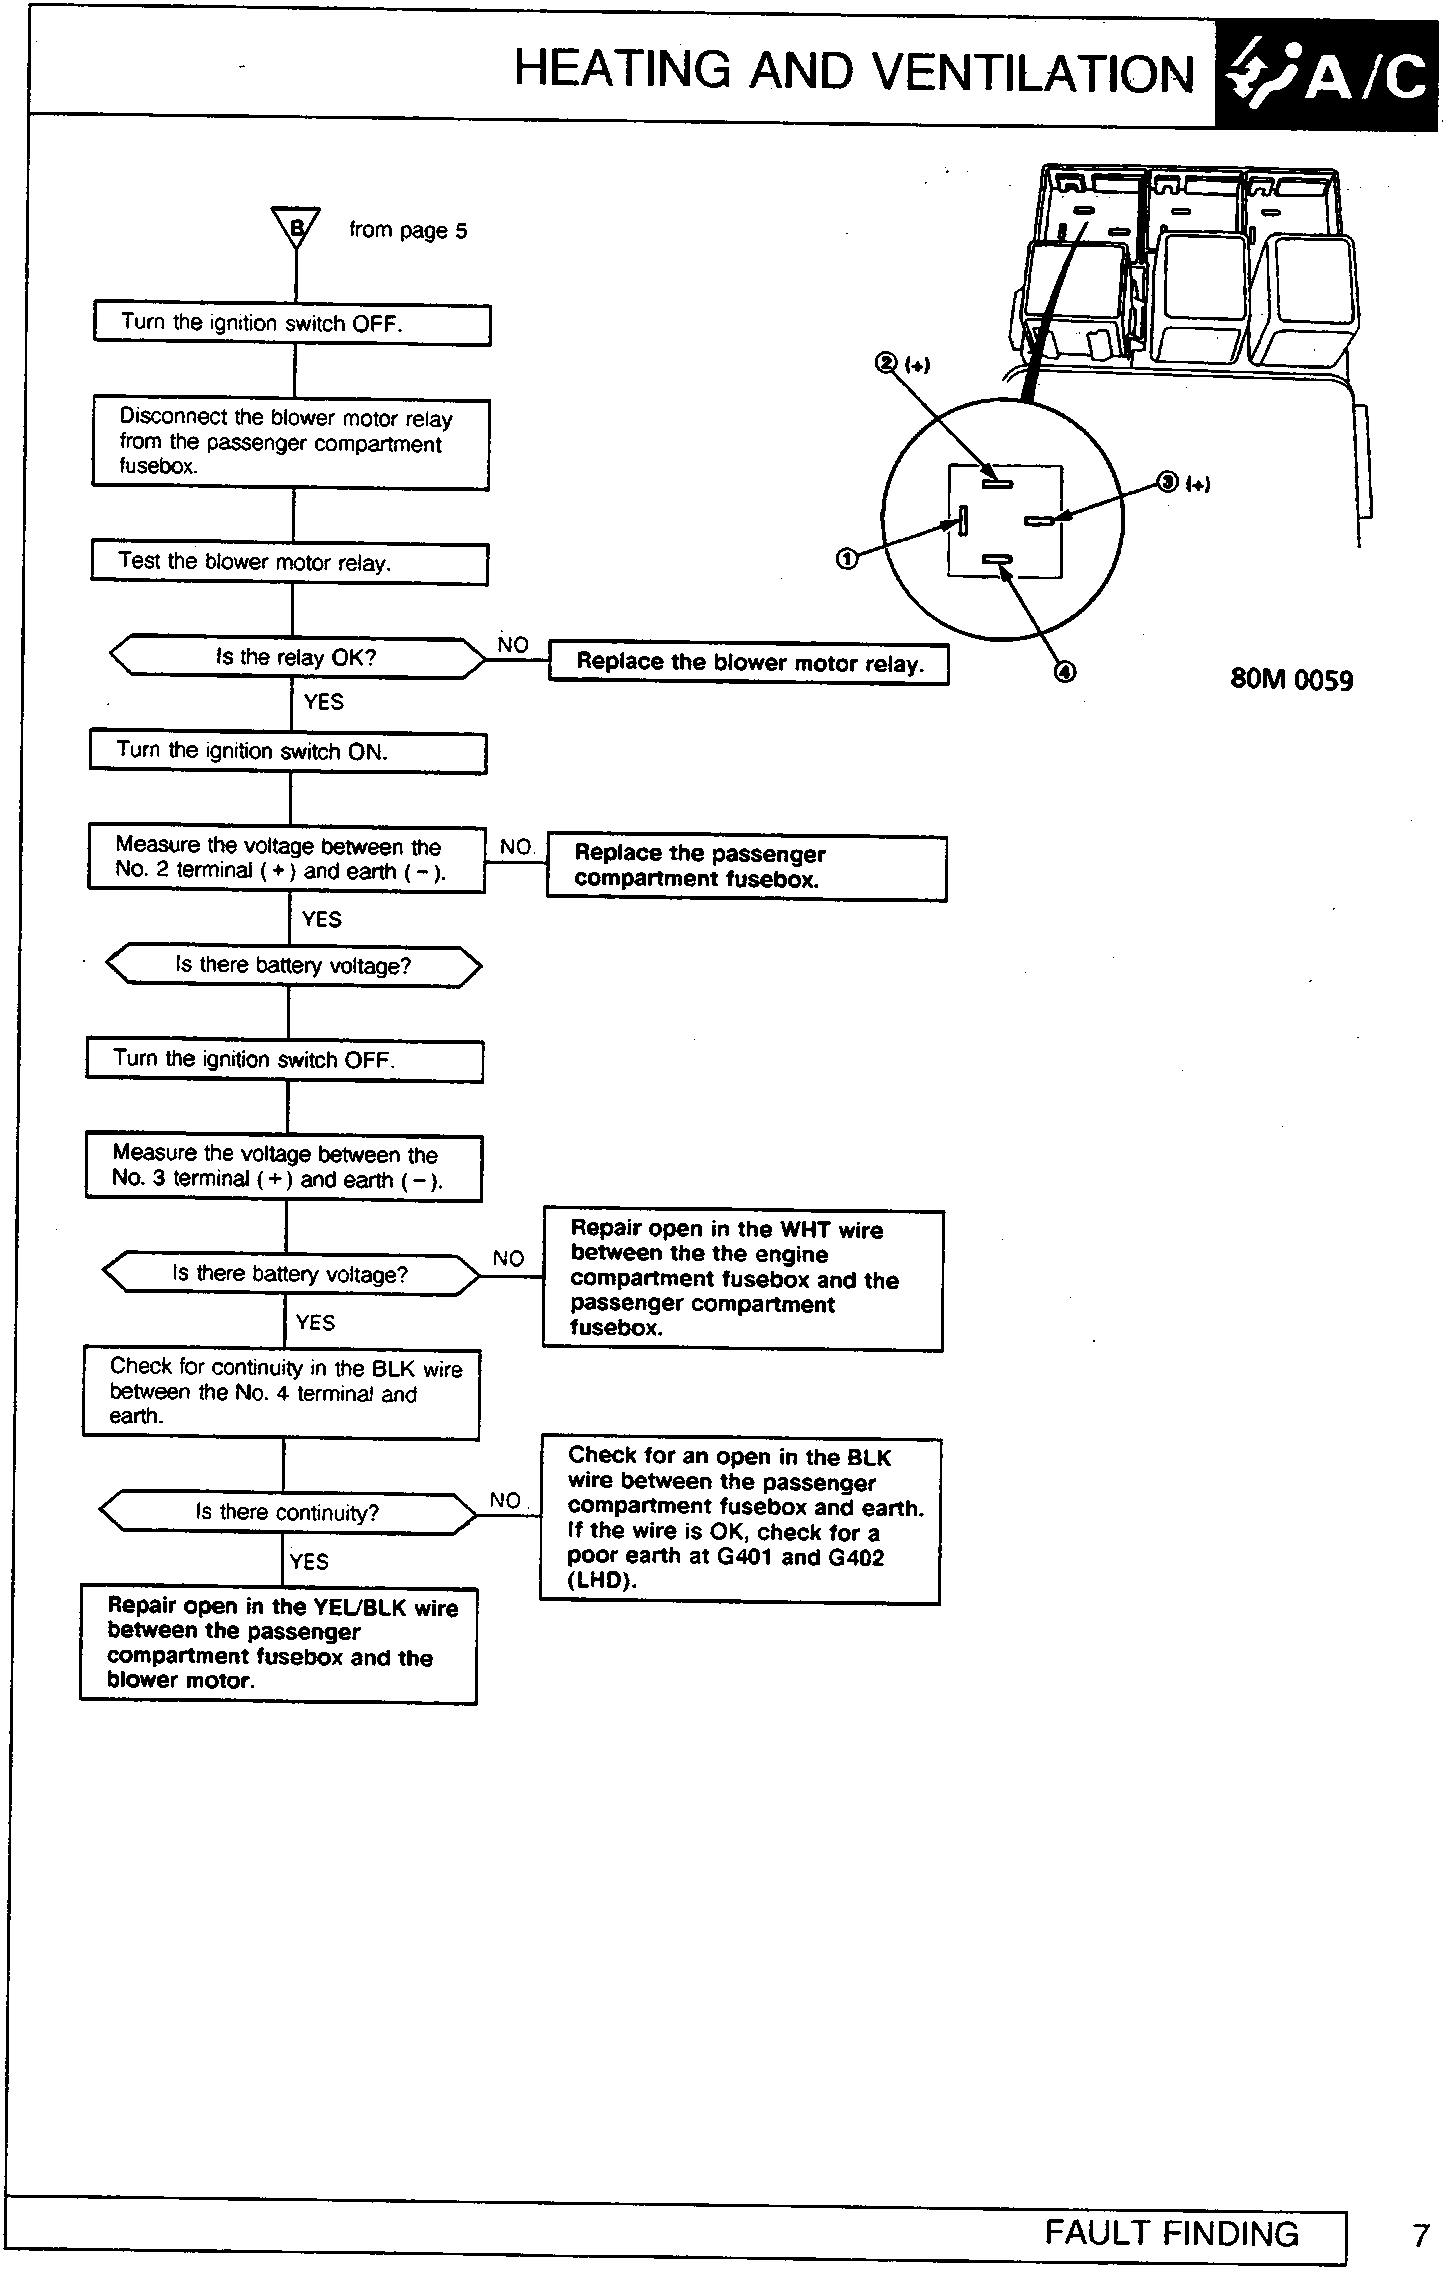
Heating and ventilationFlow Chart – Blower Motor · page 3 of 5
from page 5
- Turn the ignition switch OFF.
- Disconnect the blower motor relay from the passenger compartment fusebox.
- Test the blower motor relay.
- Is the relay OK? NO Replace the blower motor relay. YES
- Turn the ignition switch ON.
- Measure the voltage between the No. 2 terminal (+) and earth (-). NO Replace the passenger compartment fusebox. YES
- Is there battery voltage?
- Turn the ignition switch OFF.
- Measure the voltage between the No. 3 terminal (+) and earth (-).
- Is there battery voltage? NO Repair open in the WHT wire between the the engine compartment fusebox and the passenger compartment fusebox. YES
- Check for continuity in the BLK wire between the No. 4 terminal and earth.
- Is there continuity? NO Check for an open in the BLK wire between the passenger compartment fusebox and earth. If the wire is OK, check for a poor earth at G401 and G402 (LHD). YES
- Repair open in the YEL/BLK wire between the passenger compartment fusebox and the blower motor.
Parts & tools for this job For Rover 600
- TOOLA/C manifold gauge setSearch: AC manifold gauge set
- TOOLUV leak detection kitSearch: AC UV leak detection kit
- PARTCabin filterSearch: Rover 600 cabin filter
Links open Amazon search results in a new tab. As an Amazon Associate I earn from qualifying purchases.