
Clutch assemblies - assembling
- Make
- Rover
- Model
- Engine & gearbox overhaul S1LA Automatic Gearbox Overhaul Manual
- Section
- Overhaul › Clutch assemblies - assembling
OverhaulClutch assemblies - assembling · page 1 of 2
- Check clutch end plates for signs of overheating and wear, plates which are discoloured or worn must be replaced.
CAUTION: Clutch end plates are selective thickness. Thickness of end plate required can only be established when clutch is assembled. In order to provide initial datum for measuring end plate to disc clearance, note the number marked on the face of the original end plate and ensure that if a replacement plate is to be fitted, it carries the same number as the original. On the 1st hold clutch, plates are numbered 1 to 4 and 6 to 7 with one plate having no number.
- Check snap rings and spring retainers for distortion.
- Check disc springs for distortion.
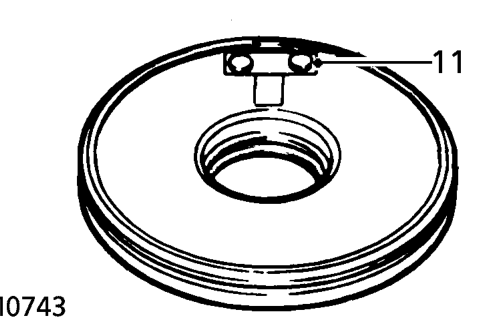
- Not 1st clutch: Examine check valve for security, if valve is loose, replace clutch piston.
- Replace components as necessary.
Clutch assemblies - assembling
NOTE: Assembling procedures are the same for all clutches but in the case of the 2nd/4th clutches, it will be necessary to assemble one clutch at a time.
- Soak clutch discs in gearbox oil for a minimum of 30 minutes before assembling.
- Lubricate all components with gearbox oil.
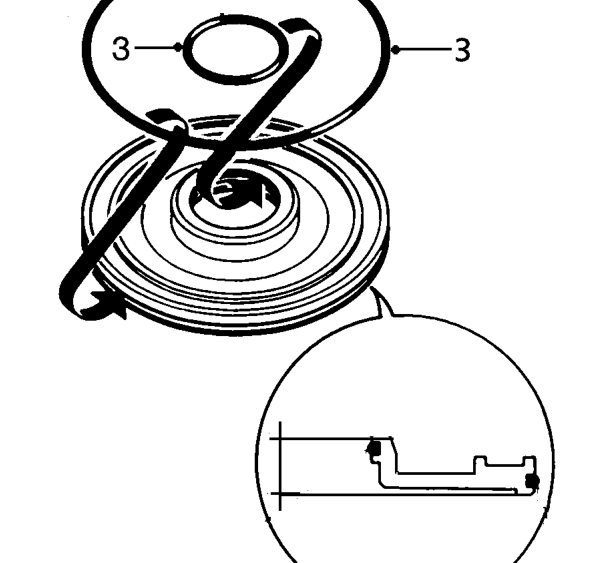
- Fit 2 new ’O’ rings to clutch piston.
Parts & tools for this job For Rover Engine & gearbox overhaul
- PARTClutch kitSearch: Rover Engine & gearbox overhaul clutch kit
- TOOLClutch alignment toolSearch: clutch alignment tool
- FLUIDGear oilSearch: Rover Engine & gearbox overhaul manual gearbox oil
Links open Amazon search results in a new tab. As an Amazon Associate I earn from qualifying purchases.