
Clutch assemblies - inspection
- Make
- Rover
- Model
- Engine & gearbox overhaul S1LA Automatic Gearbox Overhaul Manual
- Section
- Overhaul › Clutch assemblies - inspection
OverhaulClutch assemblies - inspection
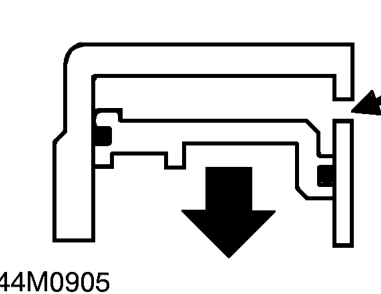
- Blank off one of the oil passages in the clutch drum with clean, lint free cloth.
WARNING: Do not use fingers to blank off oil passage.
- Apply low pressure air to the remaining oil passage and expel the clutch piston.
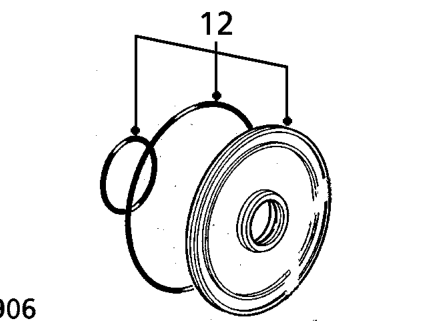
- Remove piston, remove and discard 2 ’O’ rings.
Clutch assemblies - inspection
- Thoroughly clean all components, ensure all oil passages in clutch drums are clear.
- Check clutch drums for scoring and corrosion, light corrosion may be removed using grade 600 emery cloth soaked in gearbox oil.
- Check clutch plates for signs of overheating and wear, plates which are discoloured or worn must be replaced.
- Check clutch end plate thickness: 1st clutch = 1.55 to 1.65 mm 2nd, 3rd, 4th and 1st hold clutches = 1.95 to 2.05 mm
CAUTION: Clutch plates must be replaced as a set.
- Check clutch discs for wear, the grooves in the face of each disc must be visible and of equal depth.
- Check clutch disc thickness: All clutches = 1.88 to 2.00 mm
CAUTION: Clutch discs must be replaced as a set.
- Check return spring free length: 1st clutch = 29.0 to 31.0 mm 1st hold clutch = 32.6 to 34.6 mm 2nd, 3rd and 4th clutches = 28.5 to 30.5 mm
Parts & tools for this job For Rover Engine & gearbox overhaul
- PARTClutch kitSearch: Rover Engine & gearbox overhaul clutch kit
- TOOLClutch alignment toolSearch: clutch alignment tool
- FLUIDGear oilSearch: Rover Engine & gearbox overhaul manual gearbox oil
Links open Amazon search results in a new tab. As an Amazon Associate I earn from qualifying purchases.