
Crankshaft reassembly
- Make
- Alfa Romeo
- Model
- 145/146 Engines, 146 Bodywork and Engine Overhaul Manual
- Year
- 1994–2001
- Section
- Overhauling › Crankshaft reassembly
Engine overhaul: 1.9 JTD (AR32302)Crankshaft reassembly
- Lower the tappet in question using tool no. 1.820.262.000.
- Assemble tool no. 1.860.724.001 to keep the tap-pets down.
NOTE: Direct the notches on the edge of the tap-pets to facilitate removal of the plate.
- Remove the valve clearance adjustment pad and replace it with another one of suitable thickness.
- Remove the tool used to keep the tappets lowered.
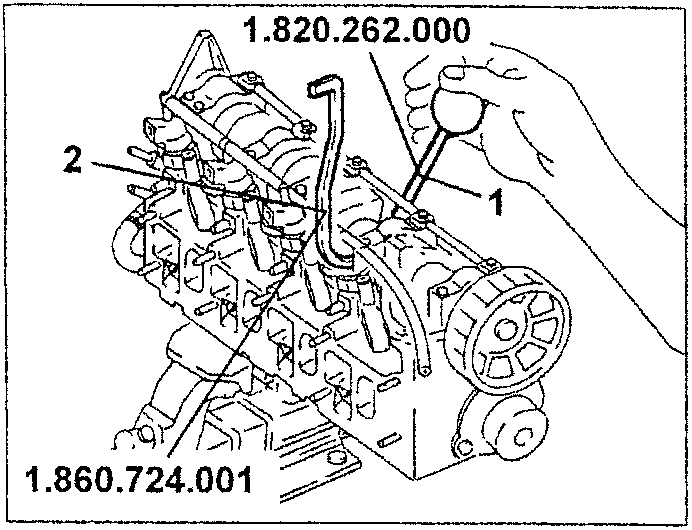
CRANKSHAFT REASSEMBLY
- After assembling the crankshaft, fit the main bearings caps complete with half bearings.
NOTE: The main bearing caps are notched consecutively (from 0 to four starting from the engine front) to define their assembly position.
- Tighten the main bearing cap screws to the specified torque using tool no. 1.860.942.000 for angle tightening.
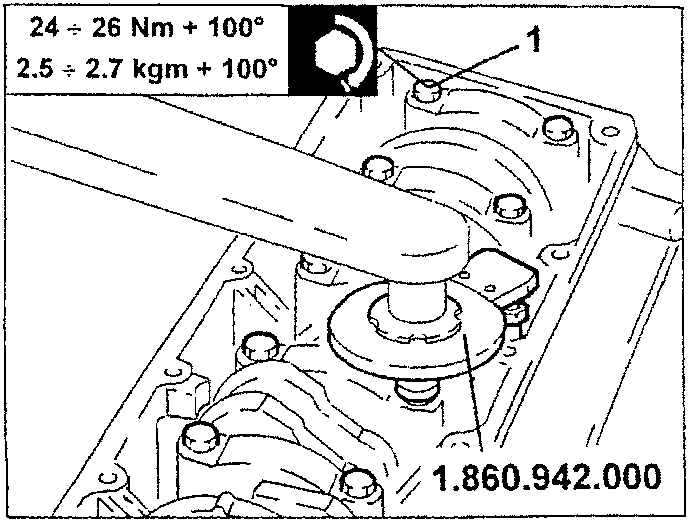
24 ÷ 26 Nm + 100°
2.5 ÷ 2.7 kgm + 100°
ASSEMBLING PISTONS AND CONNECTING RODS
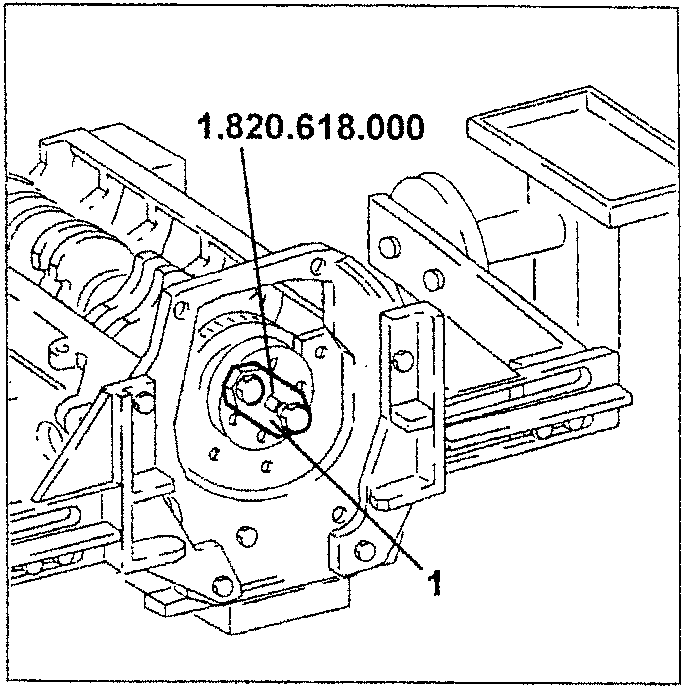
- Assemble tool no. 1.820.618.000 to make it possible to turn the crankshaft.
- Assemble the piston rings using a suitable tool.
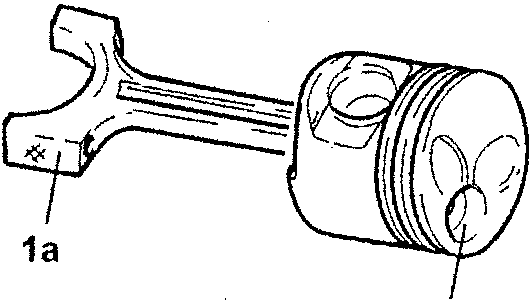
- Connect the connecting rods to the corresponding pistons so that the number stamped on the big end (1a) faces the combustion chamber (1b) machined on the piston.
- Assemble the gudgeon pins and fasten them with their circlips.
- Turn the crankshaft using the tool installed previously until the cylinder concerned reaches its B.D.C.
Parts & tools for this job For 1994 Alfa Romeo 145/146
- PARTEngine gasket setSearch: Alfa Romeo 145/146 1994 engine gasket set
- TOOLTorque wrenchSearch: 3/8 inch torque wrench
- TOOLFeeler gauge setSearch: feeler gauge set
Links open Amazon search results in a new tab. As an Amazon Associate I earn from qualifying purchases.