
Installation
- Make
- Aston Martin
- Model
- DB9 Factory Workshop Manual
- Year
- Issue 2, 2005
- Section
- Fuel Tank and Lines › Installation
The following operation is completed using one hand and without sight of the fuel filter.
- Remove the fuel filter.
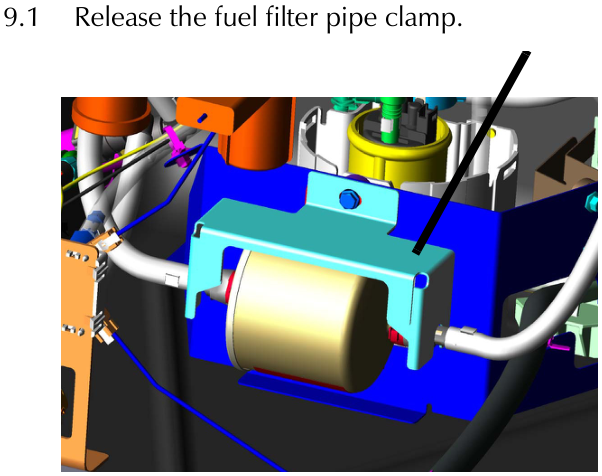
- Release the two fuel filter pipes (quick release unions).
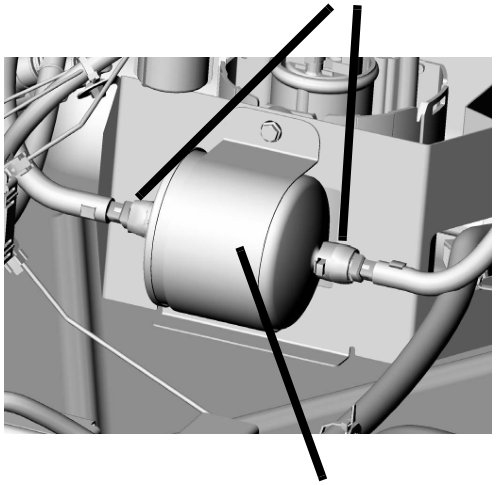
- Remove the fuel filter clamp.
- Withdraw the fuel filter.
- Repeat for the second fuel filter.
Installation
The following operation is completed using one hand and without sight of the fuel filter.
- Insert a fuel filter through the fuel tank opening. Secure in position using the fuel filter clamp.
- Connect the fuel pipes (x2).
Repeat for the second fuel filter. - Install the tank service cover plate (Refer to '310-136 (Fuel Tank Drainage Adaptor)', page 20-1-7).
When installing the service cover plate always use a new seal.
- Connect the earth lead to the vehicle battery.
⚠ Warning
Fire Risk. Do not start engine until fuel system integrity is confirmed.
- Switch on the ignition. Confirm there are no fuel leaks.
- Start the engine and check for correct fuel system operation (i.e. correct engine running).
- Install the vehicle seat belts and trim.
For trim, seat belt and seat installation refer to the following:
(Refer to 'Interior Trim (01.05)', page 1-4-1)
(Refer to 'Seating (01.10)', page 1-7-1)
(Refer to 'Restraining Devices (01.20)', page 1-14-1)
Fuel Pumps
| Repair Operation Time (ROT) | |
|---|---|
| Item | Code |
| Fuel Pump Renew | (x1) 10.01.CB (x2) 10.01.DB |
Caution
The following procedure is completed inside the vehicle cabin area. Extra care must be taken to ensure no fuel or fuel vapours come into contact with the vehicle interior.
Removal
- Depressurise the fuel system (Refer to 'Depressurising', page 10-1-8).
- Drain the fuel tank (Refer to 'Draining', page 10-1-9).
⚠ Warning ⚠
Several litres of fuel remain in the tank sump after draining.
- Disconnect the earth lead from the vehicle battery.
- Remove the following:
For trim, seat belt and seat removal refer to the following:
(Refer to 'Interior Trim (01.05)', page 1-4-1)
(Refer to 'Seating (01.10)', page 1-7-1)
(Refer to 'Restraining Devices (01.20)', page 1-14-1)
- Passenger front seat
- Both rear seats
- Disconnect the seat belts lower mounts.
- Remove the following:
- Passenger rear ¼ panel
- Rear top panel
- Both seat belts
- Remove the access cover over the tank flange.
⚠ Warning ⚠
Ensure there is adequate ventilation inside vehicle (i.e. vehicle in a well ventilated area, windows open).
Parts & tools for this job For 2005 Aston Martin DB9
- TOOLTorque wrenchSearch: 3/8 inch torque wrench
- TOOLSocket setSearch: socket set metric
- BOOKHaynes manualSearch: Haynes manual Aston Martin DB9
Links open Amazon search results in a new tab. As an Amazon Associate I earn from qualifying purchases.