
Installation
- Make
- Aston Martin
- Model
- DB9 Factory Workshop Manual
- Year
- Issue 2, 2005
- Section
- Fuel Tank and Lines › Installation
Installation
Warning
Fire Risk. Before starting braking in to the fuel system disconnect the earth lead from the vehicle battery.
Warning
Read and follow the fuel handling instructions given in Safety Precautions at the start of this section.
- Place the fuel tank on to it’s retaining plate. Using a suitable adjustable support, raise the fuel tank and retaining plate into position. Secure the tank with the tank retaining plate. Torque bolts (x18) to 20-25 Nm.
- Connect the fuel lines.
When reconnecting the fuel lines at the tank, check for complete engagement of locking clips. Test the fuel system integrity before refitting the shear plate and rear undertray.
- Remove the cap from the filler neck on the tank. Install the filler neck to the tank.
- Connect the On-Board Refuelling Vapour Recovery hose to the filter.
- Connect the tank wiring harness plugs and earth cable.
- Install the rear subframe (Refer to ‘Rear Subframe’, page 2-1-4).
- Fill the tank.
- Check and ensure integrity of the fuel system.
Warning
Fire Risk. Do not connect the battery and switch on the ignition until all work on the fuel system is completed and the area is cleared of fuel contamination.
Remove contaminated material, open fuel containers, waste fuel. Fully ventilate vehicle and work area to remove all fuel fumes.
- Connect the earth lead to the vehicle battery.
Warning
Fire Risk. Do not start the engine until the fuel system integrity is confirmed.
- Switch on the ignition. Confirm there are no fuel leaks.
- Start the engine and check for correct fuel system operation (i.e. correct engine running).
Fuel Filters
| Repair Operation Time (ROT) | |
|---|---|
| Item | Code |
| Fuel Filter Renew | (x1) 10.01.AB |
| (x2) 10.01.BB | |
Caution
The following procedure is completed inside the vehicle cabin area. Extra care must be taken to ensure no fuel or fuel vapours come into contact with the vehicle interior.
Removal
- Depressurise the fuel system (Refer to ‘Depressurising’, page 10-1-8).
- Drain the fuel tank (Refer to ‘Draining’, page 10-1-9).
Warning
Several litres of fuel remain in the tank sump after draining.
- Disconnect the earth lead from vehicle battery.
- Remove the passenger front seat.
- Remove both rear seat backs and bases.
- Remove the rear trim.
- Rear ¼ panels
- Rear top panel
- Both seat belts
For trim, seat belt and seat removal refer to the following: (Refer to ‘Interior Trim (01.05)’, page 1-4-1)
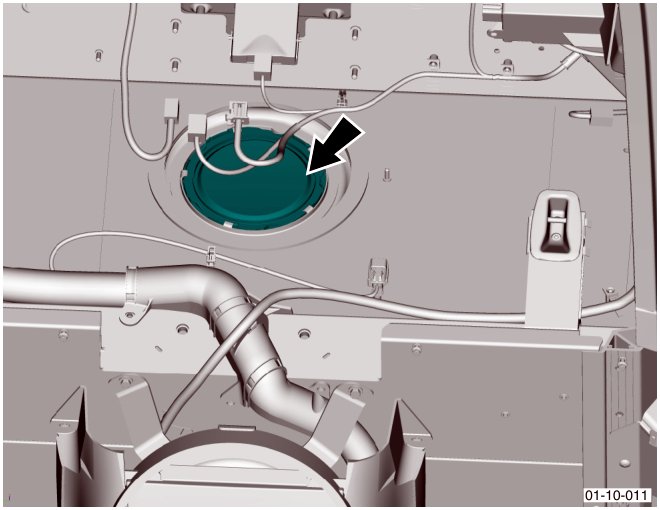
- Remove the access cover over the fuel tank flange.
Warning
Ensure there is adequate ventilation inside the vehicle (i.e. place the vehicle in a well ventilated area, with the windows open).
- Remove the tank service cover plate (Refer to ‘310-136 (Fuel Tank Drainage Adaptor)’, page 20-1-7).
Parts & tools for this job For 2005 Aston Martin DB9
- TOOLTorque wrenchSearch: 3/8 inch torque wrench
- TOOLSocket setSearch: socket set metric
- BOOKHaynes manualSearch: Haynes manual Aston Martin DB9
Links open Amazon search results in a new tab. As an Amazon Associate I earn from qualifying purchases.