
Priming
- Make
- Aston Martin
- Model
- DB9 Factory Workshop Manual
- Year
- Issue 2, 2005
- Section
- Fuel Tank and Lines › Priming
Priming
⚠ Warning ⚠
Fire Risk. Do not switch on the ignition until all work on the fuel system is completed and area is cleared of fuel and fuel vapour contamination.
The fuel system is self priming.
There must be a minimum of 5 litres of fuel in the tank.
Pressure Test
⚠ Warning ⚠
Fire Risk. Depressurise the fuel system before disconnecting pipe work. Use a pan or absorbent cloth to catch fuel spills which may occur due to residual pressure. Clean up spillages immediately and dispose of fuel contaminated materials safely.
- Set the WDS system to monitor the pressure in each fuel rail.
- Start the engine and monitor the fuel pressure readings.
- Both fuel rails must show a pressure of more than 40 psi for the engine to function satisfactorily.
- If either fuel rail is lower than 40 psi, check for blocked or restricted fuel filter or fuel lines on the side showing low pressure.
- If the filter and fuel lines are serviceable, suspect a defective fuel pump.
Fuel Tank
| Repair Operation Time (ROT) | |
|---|---|
| Item | Code |
| Fuel Tank Renew | 10.01.FB |
Draining
⚠ Warning ⚠
Fire Risk. Before starting work on the fuel system disconnect the earth lead from the vehicle battery.
⚠ Warning ⚠
Read and follow all fuel handling instructions given at the start of this chapter and in the bowser manufacturers fuel handling documentation before commencing work on fuel system.
This procedure must only be performed by staff who are fully trained in fuel handling.
- Remove the following:
- Passenger rear ¼ panel
- Rear top panel
- Both seat belts
- Satellite Navigation (if installed)
- Disconnect the seat belts lower mounts.
- Remove the access cover over the fuel tank flange.
For trim, seat belt and seat removal refer to the following:
(Refer to 'Interior Trim (01.05)', page 1-4-1)
(Refer to 'Seating (01.10)', page 1-7-1)
(Refer to 'Restraining Devices (01.20)', page 1-14-1)
⚠ Warning ⚠
Ensure there is adequate ventilation inside the vehicle (i.e. place the vehicle in a well ventilated area, with the windows open).
- Remove the tank service cover plate (Refer to '310-136 (Fuel Tank Drainage Adaptor)', page 20-1-7).
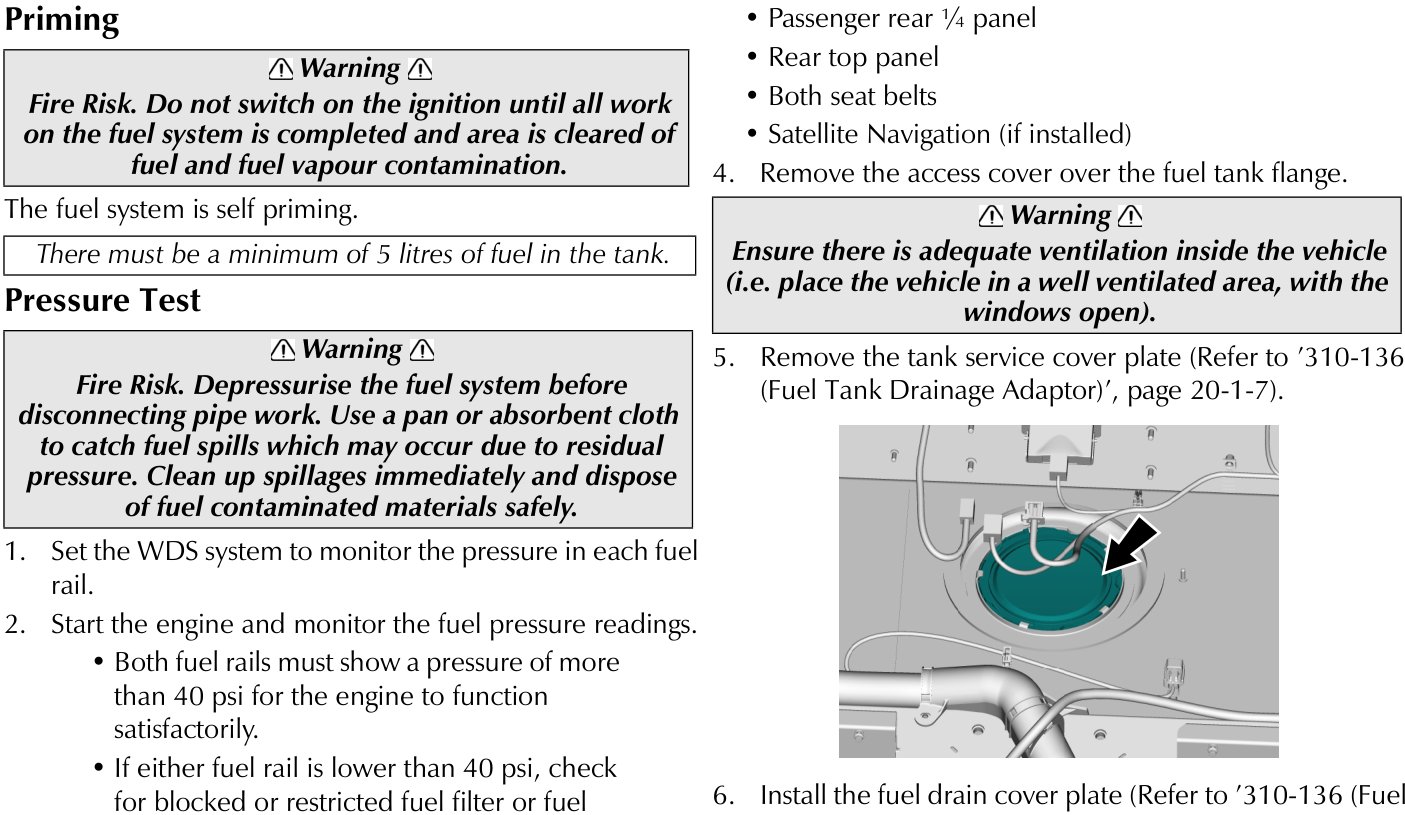
- Install the fuel drain cover plate (Refer to '310-136 (Fuel Tank Drainage Adaptor)', page 20-1-7).
- Connect the external pipe to a fuel recovery unit. Recover the fuel according to the recovery unit instructions.
Several litres of fuel will remain in the tank sump after draining.
- After fuel recovery, remove the service tool from the fuel tank. Carry out the intended repair or service procedure.
When installing the service cover plate always use a new seal.
Removal
⚠ Warning
Fire Risk. Before starting braking in to the fuel system disconnect the earth (-ve) lead from the vehicle battery.
⚠ Warning ⚠
Fuel vapour is explosive. During the following procedure, fuel tank and fuel lines will be open. Ensure good ventilation and take all necessary precautions to eliminate fire risks.
⚠ Warning
Read and follow the fuel handling instructions given in Safety Precautions at the start of this section.
Take all necessary precautions to prevent sparks from electrical / electrostatic discharge or from friction.
- Depressurise the fuel system (Refer to 'Depressurising', page 10-1-8).
- Disconnect the earth lead from the vehicle battery.
Parts & tools for this job For 2005 Aston Martin DB9
- TOOLTorque wrenchSearch: 3/8 inch torque wrench
- TOOLSocket setSearch: socket set metric
- BOOKHaynes manualSearch: Haynes manual Aston Martin DB9
Links open Amazon search results in a new tab. As an Amazon Associate I earn from qualifying purchases.