
Heater control cable - air distribution
- Make
- Land Rover
- Model
- Defender 90 Workshop Manual (NAS)
- Section
- Repair › Heater control cable - air distribution
Heating and ventilationHeater control cable - air distribution
HEATER CONTROL CABLE - AIR DISTRIBUTION
Service repair no - 80.10.12
Remove
- Disconnect battery.
- Remove steering wheel.
- Remove heater duct assembly.
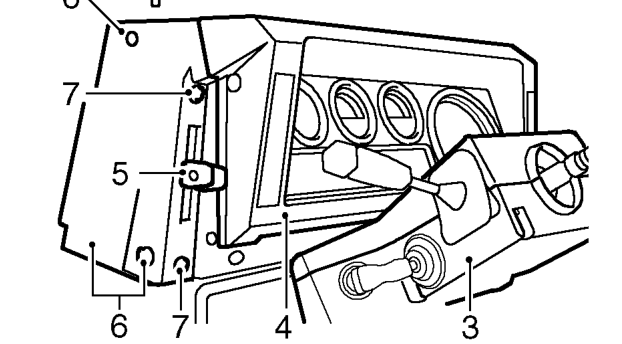
- Remove steering column nacelle.
- Remove instrument panel. See INSTRUMENTS, Repair, Instrument panel 11. Remove 19 screws and lift off heater duct cover.
- Remove retaining screws and pull off air 12. Slacken vent flap trunnion fixing, release air distribution and temperature control lever knobs.
- Remove 3 screws and detach side cover, complete with control lever assembly. 13. Check condition of foam sealant on heater duct
Refit
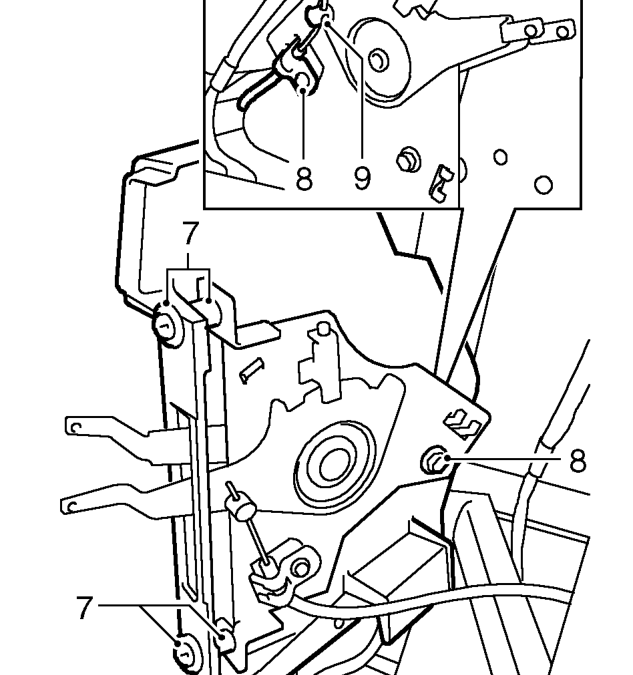
- Fit control cable through heater duct cover and
- Fit heater duct cover.
- Fit heater duct assembly to fascia bulkhead.
- Route control cable along fascia bulkhead to
- With control lever in closed position, secure
- Fit outer cable retaining clip to lever assembly.
- Fit lever assembly to side cover. Ensure screw
- Fit side cover to fascia cowl.
- Fit control lever knobs.
- Fit instrument panel.
- Fit steering column nacelle.
- Remove 2 screws securing control lever assembly to side cover and remove cover. Retain plastic screw spacers fitted between cover and control lever assembly.
- Remove bolt and release outer cable retaining clip.
- Slacken grub screw and release inner cable from clevis. See CHASSIS AND BODY, Repair, Heater duct assembly
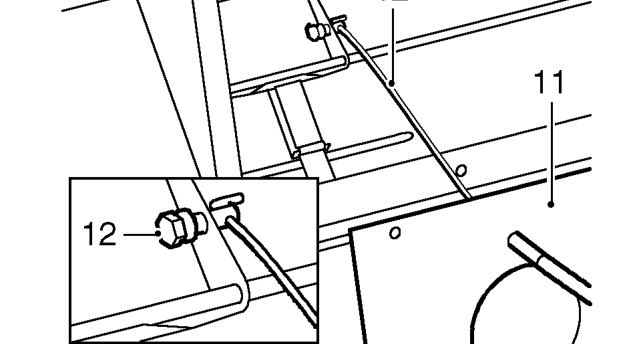
distribution control cable and remove from heater duct.
cover and renew if necessary.
secure to vent flap trunnion. Bend over cable end to fully secure.
See CHASSIS AND BODY, Repair, Heater duct assembly
contol lever assembly.
cable to clevis.
spacers are fitted between cover and lever assembly.
See INSTRUMENTS, Repair, Instrument panel
Parts & tools for this job For Land Rover Defender
- TOOLA/C manifold gauge setSearch: AC manifold gauge set
- TOOLUV leak detection kitSearch: AC UV leak detection kit
- PARTCabin filterSearch: Land Rover Defender cabin filter
Links open Amazon search results in a new tab. As an Amazon Associate I earn from qualifying purchases.