
Refit heater control cable - temperature control
- Make
- Land Rover
- Model
- Defender 90 Workshop Manual (NAS)
- Section
- Repair › Refit heater control cable - temperature control
Heating and ventilationRefit heater control cable - temperature control · page 1 of 2
Refit HEATER CONTROL CABLE - TEMPERATURE CONTROL
- Fit foam rubber to heater matrix casing.
- Position matrix in heater unit casing. Service repair no - 80.10.05
- Check that both vent flaps operate correctly without sticking. Remove
- Secure matrix top retaining plate.
- Secure matrix bottom retaining plates.
- Fit heater unit. See Heater unit
RESISTOR UNIT
Service repair no - 80.20.17
Remove
- Remove heater unit. See Heater unit
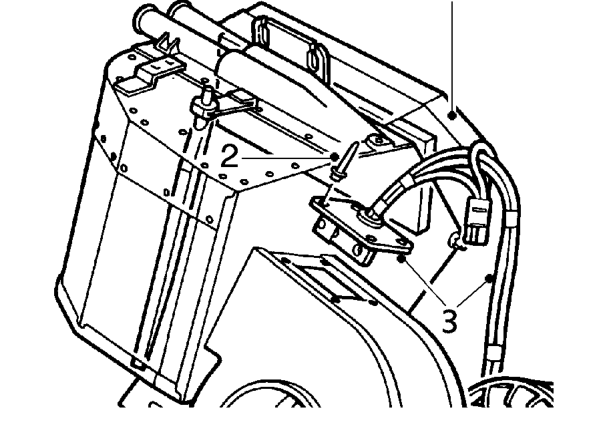
- Drill out 4 rivets securing resistor mounting plate to top of volute housing.
- Remove resistor and disconnect blower motor plug from harness.
Refit
- Apply Bostik adhesive to resistor mounting plate and rivet to volute housing.
- Reconnect blower harness motor plug.
- Fit heater unit. See Heater unit
- Disconnect battery.
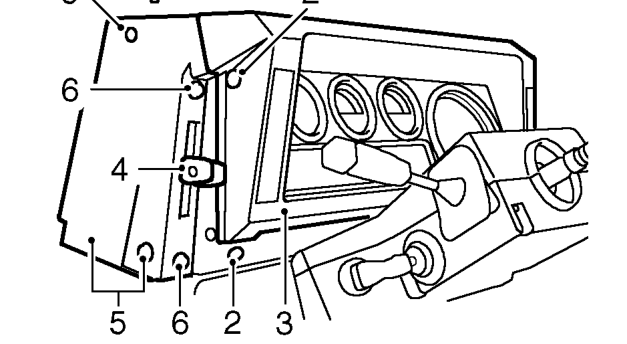
- Remove 4 screws securing instrument binnacle to fascia cowl.
- Pull instrument binnacle away from fascia to ease access to control cable at bulkhead.
- Remove retaining screws and pull off air distribution and temperature control lever knobs.
- Remove 3 screws and detach side cover, complete with control lever assembly.
Parts & tools for this job For Land Rover Defender
- TOOLA/C manifold gauge setSearch: AC manifold gauge set
- TOOLUV leak detection kitSearch: AC UV leak detection kit
- PARTCabin filterSearch: Land Rover Defender cabin filter
Links open Amazon search results in a new tab. As an Amazon Associate I earn from qualifying purchases.