
Front door outer panel
- Make
- Land Rover
- Model
- Discovery Body Repair Manual
- Year
- 1995 on
- Section
- Repair › Front door outer panel
Panel repairsFront door outer panel
FRONT DOOR OUTER PANEL
Remove
- Remove front door. See CHASSIS AND BODY, Repair.
- Remove front door trim panel. See CHASSIS AND BODY, Repair.
- Remove window lift motor, door lock actuator and door harness, if fitted.
- Remove exterior mirror.
- Remove the door glass and regulator, door lock, and inner and outer release handles. See CHASSIS AND BODY, Repair.
- Remove door and with hinge halves noting the
- Apply a (minimum thickness 4 mm (1/8 in) bead
thickness of shims fitted, to assist with refitting. See CHASSIS AND BODY, Repair.
- Remove the existing door outer panel by
- Fit new door outer panel to door frame and
grinding off the edge of the flange.
- Clean door frame and remove all trace of sealant.
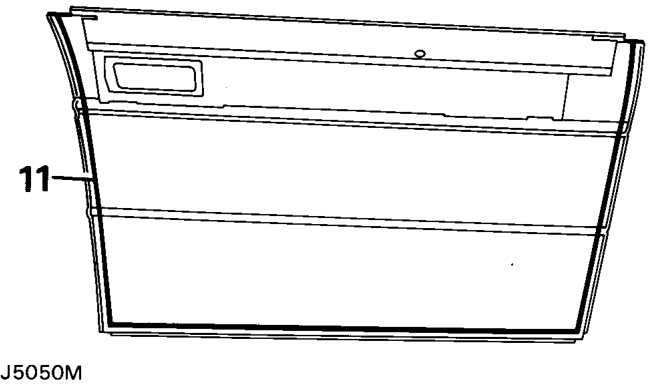
of 3M 8684 Flexseal to outer edge of new outer panel.
clinch the flange.
- Prime all bare metal with etch primer.
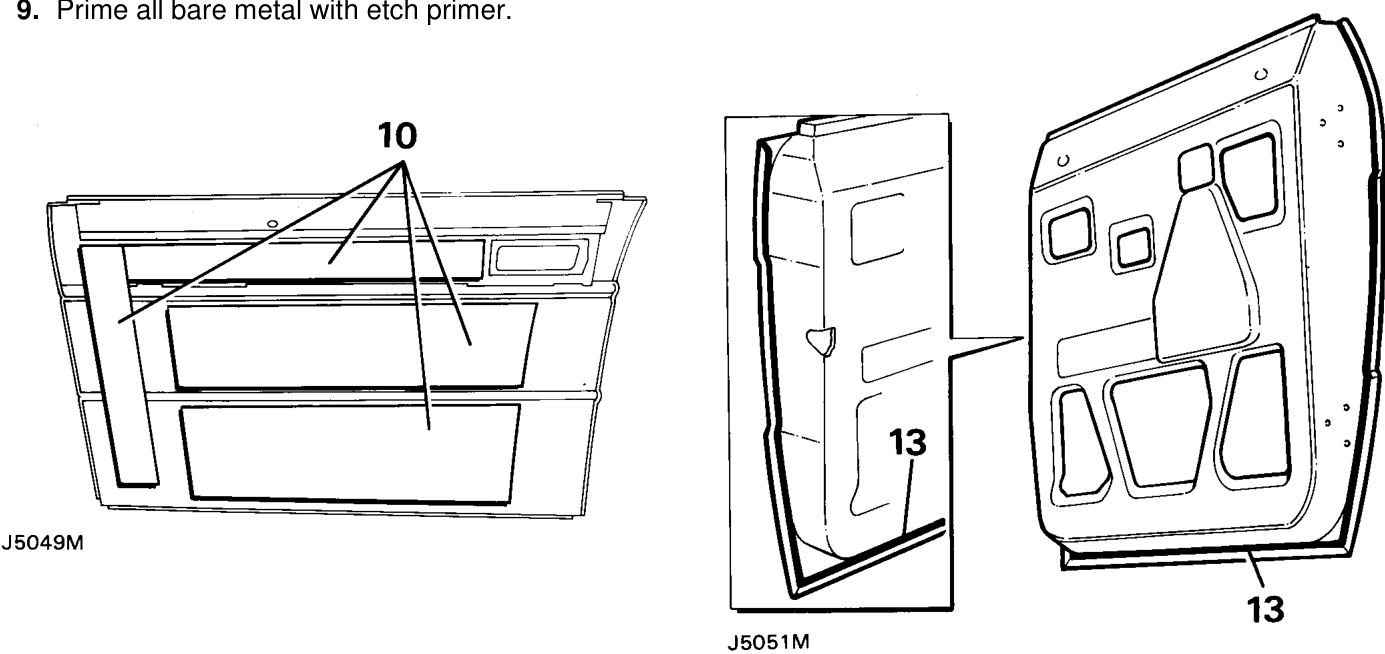
- Apply Supra SDP25 self adhesive sound deadening pads to replacement panel locations illustrated. 13. Apply a bead of Flexseal to outer edge of
- Paint panel as necessary.
- Refit associated parts to door in reverse order of
- Refit door to vehicle. Adjust as necessary to
clinched joint. Work the bead as required to achieve a smooth, cosmetically acceptable seal. See Panels,
removal.
achieve a satisfactory fit.
Parts & tools for this job For 1995 Land Rover Discovery
- TOOLTrim removal tool kitSearch: trim removal tool kit
- PARTTouch-up paintSearch: Land Rover touch up paint
- PARTPanel clip assortmentSearch: Land Rover panel clips assortment
Links open Amazon search results in a new tab. As an Amazon Associate I earn from qualifying purchases.