
FRONT SPOILER
- Make
- Land Rover
- Model
- Range Rover Classic
- Section
- REPAIR › FRONT SPOILER
CHASSIS AND BODY
45
REPAIR
Refit
CAUTION: When refitting avoid trapping of
electrical wiring.
36. Reverse removal procedure.
37. With assistance: Position dash panel and
connect dash harness multiplugs to fusebox and
main harness.
38. Reverse removal procedure. Ensure dash panel
upper bracket studs are located before the 4
lower brackets.
39. Reverse removal procedure. Disconnect
glovebox switch Lucars to ease fitting of relay
bracket.
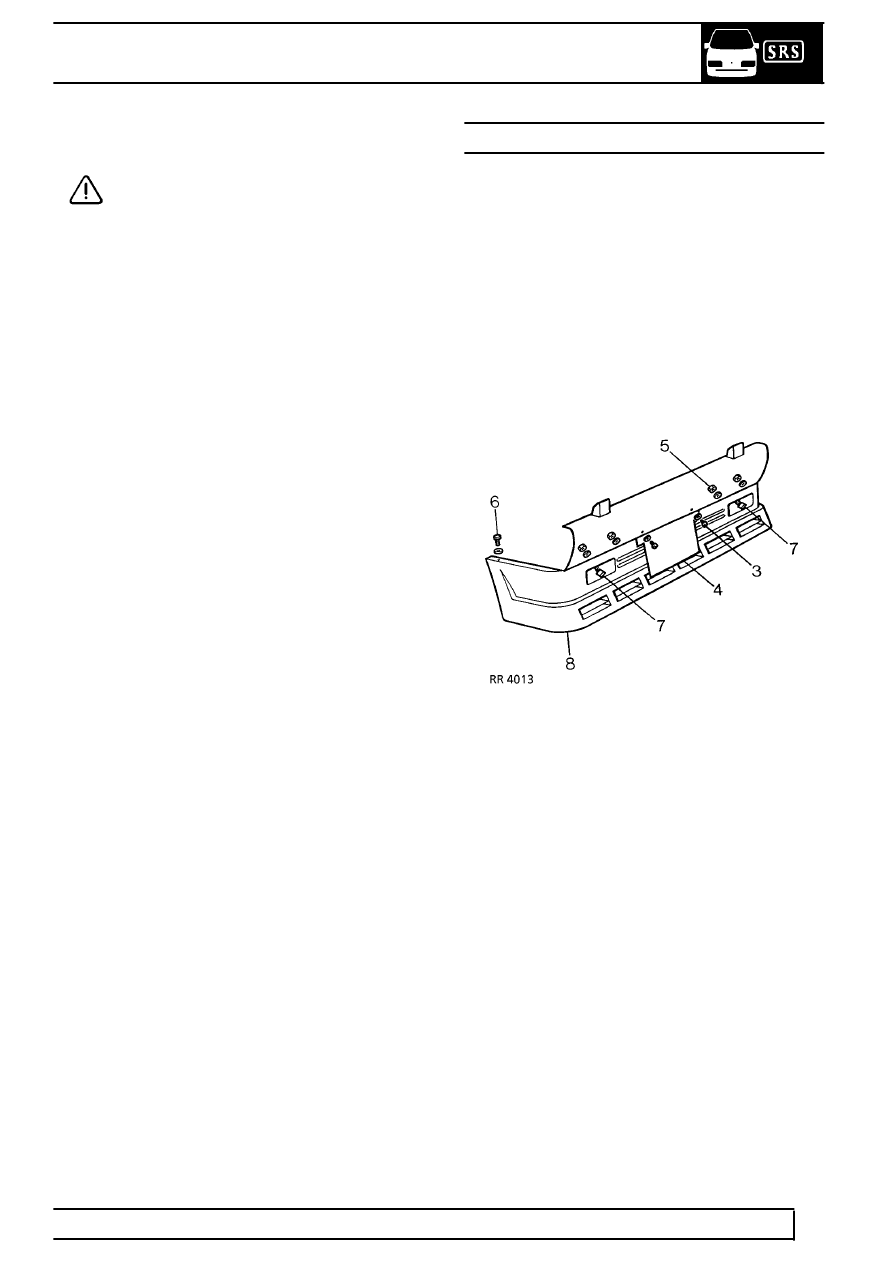
FRONT SPOILER
Service repair no - 76.10.46
The spoiler will reduce the vehicle approach angle by
approximately 10
°
. Where the vehicle is expected to
perform on rough or hilly terrain, it is advisable to
remove the spoiler assembly to prevent possible
damage from ground contact.
Remove
1. Raise and support front of vehicle on safety
stands.
2. Remove engine undertray.
3. Remove two screws with spring washers
securing centre of front spoiler and number
plate.
4. Remove number plate.
5. Remove four nuts with spring washers located
behind front bumper above auxiliary lamps.
6. Remove two bolts, nuts and washers securing
outer edges of spoiler to front wing[fender]s.
7. Release auxiliary lamp multiplugs from clips and
disconnect the multiplugs.
8. Remove front spoiler assembly.
Do not carry
out further dismantling if component is
removed for access only.
9. Remove nut retaining each auxiliary lamp.
10. Remove 2 auxiliary lamps.
11. Transfer components removed to new spoiler.
Refit
12. Reverse removal procedure.
Parts & tools for this job For Land Rover Range Rover
- TOOLTrim removal tool kitSearch: trim removal tool kit
- PARTTouch-up paintSearch: Land Rover touch up paint
- PARTPanel clip assortmentSearch: Land Rover panel clips assortment
Links open Amazon search results in a new tab. As an Amazon Associate I earn from qualifying purchases.