
SUNROOF ASSEMBLY (page 2 of 3)
- Make
- Land Rover
- Model
- Range Rover Classic
- Section
- REPAIR
76
CHASSIS AND BODY
50
REPAIR
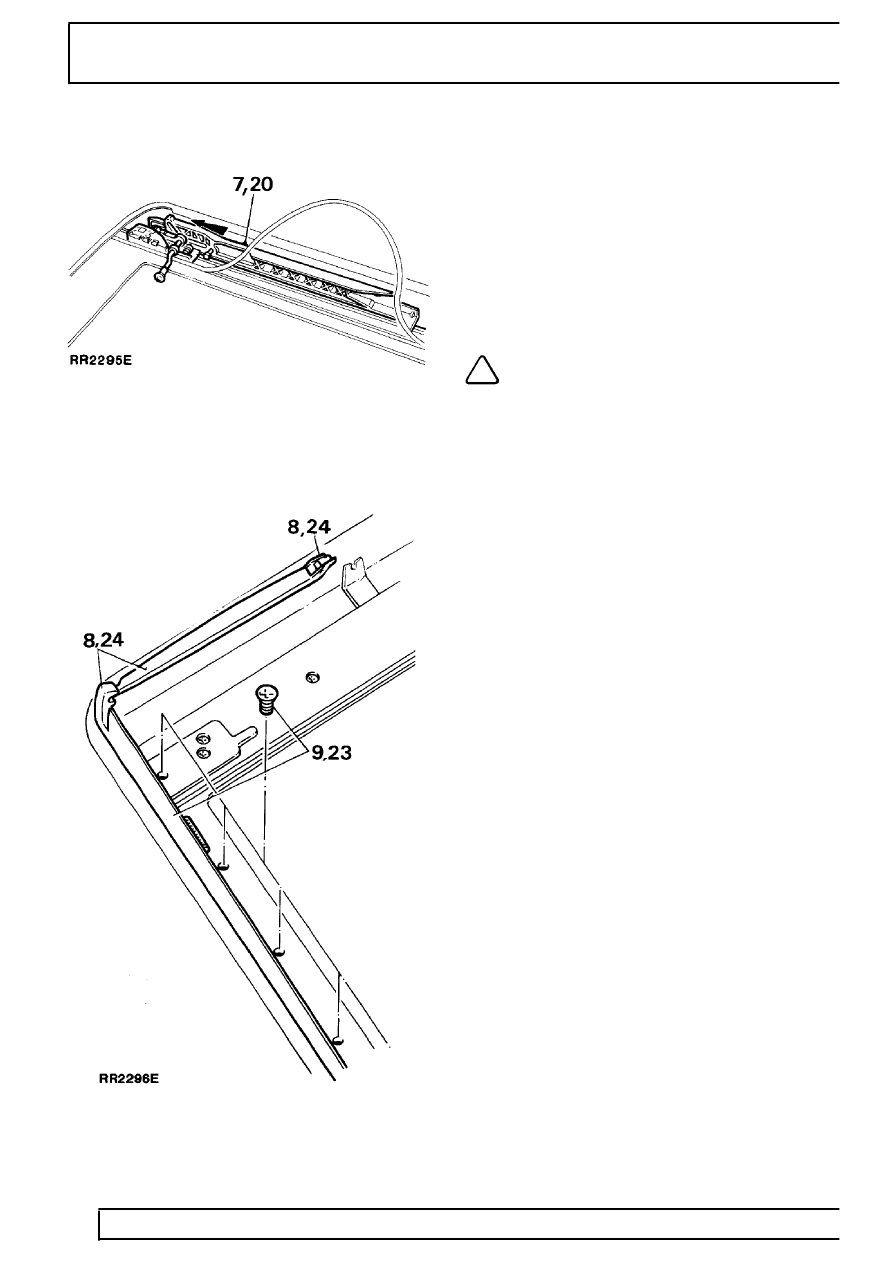
8. Unclip both wind deflector operating arms from
rear mounting brackets. Remove arms from
deflector, if required.
9. Remove seven screws, and withdraw wind
deflector.
10. Remove lower guide rails and rear edge finisher,
seven screws.
11. Remove screws from guide tubes, two each
side. Remove five screws and withdraw motor
mounting bracket.
12. Pull sunroof headliner assembly forward and
remove.
Refit
NOTE: During assembly lightly lubricate
all sliding parts using a silicon spray.
13. Position motor bracket and guide tube assembly.
Fit and tighten securing screws.
14. Position right guide rail in rear retaining bracket.
Push rearwards fully and locate leading edge
under drive cable opening. Repeat operation for
left hand guide rail.
15. Align fixing holes, and loosely fit screw in
seventh hole from front.
16. Position finisher to rear edge of sun roof opening
and secure using seven screws.
17. Position sunroof headliner assembly into outer
guide runners, and push fully rearwards.
18. Lubricate drive cables. Ensure slide and tilt
mechanism is fully assembled.
19. Push cable fully into right side guide tube. Loop
remaining cable and enter rear end into right
inner side runner.
20. Repeat operation 19. for left side. Push both
assemblies rearwards to take up slack in cables,
and push a further 75 mm to rear.
21. Position both front guide rails, aligning with four
forward holes. Fit screws, do not tighten.
22. Position both pivot brackets, loosely fit screws.
23. Fit wind deflector and tighten fixings.
24. Position right operating arm in locating slot in
deflector. Secure opposite end in frame bracket.
Repeat for left side.
25. Pull right slide and tilt mechanism forward, align
with pivot bracket and secure in position using
setting key. Repeat operation for left side.
26. Tighten screws to guide rails, seven each side.
27. Fit and secure relay.
28. Ensure operating motor is in park position ie.
hole on driven gear aligned with drive spindle. Fit
and secure to mounting bracket.
Parts & tools for this job For Land Rover Range Rover
- TOOLTrim removal tool kitSearch: trim removal tool kit
- PARTTouch-up paintSearch: Land Rover touch up paint
- PARTPanel clip assortmentSearch: Land Rover panel clips assortment
Links open Amazon search results in a new tab. As an Amazon Associate I earn from qualifying purchases.