
RESISTOR UNIT
- Make
- Land Rover
- Model
- Range Rover Classic
- Section
- REPAIR › RESISTOR UNIT
HEATING AND VENTILATION
3
REPAIR
Air direction
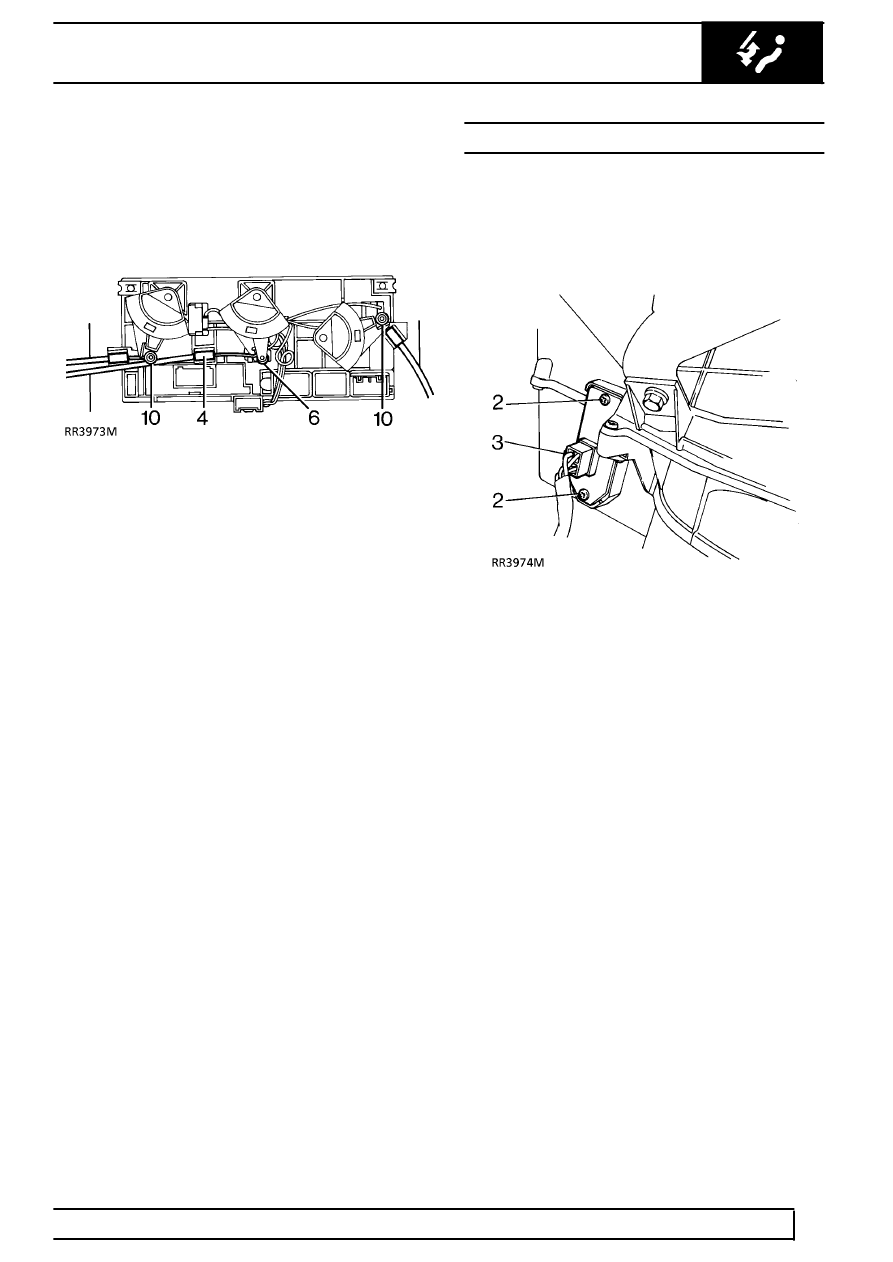
3. Set control fully clockwise
4. Release outer cable from 2 clips on unit.
5. Release cable from stud on flap lever.
6. Remove control cable from control lever.
Temperature
7. Set RH control fully clockwise, LH control fully
anti-clockwise
8. Release outer cable from 2 clips on unit.
9. Release cable from stud on flap lever.
10. Remove control cable from control lever.
Refit
11. Reverse removal procedure. Check the
satisfactory function of the controls before fitting
louvre vent panel.
RESISTOR UNIT
Service repair no - 80.20.17
Remove
1. Open glove box, manoeuvre side springs
through cut-outs and lower lid.
2. Remove 2 screws securing resistor unit to
trunking.
3. Disconnect multiplug and remove resistor unit.
Refit
4. Reverse removal procedure.
Parts & tools for this job For Land Rover Range Rover
- TOOLA/C manifold gauge setSearch: AC manifold gauge set
- TOOLUV leak detection kitSearch: AC UV leak detection kit
- PARTCabin filterSearch: Land Rover Range Rover cabin filter
Links open Amazon search results in a new tab. As an Amazon Associate I earn from qualifying purchases.