
COMPRESSOR
- Make
- Land Rover
- Model
- Range Rover Classic
- Section
- REPAIR › COMPRESSOR
AIR CONDITIONING
5
REPAIR
COMPRESSOR
Service repair no - 82.10.20
Remove
1. Disconnect battery negative lead.
2. Recover refrigerant from air conditioning system.
See Adjustment, Refrigerant Recovery
Recycling Recharging
3. Remove screws retaining centre panel to fan
cowl
4. Remove centre panel.
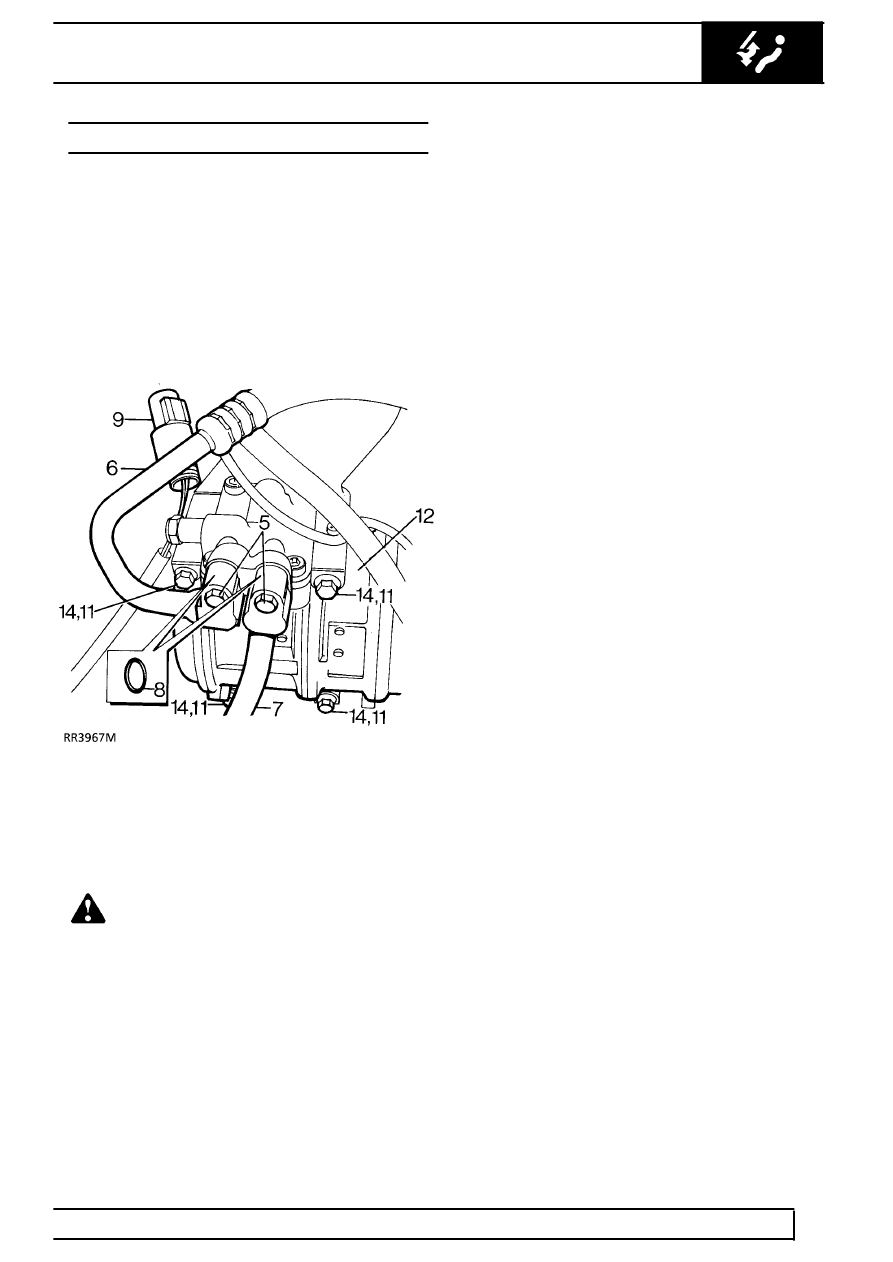
V8i Engine Illustrated
5. Remove 2 bolts securing hose flanges to
compressor.
WARNING: Wear eye and hand protection
when disconnecting components
containing refrigerant. Plug all exposed
connections immediately.
6. Disconnect high pressure hose from
compressor.
7. Disconnect low pressure hose from compressor.
8. Remove ’O’ ring from each flange.
9. Disconnect electrical lead from compressor
clutch.
10. Release drive belt from compressor pulley.
See
ENGINE, Repair, Drive Belt
11. Remove 4 bolts securing compressor to
mounting bracket.
12. Remove compressor from mounting bracket.
Refit
13. New compressor to be fitted: Drain oil from new
compressor outlet port. Drain and measure oil
from old compressor. Measure new oil equal to
amount drained from old compressor, add 30 ml
extra to this amount and refill new compressor
through outlet port.
14. Locate compressor in mounting bracket, fit bolts.
Tighten to
25 Nm.
15. Connect electrical lead to compressor clutch.
16. Fit new ’O’ rings to high and low pressure hose
flanges, lubricate with refrigerant oil.
17. Engage hose flanges, fit bolts. Tighten to
10
Nm.
18. Fit compressor drive belt.
See ENGINE, Repair,
Drive Belt
19. Fit centre panel to fan cowl.
20. Evacuate and recharge air conditioning system.
See Adjustment, Refrigerant Recovery
Recycling Recharging
21. Perform a leak test on disturbed joints.
22. Carry out a functional check.
Parts & tools for this job For Land Rover Range Rover
- TOOLA/C manifold gauge setSearch: AC manifold gauge set
- TOOLUV leak detection kitSearch: AC UV leak detection kit
- PARTCabin filterSearch: Land Rover Range Rover cabin filter
Links open Amazon search results in a new tab. As an Amazon Associate I earn from qualifying purchases.