
1.4.0.4. Valve Clearance Adjustment (page 2 of 2)
- Make
- Peugeot
- Model
- J5 Pocket Mechanic, 1.8 and 2.0 petrol
- Year
- 1987–1994
- Section
- Servicing and overhaul
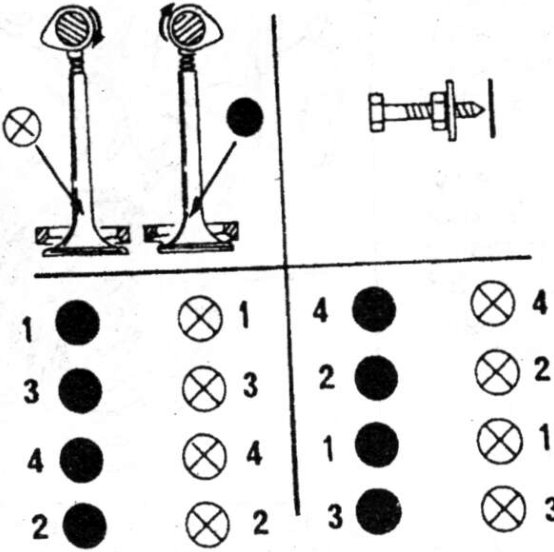
Fig. 1.62. — Adjusting the valve clearances when the valves shown on the L.H. side are fully closed. Adjust both valves of the cylinder shown on the R.H. side. Note the positions of the cams.
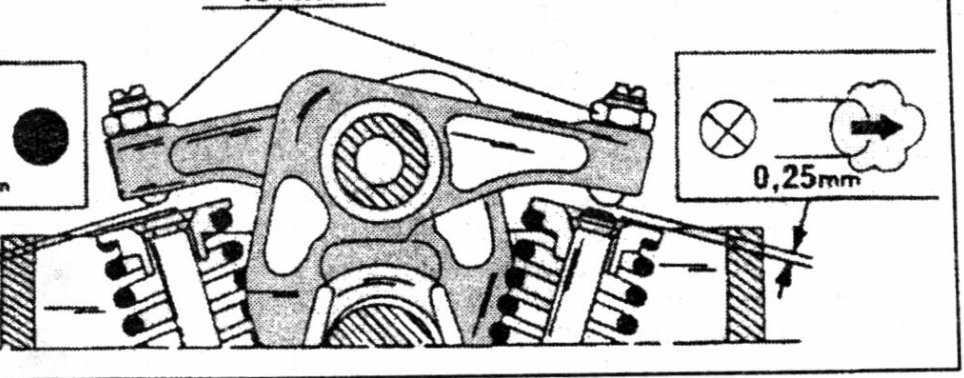
Fig. 1.63. — Insert feeler gauges of the thickness shown between the ends of the valve stems and the rocker arm pads. Tighten the locknuts to 1.8 kgm.
will notice that some play can be felt. After adjusting the valves of No. 4 cylinder, turn the crankshaft by half a turn and adjust the next closed pair of valves. Follow the table below:
| Valves closed | Valves to be adjusted |
|---|---|
| Cylinder No. 1 | Cylinder No. 4 |
| Cylinder No. 3 | Cylinder No. 2 |
| Cylinder No. 4 | Cylinder No. 1 |
| Cylinder No. 2 | Cylinder No. 3 |
To adjust the valves insert a feeler gauge of the applicable size between the end of the valve stem and the rocker arm pad as shown in Fig. 1.62. The feeler gauge should have a gliding fit. A good indication of a perfect play is when the feeler gauge can be inserted easily, tries to offer a slight resistance and then “jumps” into the gap.
To adjust the clearance slacken the adjusting screw locknut with a ring spanner and turn the screw with a screwdriver. Re-tighten the nut (Fig. 1.62).
Parts & tools for this job For 1987 Peugeot J5
- PARTEngine gasket setSearch: Peugeot J5 1987 engine gasket set
- TOOLTorque wrenchSearch: 3/8 inch torque wrench
- TOOLFeeler gauge setSearch: feeler gauge set
Links open Amazon search results in a new tab. As an Amazon Associate I earn from qualifying purchases.