
Outer valance - front cushion
- Make
- Rover
- Model
- 200 Workshop Manual
- Year
- 1995–1999
- Section
- Seats and seat belts › Outer valance - front cushion
BodyOuter valance - front cushion
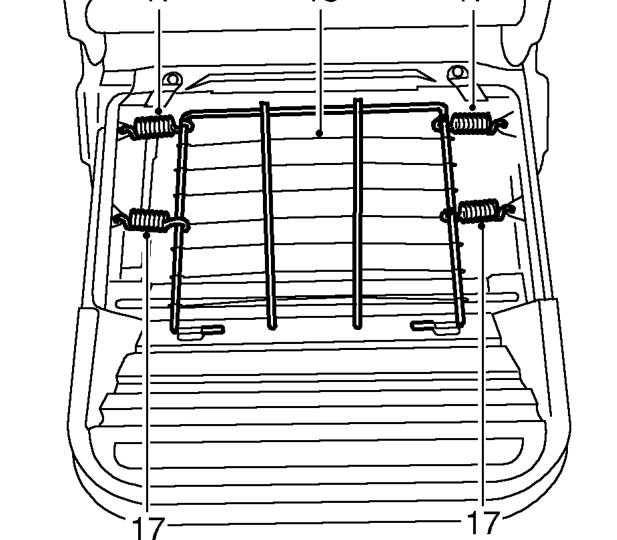
- Release 4 springs securing cushion suspension to seat frame.
- Remove suspension.
Refit
- Position cushion suspension to seat frame and secure with springs.
- Fit cushion pad to seat frame.
- Fit cushion cover over pad.
- Secure cover to pad using new hog rings.
- Secure cushion cover retainers.
- Fit pre-tensioner to seat and tighten bolt to 30 Nm.
- Secure pre-tensioner harness to seat cushion with clip.
- Fit outer valance to seat frame and secure with screws.
- Fit escutcheons to valance.
- Fit upper valance to seat.
- Fit inner valance to seat.
- Fit adjustment wheel to valance.
- Position squab suspension to seat frame and secure with springs.
- Fit head restraint escutcheons to squab frame and secure spring clips.
- Fit squab pad to frame.
- Fit front squab cover. See this section.
OUTER VALANCE - FRONT CUSHION
Service repair no - 78.30.42
Remove
- Remove front seat. See this section.
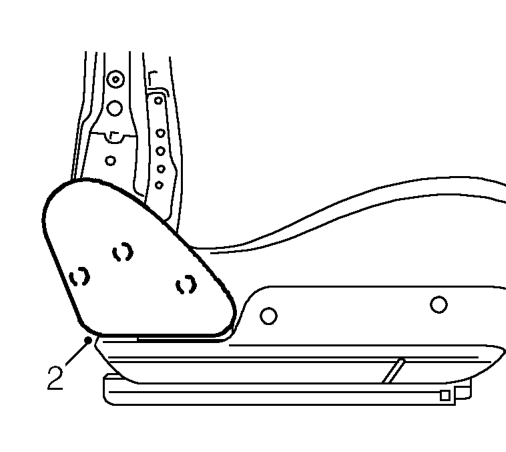
- Release upper valance from 3 clips and remove.
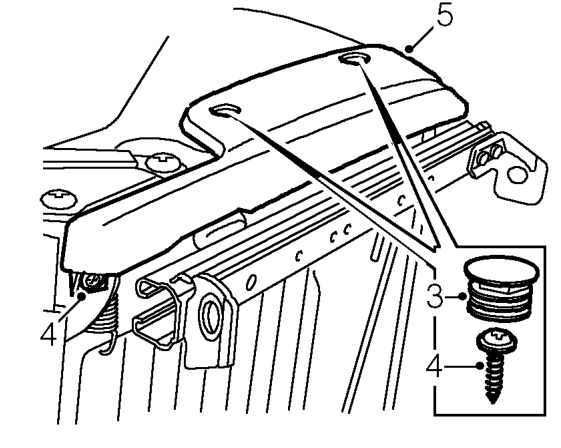
- Remove 2 escutcheons from side of lower valance.
- Remove 3 screws securing lower valance to seat.
- Remove valance from seat.
Parts & tools for this job For 1995 Rover 200
- TOOLOBD2 scanner with SRSSearch: OBD2 scanner ABS SRS
- TOOLTrim removal tool kitSearch: trim removal tool kit
Links open Amazon search results in a new tab. As an Amazon Associate I earn from qualifying purchases.