
Resistor unit (page 4 of 4)
- Make
- Rover
- Model
- 200 Workshop Manual
- Year
- 1995–1999
- Section
- Repairs
Heating & ventilationResistor unit · page 4 of 4
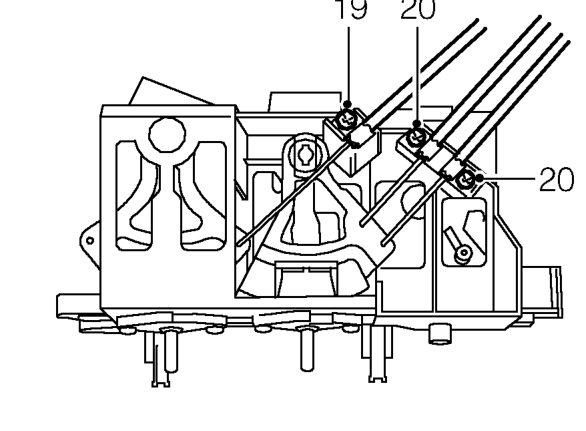
- Remove 2 screws securing heater control cables and release from heater controls.
- Remove screw securing fresh air vent control cable to heater controls and fit to new heater controls. Secure with screw.
- Fit heater control cables to heater controls and secure with screws.
- Fit air distribution cable to heater controls and secure with screw.
- Fit air recirculation cable to heater controls and secure with screw.
- Fit fan switch to heater controls and secure with screws.
- Fit bezel to heater controls and secure with screws.
- Fit trim finisher to heater controls.
- Fit knobs to heater controls.
Refit
- Position heater controls to fascia and connect multiplugs.
- Fit and tighten screws securing heater controls to fascia.
- Rotate heater control and control lever on heater assembly to cool positions.
- Connect heater control cable to lever and secure with clip.
- Set heater valve to closed position.
- Feed heater control cable through bulkhead and connect to heater valve. Secure with clip.
- Set air distribution control and lever on heater assembly to vent positions.
- Connect air distribution cable to lever and secure with clip.
- Feed air recirculation cable behind blower assembly and connect to lever. Secure with clip.
- Fit fresh air vent control cable to heater assembly and secure with clip.
- Fit fascia lower cover and secure turnbuckles.
- Fit glove box. See BODY, Interior trim components.
- Fit front console. See BODY, Interior trim components.
Parts & tools for this job For 1995 Rover 200
- TOOLA/C manifold gauge setSearch: AC manifold gauge set
- TOOLUV leak detection kitSearch: AC UV leak detection kit
- PARTCabin filterSearch: Rover 200 1995 cabin filter
Links open Amazon search results in a new tab. As an Amazon Associate I earn from qualifying purchases.