
Fuel tank - ’l’ series (page 2 of 3)
- Make
- Rover
- Model
- 400 Workshop Manual
- Year
- 1995–2000
- Section
- Repairs
Fuel delivery systemFuel tank - ’l’ series · page 2 of 3
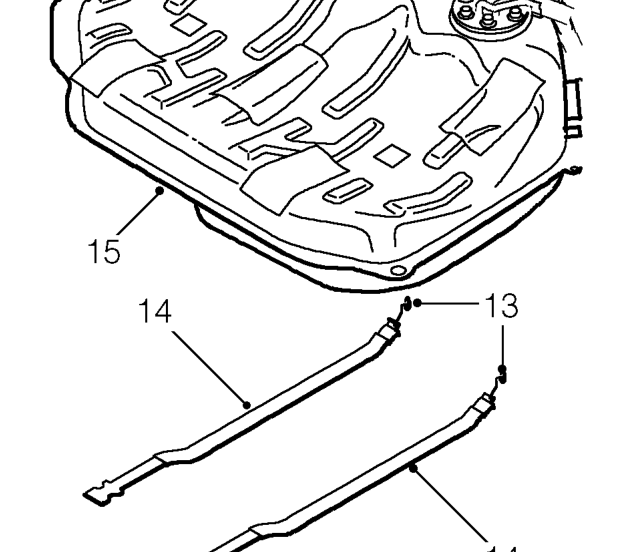
- Loosen 2 fuel tank strap locknuts and remove 2 tank strap nuts.
- Release fuel tank straps from body.
- Using assistance, release fuel tank from body and lower.
- Remove fuel tank from beneath vehicle. Do not carry out further dismantling if component is removed for access only.
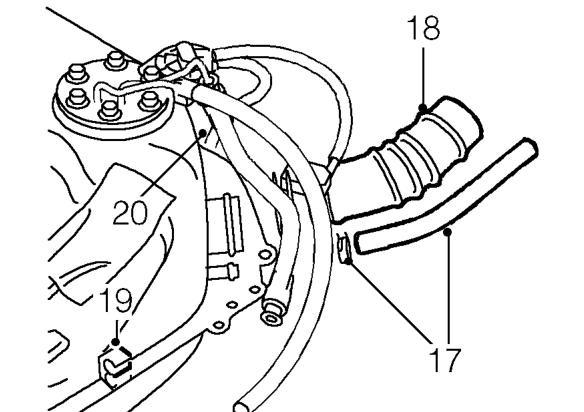
- Release clip securing filler neck breather hose to fuel tank and remove breather hose.
- Loosen clip securing filler neck hose to fuel tank and remove filler neck hose.
- Remove hose clip from fuel tank.
- Disconnect breather hose from fuel tank.
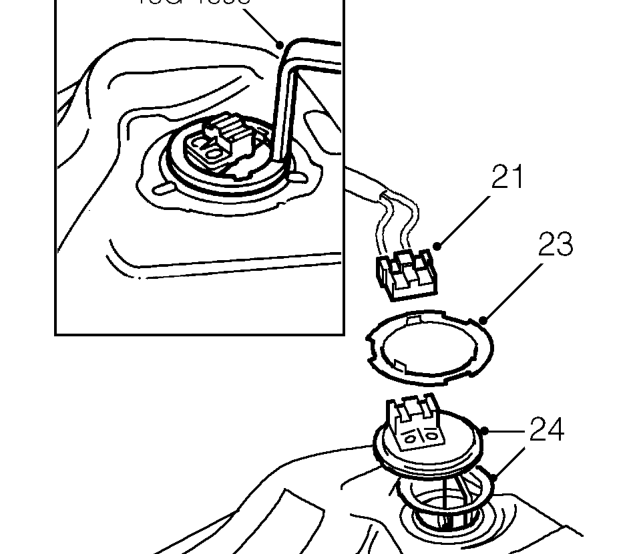
- Release cover and disconnect multiplug from fuel gauge tank unit.
- Release harness from clip on fuel tank.
- Use tool 18G 1595. and remove looking ring from tank unit.
- Remove fuel gauge tank unit and sealing ring.
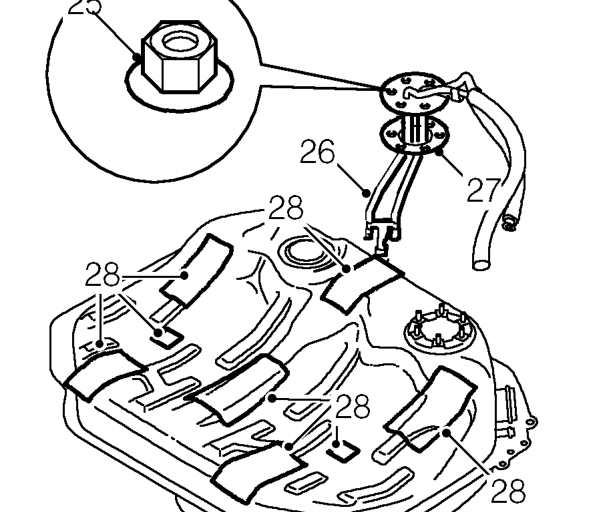
- Remove 6 nuts securing fuel pipe adaptor to fuel tank.
- Remove pipe adaptor from fuel tank.
- Remove seal from adaptor.
- Remove rubber pads from old fuel tank, apply adhesive and fit to new tank.
Parts & tools for this job For 1995 Rover 400
- PARTFuel filterSearch: Rover 400 1995 fuel filter
- TOOLFuel pressure test kitSearch: fuel pressure test kit
- TOOLFuel line disconnect toolSearch: fuel line disconnect tool
Links open Amazon search results in a new tab. As an Amazon Associate I earn from qualifying purchases.