
Connectiong Rod - Toyota Hilux Generation 7 2005-2010 Workshop Manual
- Make
- Toyota
- Model
- Hilux Toyota Hilux Generation 7 2005-2010 Workshop Manual
- Section
- Connectiong Rod - Toyota Hilux Generation 7 2005-2010 Workshop Manual
Connectiong Rod
EM–246
1GR-FE ENGINE MECHANICAL – ENGINE UNIT
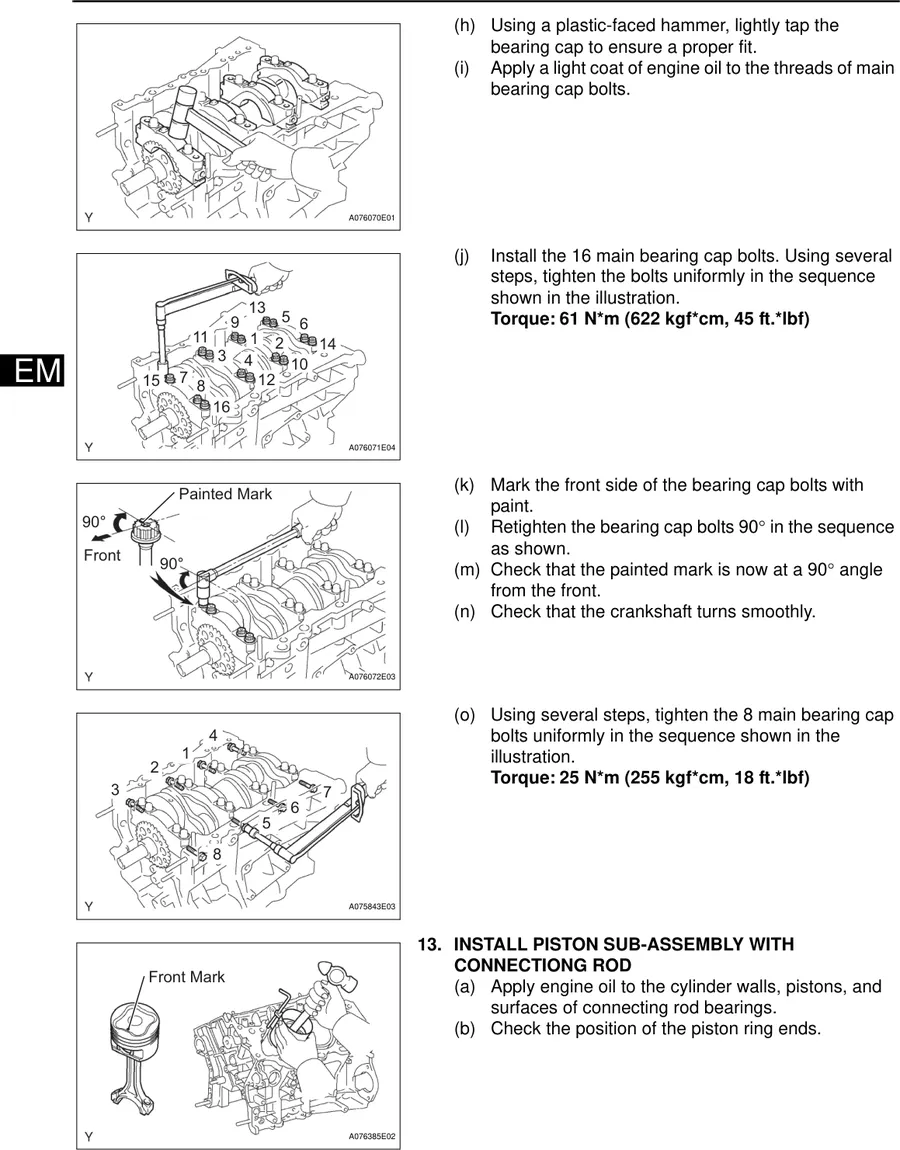
(h) Using a plastic-faced hammer, lightly tap the bearing cap to ensure a proper fit. (i) Apply a light coat of engine oil to the threads of main bearing cap bolts.
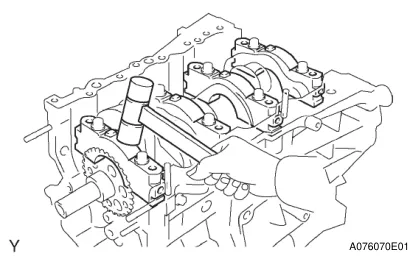
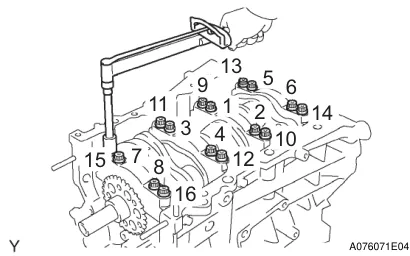
A076070E01 (j) Install the 16 main bearing cap bolts. Using several steps, tighten the bolts uniformly in the sequence shown in the illustration. 13 Torque: 61 N*m (622 kgf*cm, 45 ft.*lbf) 5 9 6 11 1 2 14 3 EM 4 10 7 15 12 8 16 A076071E04 (k) Mark the front side of the bearing cap bolts with Painted Mark paint. 90° Retighten the bearing cap bolts 90° in the sequence (l) as shown. Front 90° (m) Check that the painted mark is now at a 90° angle from the front. (n) Check that the crankshaft turns smoothly.
A076072E03 (o) Using several steps, tighten the 8 main bearing cap bolts uniformly in the sequence shown in the 4 1 illustration. 2 Torque: 25 N*m (255 kgf*cm, 18 ft.*lbf) 3 7 6 5 8
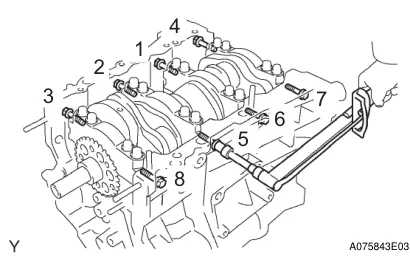
A075843E03
13. INSTALL PISTON SUB-ASSEMBLY WITH
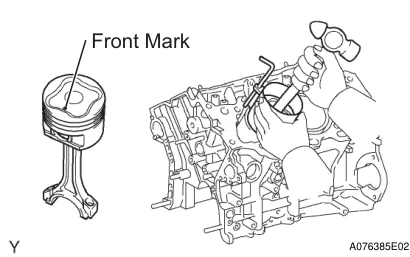
CONNECTIONG ROD
Front Mark (a) Apply engine oil to the cylinder walls, pistons, and surfaces of connecting rod bearings. (b) Check the position of the piston ring ends.
A076385E02
Parts & tools for this job For Toyota Hilux
- TOOLTorque wrenchSearch: 3/8 inch torque wrench
- TOOLSocket setSearch: socket set metric
- BOOKHaynes manualSearch: Haynes manual Toyota Hilux
As an Amazon Associate we earn from qualifying purchases.