
Mounting inboard piston
- Make
- Land Rover
- Model
- Defender 90 Workshop Manual (NAS)
- Section
- Repair › Mounting inboard piston
BrakesMounting inboard piston
- Coat piston with brake fluid. Insert it squarely REAR BRAKE DISC into bore. Do not tilt piston during insertion and leave 8mm, 0.2 in projecting from bore. Service repair no - 70.10.11.
- Coat a new wiper seal with brake fluid and fit to new seal retainer. Slide assembly, seal first, over Remove protruding piston into bore recess.
- Using special tool LRT-70-500- piston clamp, press home seal retainer and piston.
Mounting inboard piston
- Remove rear hub assembly. See REAR AXLE AND FINAL DRIVE, Repair, Rear hub .
assembly
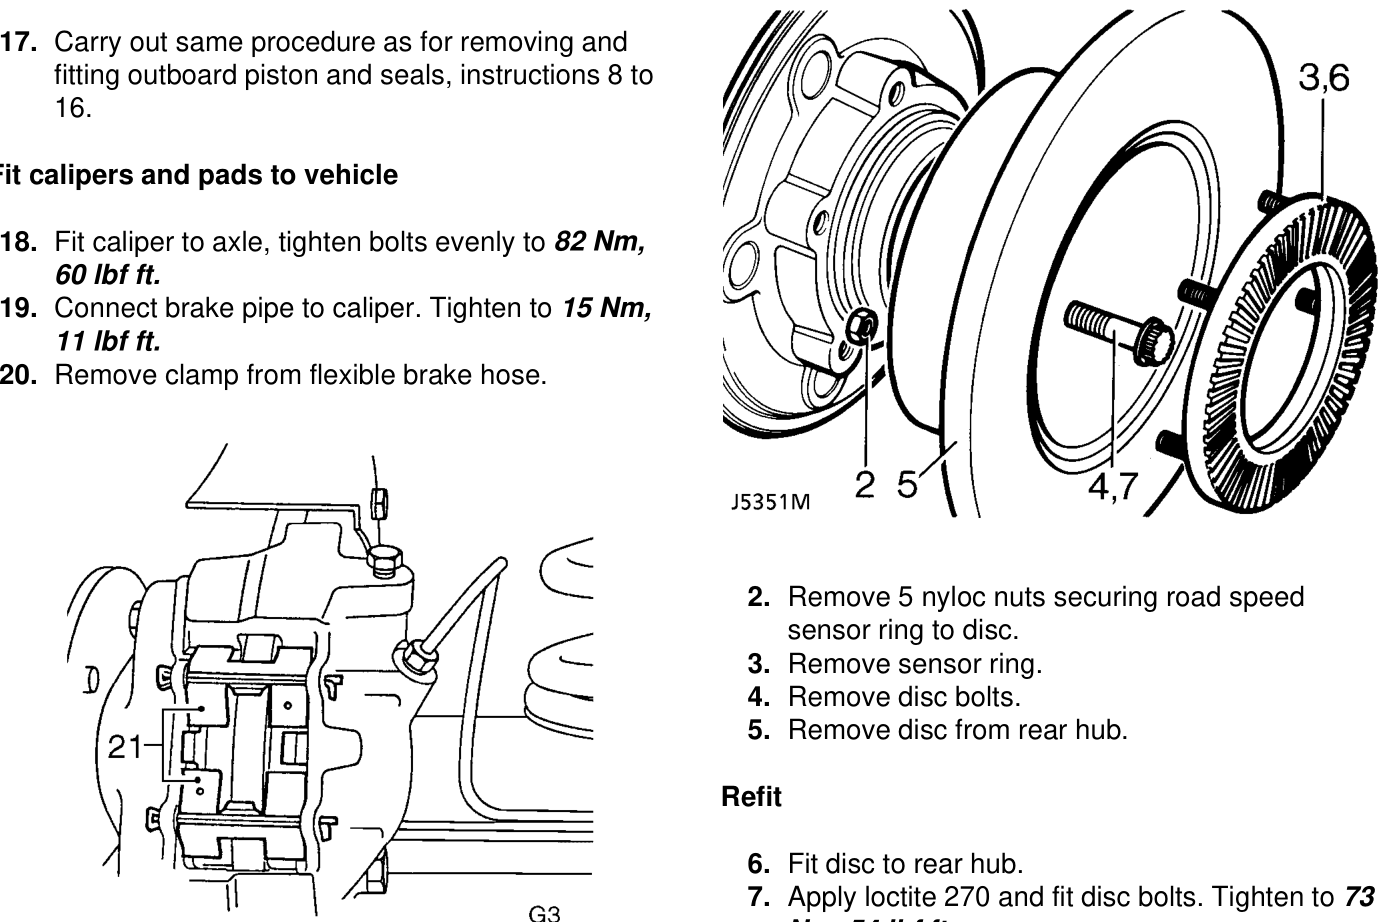
- Carry out same procedure as for removing and fitting outboard piston and seals, instructions 8 to 16.
Fit calipers and pads to vehicle
- Fit caliper to axle, tighten bolts evenly to 82 Nm, 60 lbf ft.
- Connect brake pipe to caliper. Tighten to 15 Nm, 11 lbf ft.
- Remove clamp from flexible brake hose.
- Remove 5 nyloc nuts securing road speed sensor ring to disc.
- Remove sensor ring.
- Remove disc bolts.
- Remove disc from rear hub.
Refit
- Fit disc to rear hub.
- Apply loctite 270 and fit disc bolts. Tighten to 73
- Insert pads and retaining springs, secure in position with new retaining pins and spread 10. Fit rear hub assembly. ends. Ensure retaining springs are located correctly.
- Bleed brake system. See Brake System Bleed Disc reclamation
- Press brake pedal firmly several times to locate pads. 11. Check disc thickness. The disc may be
- Fit road wheels, remove axle stands and finally tighten road wheel nuts, 130 Nm, 95 lbf ft.
- Road test vehicle.
- CAUTION: New brake pads require
- ’bedding-in’, for several hundred miles
- before brakes are at maximum efficiency.
.
Nm, 54 lbf ft
- Using new nyloc nuts fit sensor ring.
- Check total disc run out, this must not exceed 0,15 mm, 0.006 in. If necessary reposition disc. See REAR AXLE AND .
FINAL DRIVE, Repair, Rear Hub Assembly
machined to minimum thickness of 12 mm, 0.472 in. Machine equal amounts off each face.
- NOTE: The brake disc MUST BE renewed if
- the minimum running thickness stamped
- on the disc is recorded.
Parts & tools for this job For Land Rover Defender
- PARTEngine gasket setSearch: Land Rover Defender engine gasket set
- TOOLTorque wrenchSearch: 3/8 inch torque wrench
- TOOLFeeler gauge setSearch: feeler gauge set
Links open Amazon search results in a new tab. As an Amazon Associate I earn from qualifying purchases.