
Lower fascia panel (heater duct) assembly
- Make
- Land Rover
- Model
- Defender V8i Workshop Manual Supplement
- Section
- Repair › Lower fascia panel (heater duct) assembly
Chassis and bodyLower fascia panel (heater duct) assembly · page 1 of 2
LOWER FASCIA PANEL (HEATER DUCT) ASSEMBLY
Service repair no - 76.46.05
Remove
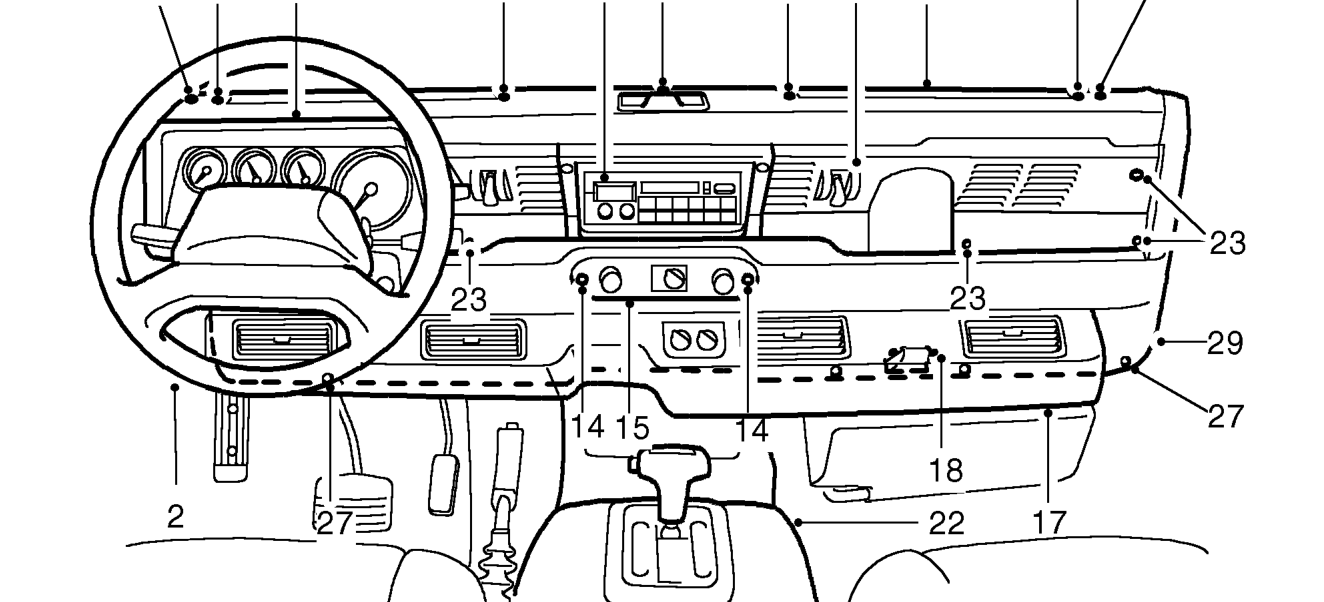
- Disconnect battery.
- Remove steering wheel. If necessary, use puller LRT-57-014.
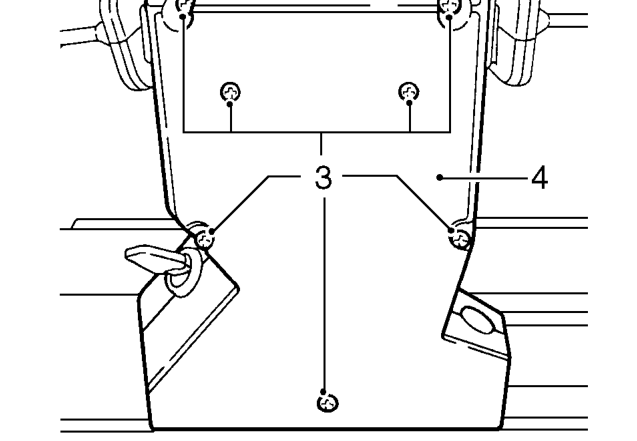
- Remove 7 screws and lift lift top half of nacelle from steering column switch assembly.
- Ease bottom half of nacelle from switch gaiters/grommets and remove.
- Remove instrument panel. See INSTRUMENTS, Repair, Instrument panel
- Disconnect heater control cable. See HEATING AND VENTILATION, Repair, Heater control cable - air distribution
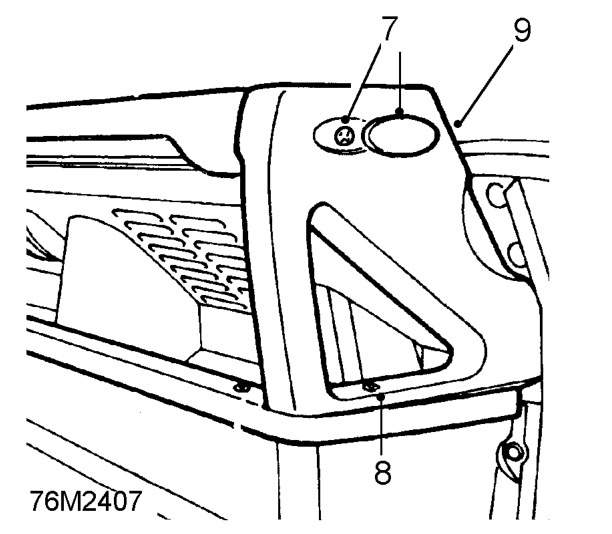
- Prise out Land Rover decal and remove screw securing grab handle to crash pad.
- Remove screw securing grab handle to lower fascia panel.
- Lift grab handle to release locating pins from fascia panel.
Parts & tools for this job For Land Rover Defender
- TOOLA/C manifold gauge setSearch: AC manifold gauge set
- TOOLUV leak detection kitSearch: AC UV leak detection kit
- PARTCabin filterSearch: Land Rover Defender cabin filter
Links open Amazon search results in a new tab. As an Amazon Associate I earn from qualifying purchases.