
Seat belt buckle - rear - 5 door
- Make
- Land Rover
- Model
- Freelander Workshop Manual
- Year
- 1998–2000
- Section
- Repairs › Seat belt buckle - rear - 5 door
Restraint systemsSeat belt buckle - rear - 5 door
SEAT BELT BUCKLE - REAR - 5 DOOR
Service repair no - 76.73.32
Remove
- Position rear seat forward.
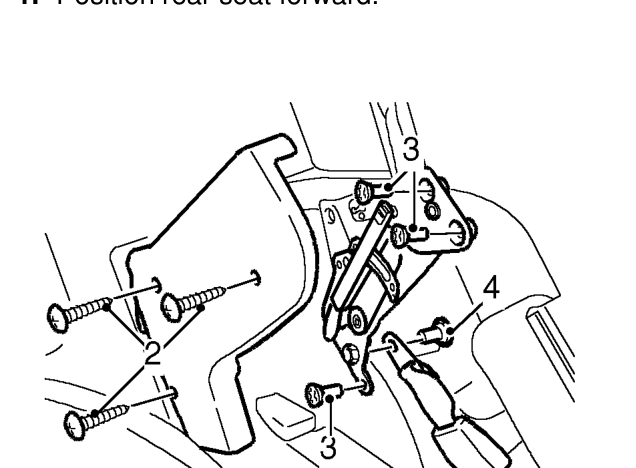
- Remove 3 screws from end cover and remove covers from seat hinges.
- Remove 4 Torx bolts from seat lock down catch and remove catch assembly.
- Remove Torx bolt from seat belt buckle and remove buckle.
Refit
- Fit buckle to catch assembly and tighten Torx bolt to 32 Nm.
- Fit catch assembly to seat, fit Torx bolts but do not tighten at this stage.
- Fold seat down and check that seat unfolds on lockdown bar correctly. Adjust catch assembly if required.
- Tighten Torx bolts to 32 Nm.
- Re-check seat fold.
- Fit end cover and tighten screws.
- Reposition seat.
PRETENSIONER - SEAT BELT - FRONT
Service repair no - 76.73.75
Remove
WARNING: See GENERAL INFORMATION, SRS Precautions.
- Make the SRS system safe. See GENERAL INFORMATION, SRS Precautions.
- Remove rear console. See BODY, Interior trim components.
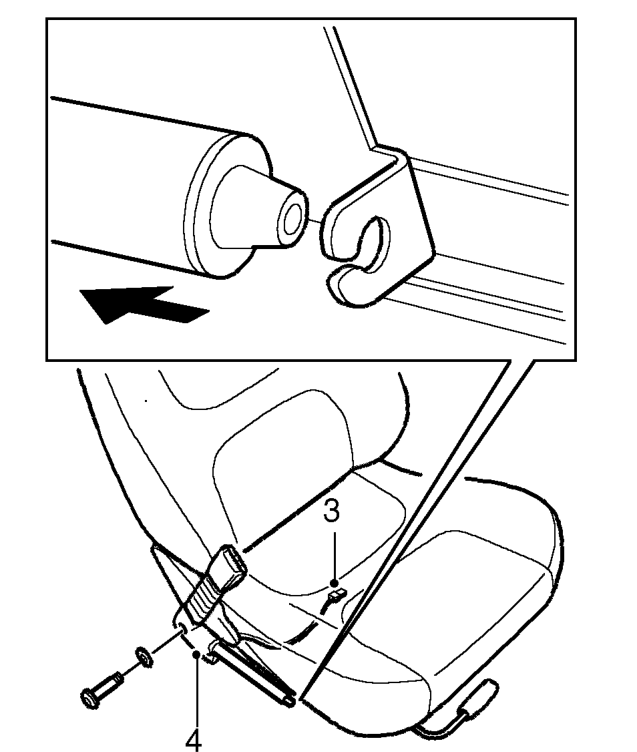
- Disconnect and secure pretensioner multiplug.
- Remove Torx bolt from pretensioner, release pretensioner from seat location and remove pretensioner assembly.
WARNING: Store the pretensioner in accordance with the storage procedures. See GENERAL INFORMATION, SRS Precautions.
Parts & tools for this job For 1998 Land Rover Freelander
- TOOLOBD2 scanner with SRSSearch: OBD2 scanner ABS SRS
- TOOLTrim removal tool kitSearch: trim removal tool kit
Links open Amazon search results in a new tab. As an Amazon Associate I earn from qualifying purchases.