
Diagnostic control unit (dcu)
- Make
- Land Rover
- Model
- Freelander Workshop Manual
- Year
- 1998–2000
- Section
- Repairs › Diagnostic control unit (dcu)
Restraint systemsDiagnostic control unit (dcu)
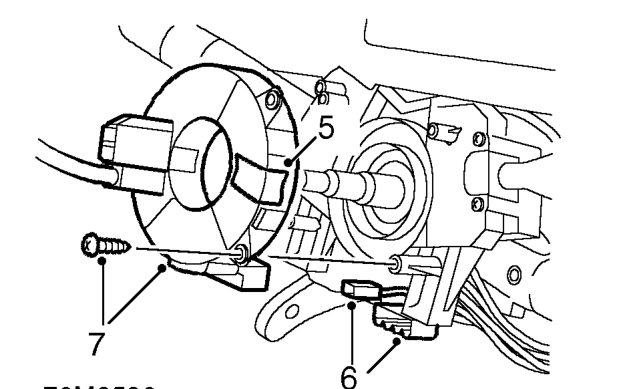
- If the rotary coupler is being re-used place adhesive tape around moulding to prevent rotation.
- Disconnect 2 multiplugs from rotary coupler.
- Remove 4 screws and remove rotary coupler.
CAUTION: Do not dismantle the rotary coupler, it has no serviceable parts and must be replaced as a complete assembly.
Refit
CAUTION: Ensure front road wheels are in the straight ahead position.
- Ensure the rotary coupler is installed in its centred position, as indicated by the white segment on the indicator wheel.
- Fit rotary coupler and secure with screws.
- Connect multiplugs to rotary coupler.
- Fit upper and lower halves of nacelle to steering column and tighten screws.
- If fitting existing rotary coupler, remove retaining tape from rotary coupler. If fitting new rotary coupler, remove blue locking tab from rotary coupler.
- Fit steering wheel. See STEERING, Repairs.
DIAGNOSTIC CONTROL UNIT (DCU)
Service repair no - 76.74.68 Service repair no - 76.74.68/20
Remove
WARNING: See GENERAL INFORMATION, SRS Precautions.
- Make the SRS system safe. See GENERAL INFORMATION, SRS Precautions.
- Remove heater assembly. See HEATING & VENTILATION, Repairs.
Models with air conditioning fitted
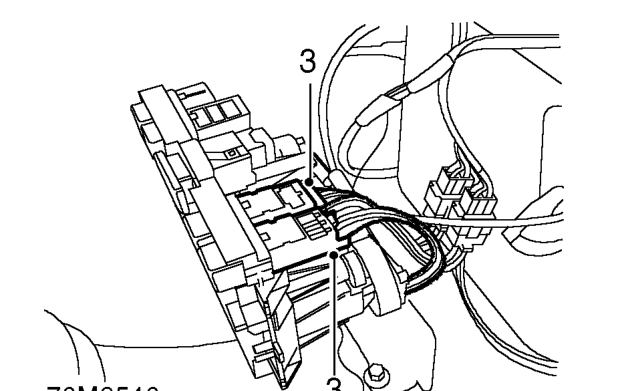
- Disconnect 2 multiplugs from air conditioning switches.
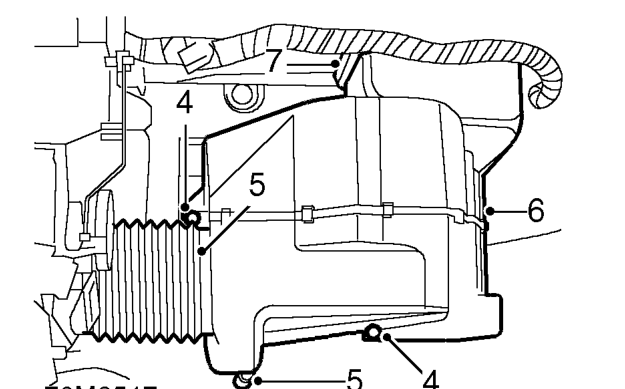
- Remove 2 nuts securing evaporator.
- Release evaporator from drain hose and air intake.
- Remove evaporator.
- Collect air duct and pipe seal.
Parts & tools for this job For 1998 Land Rover Freelander
- TOOLOBD2 scannerSearch: OBD2 scanner
- TOOLDigital multimeterSearch: automotive digital multimeter
- TOOLBack-probe test leadsSearch: back probe test leads
Links open Amazon search results in a new tab. As an Amazon Associate I earn from qualifying purchases.