
Models with sun roof:
- Make
- Land Rover
- Model
- Freelander Body Repair Manual
- Year
- 1998 on
- Section
- Interior trim components › Models with sun roof:
BodyModels with sun roof:
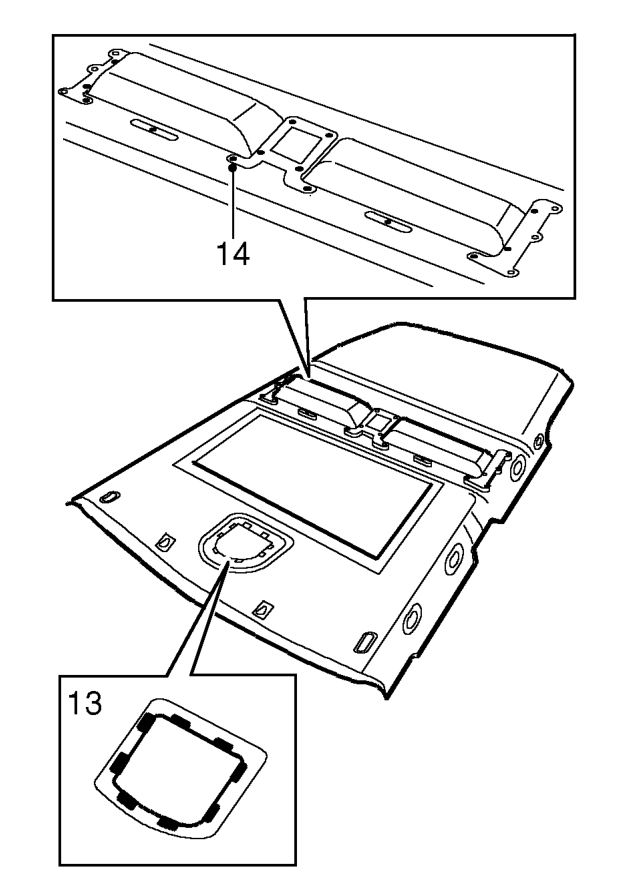
Do not carry out further dismantling if component is removed for access only.
- Release 8 tags securing front roof lamp support and remove support.
- Remove 14 nuts from stowage pockets, collect backing plates and remove stowage pockets.
- Position stowage pockets and backing plates on replacement headlining and secure with nuts.
- Position roof lamp support on replacement headlining and secure retaining tags.
Refit
- With assistance, position headlining and secure with retaining studs.
Models with sun roof:
- Position sunroof surround finisher and secure in position.
All models:
- Locate headlining to front and rear door aperture seals.
- Fit and secure ’B/C’ post upper finishers.
- Connect multiplugs and fit roof lamps.
- Fit grab handle blanking plugs.
- Fit grab handles, tighten screws and fit screw covers.
- Fit sun visor clips and tighten screws.
- Fit both sun visors. See this section.
- Fit both ’A’ post trims. See this section.
- Fit rear quarter upper trim casings. See this section.
Parts & tools for this job For 1998 Land Rover Freelander
- TOOLTrim removal tool kitSearch: trim removal tool kit
- PARTTouch-up paintSearch: Land Rover touch up paint
- PARTPanel clip assortmentSearch: Land Rover panel clips assortment
Links open Amazon search results in a new tab. As an Amazon Associate I earn from qualifying purchases.