
Floor longitudinal
- Make
- Land Rover
- Model
- Freelander Body Repair Manual
- Year
- 1998 on
- Section
- Repairs › Floor longitudinal
Panel repairsFloor longitudinal
FLOOR LONGITUDINAL
Remove
- Disconnect battery earth lead.
- Disconnect alternator. See ELECTRICAL, Repairs.
- Disconnect all ECUs.
- Remove tail exhaust pipe. See MANIFOLD & EXHAUST SYSTEMS, Repairs.
- Remove tail door. See BODY, Doors.
- Remove tail door aperture seal.
- Remove LH and RH rear quarter lower casings. See BODY, Interior trim components.
- Remove loadspace carpet. See BODY, Interior trim components.
- Remove fuel tank. See FUEL DELIVERY SYSTEM, Repairs.
- Release vehicle harness from rear body lower closing and position aside.
Repair
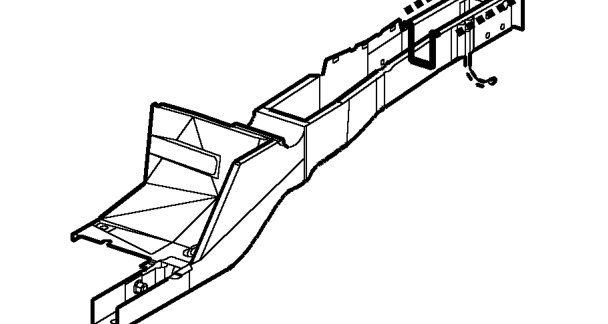
- Remove existing panel(s), prepare panel joint faces and install new panel(s) in accordance with Panel Replacement Procedure. Punch or drill holes in new panel for plug welding as shown.
Refit
- Secure vehicle harness to rear body lower closing.
- Fit fuel tank. See FUEL DELIVERY SYSTEM, Repairs.
- Fit loadspace carpet. See BODY, Interior trim components.
- Fit LH and RH rear quarter lower casings. See BODY, Interior trim components.
- Fit tail door aperture seal.
- Fit tail door. See BODY, Doors.
- Fit tail exhaust pipe. See MANIFOLD & EXHAUST SYSTEMS, Repairs.
- Connect all ECUs.
- Connect alternator. See ELECTRICAL, Repairs.
- Connect battery earth lead.
Parts & tools for this job For 1998 Land Rover Freelander
- TOOLTorque wrenchSearch: 3/8 inch torque wrench
- TOOLSocket setSearch: socket set metric
- BOOKHaynes manualSearch: Haynes manual Land Rover Freelander
Links open Amazon search results in a new tab. As an Amazon Associate I earn from qualifying purchases.