
For LH side
- Make
- Land Rover
- Model
- Freelander Body Repair Manual
- Year
- 1998 on
- Section
- Repairs › For LH side
Panel repairsFor LH side
- Remove loadspace carpet. See BODY, Interior trim components.
- Remove rear seat. See BODY, Seats and seat belts.
- Remove headlining. See BODY, Interior trim components.
- Remove rear body side glass. See BODY, Screens.
- Remove rear damper. See REAR SUSPENSION, Repairs.
- Release vehicle harness from rear quarter and position aside.
For LH side
- Remove tail door striker from ’E’ post.
For RH side
- Remove tail door. See BODY, Doors.
- Remove fuel filler neck. See FUEL DELIVERY SYSTEM, Repairs.
- Remove fuel tank. See FUEL DELIVERY SYSTEM, Repairs.
Repair
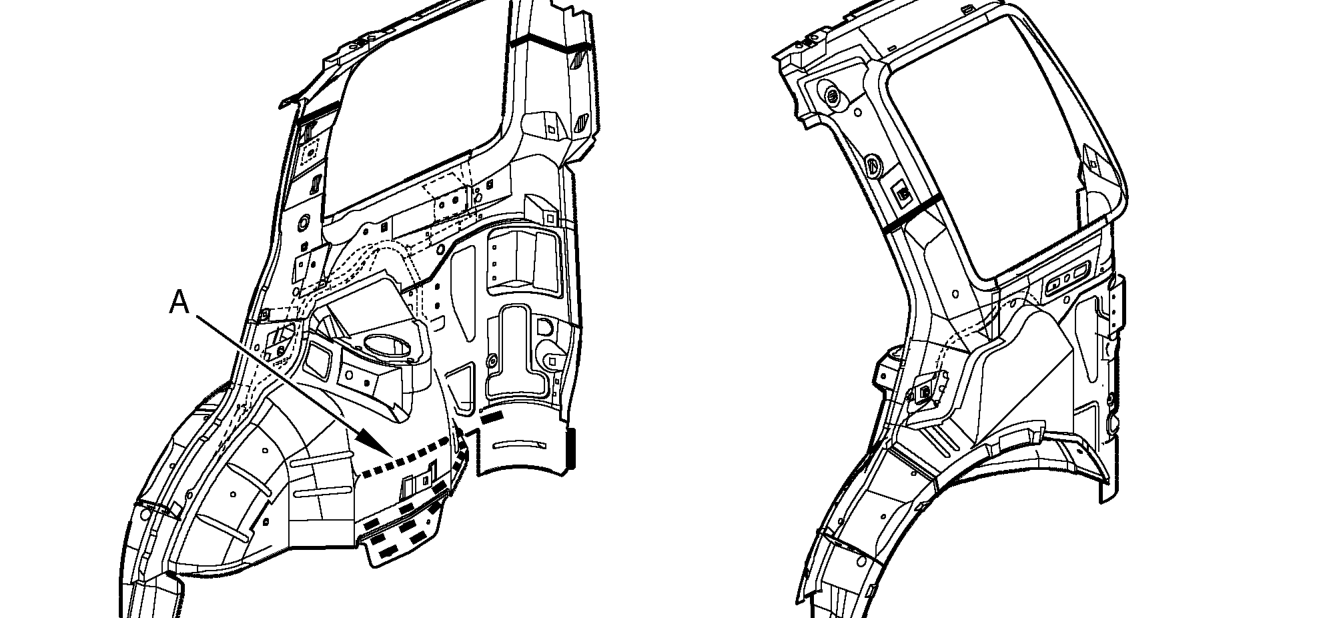
- Remove existing panel(s), prepare panel joint faces and install new panel(s) in accordance with Panel Replacement Procedure. Punch or drill holes in new panel for plug welding as shown.
- Arrow A is shown to highlight the fact that there are plug welds on the other side of the inner wheelarch as well. These are to weld the rear longitudinal to the inner wheelarch.
Parts & tools for this job For 1998 Land Rover Freelander
- TOOLTorque wrenchSearch: 3/8 inch torque wrench
- TOOLSocket setSearch: socket set metric
- BOOKHaynes manualSearch: Haynes manual Land Rover Freelander
Links open Amazon search results in a new tab. As an Amazon Associate I earn from qualifying purchases.