
Front sidemember (front section)
- Make
- Land Rover
- Model
- Freelander Body Repair Manual
- Year
- 1998 on
- Section
- Repairs › Front sidemember (front section)
Panel repairsFront sidemember (front section)
FRONT SIDEMEMBER (FRONT SECTION)
NOTE: In this procedure, the front section of the front sidemember closing panel and the related crossmember to sidemember gusset plate are replaced in conjunction with the front sidemember.
Remove
- Disconnect battery earth lead.
- Disconnect all ECUs.
- Remove road wheel(s).
- Remove underbelly panel. See BODY, Exterior fittings.
- Remove front bumper valance. See BODY, Exterior fittings.
- Remove radiator. See COOLING SYSTEM, Repairs.
- Remove PAS fluid cooler. See STEERING, Repairs.
- Remove headlamp. See ELECTRICAL, Repairs.
- Release wiring to headlamp and position aside.
- Remove engine bay shield.
- Remove front wheel arch liner. See BODY, Exterior fittings.
For LH side
- Remove front bumper LH support bracket.
- Remove ECM.
- Remove battery carrier. See ELECTRICAL, Repairs.
- Remove air cleaner.
- Remove air intake hose.
- Remove horn. See ELECTRICAL, Repairs.
For RH side
- Remove front bumper RH support bracket.
- Remove windscreen washer reservoir. See WIPERS & WASHERS, Repairs.
- Remove alternator. See ELECTRICAL, Repairs.
- Remove PAS pump. See STEERING, Repairs.
Repair
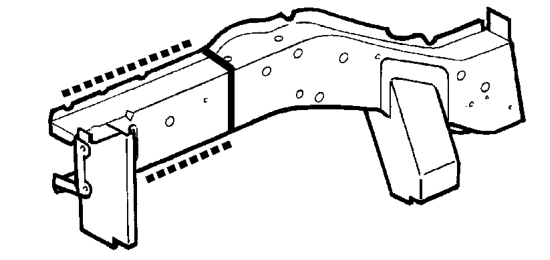
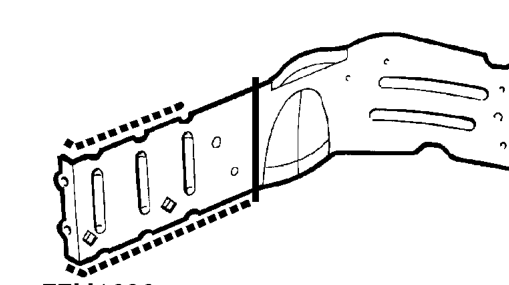
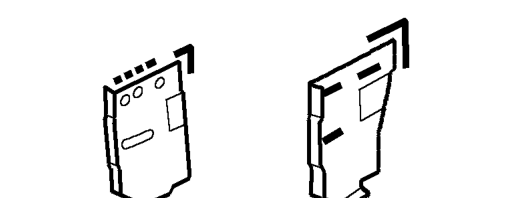
- Remove existing panel(s), prepare panel joint faces and install new panel(s) in accordance with Panel Replacement Procedure. Punch or drill holes in new panel for plug welding as shown.
Parts & tools for this job For 1998 Land Rover Freelander
- TOOLTorque wrenchSearch: 3/8 inch torque wrench
- TOOLSocket setSearch: socket set metric
- BOOKHaynes manualSearch: Haynes manual Land Rover Freelander
Links open Amazon search results in a new tab. As an Amazon Associate I earn from qualifying purchases.