
AIR PIPE CONNECTION COLLET AND ’O’ RINGS
- Make
- Land Rover
- Model
- Range Rover Classic
- Section
- REPAIR › AIR PIPE CONNECTION COLLET AND ’O’ RINGS
AIR SUSPENSION
3
REPAIR
AIR PIPE CONNECTION COLLET AND ’O’ RINGS
Remove
WARNING: Air suspension is pressurised
up to 10 bar. Dirt or grease must not enter
the system. Wear hand, ear and eye safety
standard protection when servicing system.
1. Clean area with stiff brush and soapy water.
2. Depressurise system.
See Adjustment,
Depressurise System
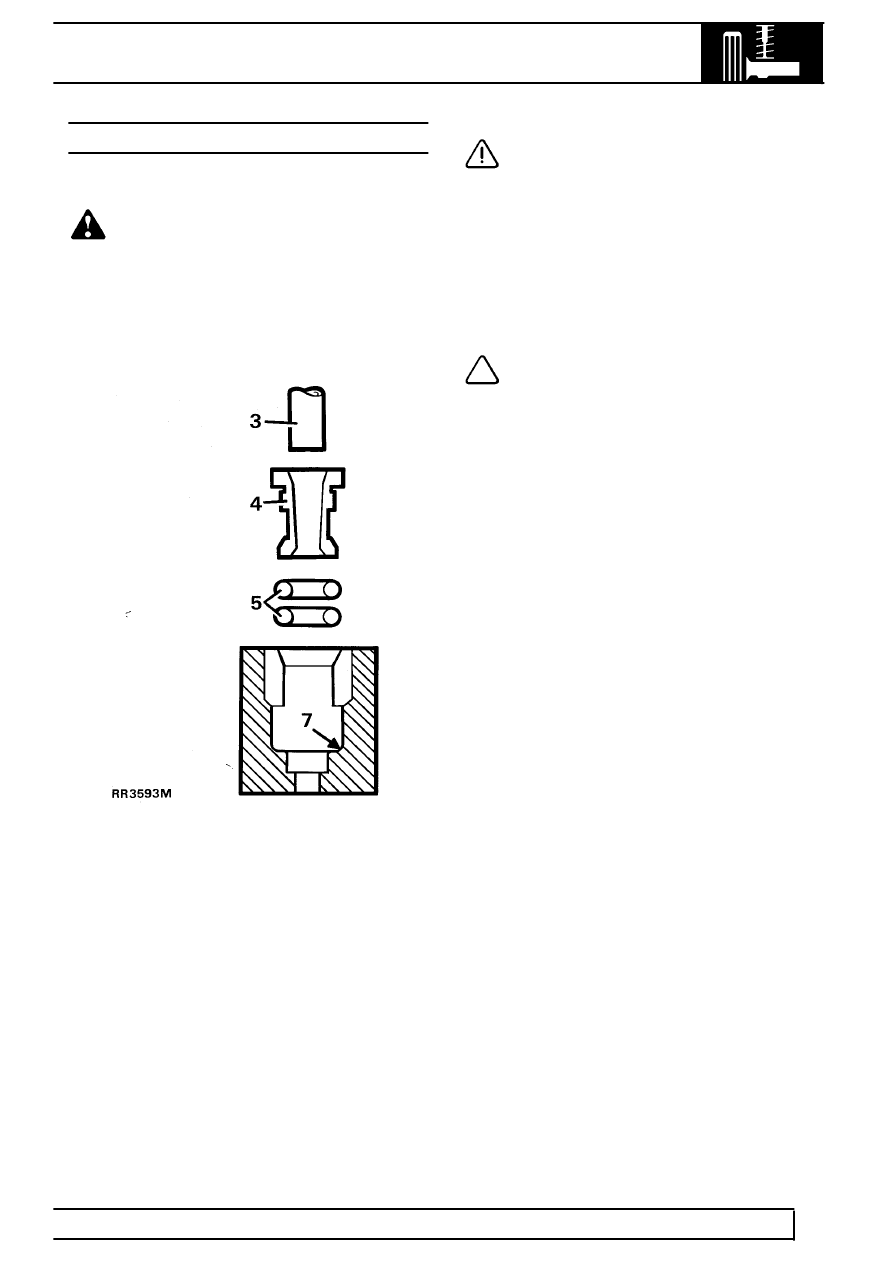
3. Disconnect air pipe.
See Disconnect/Connect
Air Pipe
4. Remove collet.
5. Carefully pry out two ’O’ rings, using a smooth
plastic hook, eg: a crochet hook.
CAUTION: Avoid scratching inside wall of
housing, creating possible leak path.
Refit
6. Lightly grease new ’O’ rings.
7. Fit ’O’ rings into recess. Use a crochet hook to
avoid damage to ’O’ rings and housing.
8. Locate collet legs into housing, push fully home.
9. Inspect end of air pipe for damage and scores
rectify by trimming.
NOTE: Air pipe may be trimmed if
sufficient straight pipe remains. Ensure
pipe end is cut square, without distortion
or frays to obtain air tight seal. Use service tool
LRT-60-002. Lightly chamfer pipe using a pencil
sharpener after cutting. DO NOT CUT PIPES
MORE THAN TWICE.
10. Connect air pipe.
See Disconnect/Connect
Air Pipe
11. Pressurise system.
See Adjustment,
Depressurise System
12. Leak test connection.
See Adjustment, Leak
Test Procedure
Parts & tools for this job For Land Rover Range Rover
- TOOLCoil spring compressorSearch: coil spring compressor
- TOOLBall joint separatorSearch: ball joint separator
- PARTShock absorbersSearch: Land Rover Range Rover shock absorbers
Links open Amazon search results in a new tab. As an Amazon Associate I earn from qualifying purchases.