
Flywheel housing cover (page 5 of 5)
- Make
- Mini
- Model
- Mini Workshop Manual
- Year
- 1996–2000
- Section
- Repairs
ClutchFlywheel housing cover · page 5 of 5
Refit
- Clean flywheel housing cover and mating face of flywheel housing.
- Manoeuvre cover through gap between brake master cylinder and engine.
- Position cover to flywheel housing.
- Raise engine on jack.
- Fit and tighten bolts securing cover to flywheel housing.
- Lower engine on jack and align engine RH mounting to subframe.
- Fit bolts, washers and nuts securing engine mounting to subframe.
- Remove jack supporting engine.
- Align engine lower steady bar to bracket on flywheel housing and position washers.
- Fit bolt and nut securing engine lower steady bar to flywheel housing bracket and tighten to 40 Nm.
- Fit brake master cylinder to studs on servo, fit nuts and tighten to 25 Nm.
- Position clutch slave cylinder mounting bracket and spacer to flywheel housing.
- Fit 3 bolts securing mounting bracket to flywheel housing, tighten bolts: M8 bolts to 37 Nm. M5 bolt to 7 Nm.
- Fit clutch slave cylinder onto push rod.
- Align slave cylinder to mounting bracket, fit bolts and tighten to 37 Nm.
- Depress clutch pedal to load clutch lever and remove any free play.
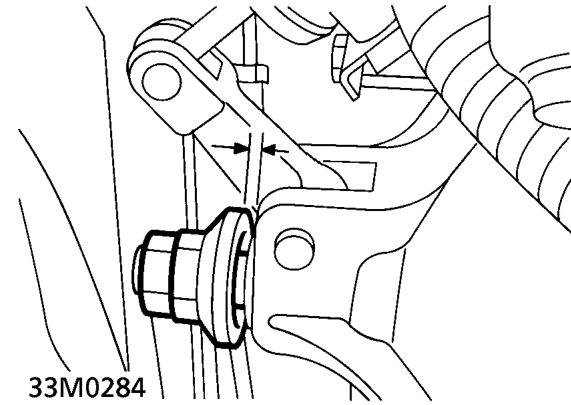
- Measure clearance between throw out stop lock nut and flywheel housing cover.
- The correct clearance is 6.5 mm. If the clearance is incorrect, loosen lock nut and adjust throw out stop to obtain correct clearance.
- Tighten lock nut and recheck clearance.
- Secure battery feed cable grommet to bracket on flywheel housing.
- Position engine harness retaining bracket to flywheel housing, fit bolt and tighten to 25 Nm.
- Connect Lucar to bonnet switch.
- Position earth leads to body, fit bolt and tighten to 9 Nm.
- Fit fresh air intake duct to inner wing.
- Connect fresh air intake hose to duct beneath wing.
- Locate ECM mounting bracket on body, fit bolt and tighten to 10 Nm.
- Secure clip on main harness to ECM mounting bracket.
- Secure engine compartment fuse box to ECM mounting bracket.
- Connect engine harness lead to engine compartment fuse box.
- Fit fusible link.
- Fit cover to engine compartment fuse box.
- Fit engine breather/oil separator. See EMISSION CONTROL, Repairs.
- Fit ECM. See ENGINE MANAGEMENT SYSTEM - MEMS, Repairs.
- Fit bonnet. See BODY, Exterior fittings.
- Fit starter motor. See ELECTRICAL, Repairs.
Parts & tools for this job For 1996 Mini Mini
- PARTClutch kitSearch: Mini Mini 1996 clutch kit
- TOOLClutch alignment toolSearch: clutch alignment tool
- FLUIDGear oilSearch: Mini Mini manual gearbox oil
Links open Amazon search results in a new tab. As an Amazon Associate I earn from qualifying purchases.