
Gearbox assembly (page 3 of 6)
- Make
- Rover
- Model
- 100 Repair Manual Supplement
- Year
- 1996–1998
- Section
- Repairs
Manual gearboxGearbox assembly · page 3 of 6
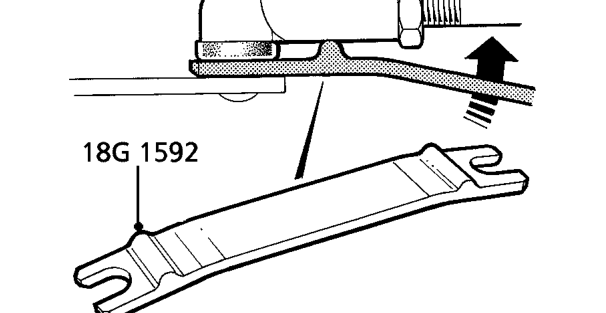
- Using tool 18G 1592, disconnect gear change linkage ball joint from upper selector lever.
- Raise front of vehicle.
WARNING: Support on safety stands.
- Remove starter motor. See REPAIR MANUAL - Electrical.
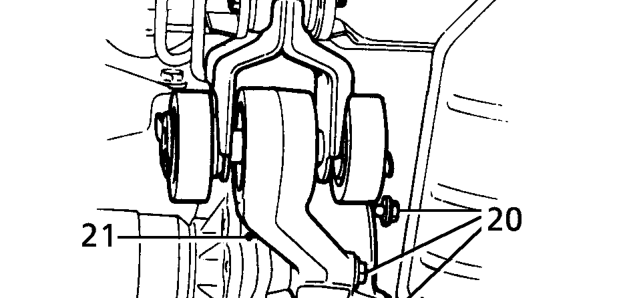
- Remove bolt securing engine steady bar to body.
- Remove 3 bolts securing engine steady bar bracket to gearbox.
- Remove steady bar brack
- Using tool 18G 1592, disconnect gear change linkage ball joint from lower selector lever.
- Position container under gearbox. Remove gearbox filler/level and drain plugs, and allow oil to drain. Refit plugs and tighten to 35 Nm.
- Remove both drive shaft and hub assemblies. See REPAIR MANUAL - Manual Gearbox - Differential Oil Seal.
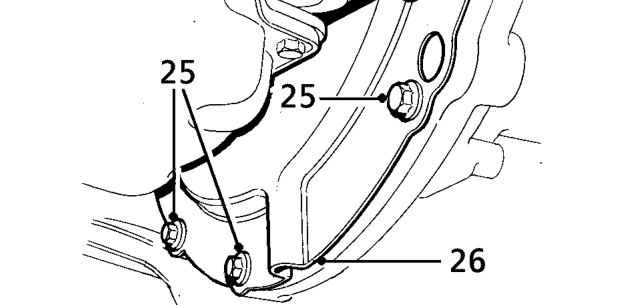
- Remove 3 bolts securing flywheel lower cover plate to engine.
- Remove cover plate.
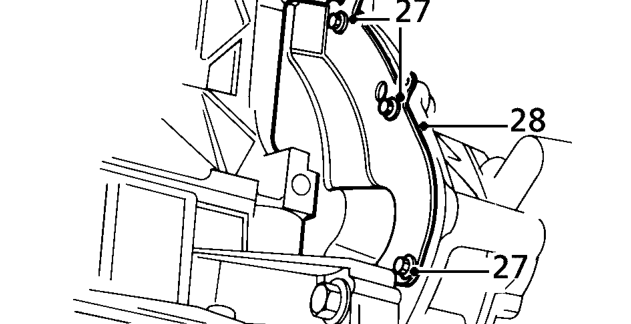
- Remove 3 bolts securing flywheel front cover plate.
- Remove cover plate.
Parts & tools for this job For 1996 Rover 100
- PARTClutch kitSearch: Rover 100 1996 clutch kit
- TOOLClutch alignment toolSearch: clutch alignment tool
- FLUIDGear oilSearch: Rover 100 manual gearbox oil
Links open Amazon search results in a new tab. As an Amazon Associate I earn from qualifying purchases.