
Vehicles fitted with heated washer jets:
- Make
- Rover
- Model
- 200 Body Repair Manual
- Year
- 1995–1999
- Section
- Exterior fittings › Vehicles fitted with heated washer jets:
BodyVehicles fitted with heated washer jets:
Refit
- With assistance position bonnet to hinges and finger tighten bolts.
- Connect washer tube.
Vehicles fitted with heated washer jets:
- Connect heated washer jet multiplugs.
- Position harness to bonnet and secure sound deadening pad with trim studs.
All models:
- Remove protection covers.
- Close bonnet to safety catch position and check that bonnet is aligned to both front wings and that gaps are equal.
- Tighten hinge bolts to 9 Nm.
BONNET LOCK
Service repair no - 76.16.21
Remove
- Remove 2 nuts securing bonnet lock cover.
- Remove cover.
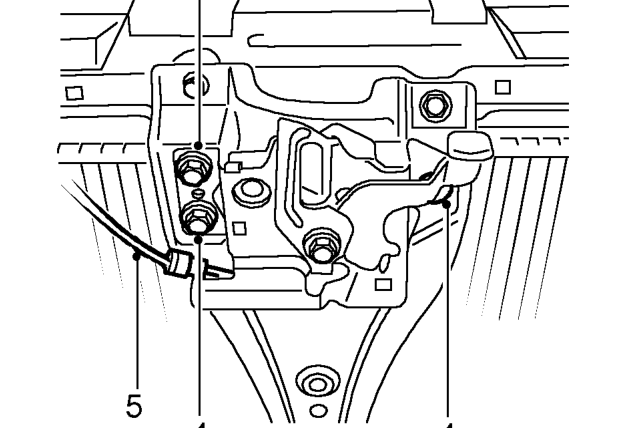
- Mark position of bonnet lock.
- Remove 3 bolts securing lock to body.
- Release cable from lock.
Refit
- Fit cable to bonnet lock.
- Align lock to marks made during remove.
- Fit and tighten bolts to 10 Nm.
- Close and open bonnet to check lock operation and alignment.
- Slacken bolts securing lock and adjust lock alignment.
- Tighten bolts to 10 Nm.
- Close and open bonnet to check lock operation and alignment.
- Fit lock cover and tighten nuts to 3 Nm.
Parts & tools for this job For 1995 Rover 200
- PARTWiper bladesSearch: Rover 200 1995 wiper blades
- PARTWasher pumpSearch: Rover 200 1995 washer pump
Links open Amazon search results in a new tab. As an Amazon Associate I earn from qualifying purchases.