
Gear selector mounting (page 2 of 5)
- Make
- Rover
- Model
- 200 Workshop Manual
- Year
- 1995–1999
- Section
- Repairs
Manual gearbox - PG1Gear selector mounting · page 2 of 5
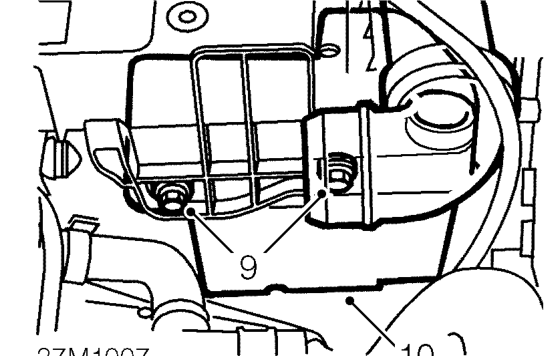
- Remove 2 bolts securing resonator to battery tray.
- Release resonator from air intake pipe and remove.
- Loosen 3 bolts securing battery tray to body.
- Release ABS fuse holder from battery tray.
- Remove battery tray from vehicle.
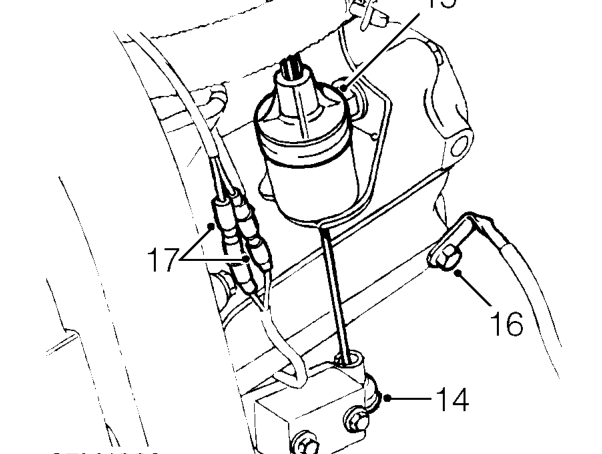
- Disconnect clutch cable from clutch release lever.
- Release clutch cable from abutment bracket on gearbox and position aside.
- Remove bolt securing earth lead to gearbox.
- Disconnect 2 reverse lamp switch leads from engine harness.
- Release exhaust front pipe from manifold. See MANIFOLD & EXHAUST SYSTEMS, Repairs.
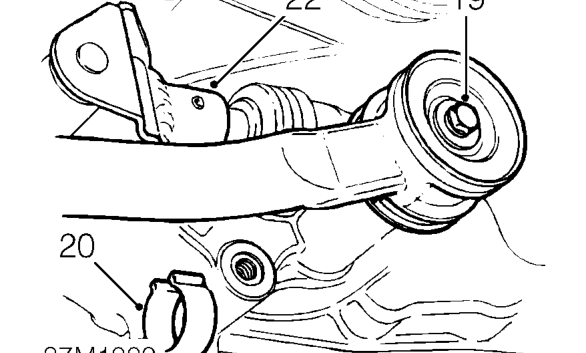
- Remove bolt and disconnect gear change steady bar from gearbox, collect 2 washers.
- Remove clip retaining selector rod roll pin.
- Using a suitable punch, drive out roll pin securing selector rod to selector shaft.
- Release selector rod from selector shaft.
- Tie selector rod and steady bar aside.
- Release both drive shafts from gearbox, as detailed in Differential oil seal. See this section.
- Remove LH front tie rod. See FRONT SUSPENSION, Repairs.
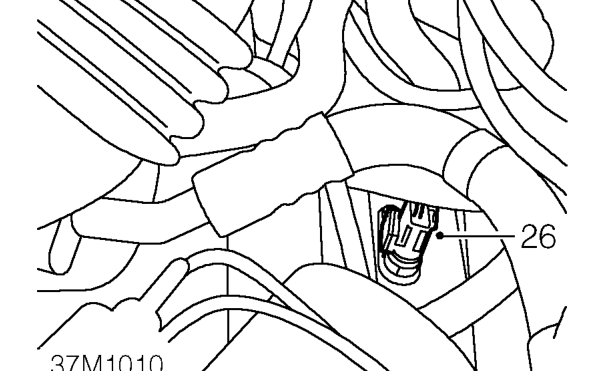
- Disconnect multiplug from vehicle speed sensor.
Parts & tools for this job For 1995 Rover 200
- PARTClutch kitSearch: Rover 200 1995 clutch kit
- TOOLClutch alignment toolSearch: clutch alignment tool
- FLUIDGear oilSearch: Rover 200 manual gearbox oil
Links open Amazon search results in a new tab. As an Amazon Associate I earn from qualifying purchases.