
Drive plate - ’t’ series
- Make
- Rover
- Model
- 400 Workshop Manual
- Year
- 1995–2000
- Section
- Repairs › Drive plate - ’t’ series
ClutchDrive plate - ’t’ series · page 1 of 2
Refit
- Clean clutch release lever and clutch slave cylinder.
- Fit clutch slave cylinder to clutch release lever.
- Locate clutch slave cylinder on gearbox mounting bracket and secure with locking collar.
- Clean 2 ends of clutch hydraulic pipe.
- Connect 2 halves of clutch hydraulic pipe, ensure 2 halves of pipe are correctly engaged by trying to pull hydraulic pipes away from connector.
- Fit air cleaner. See FUEL DELIVERY SYSTEM, Repairs.
DRIVE PLATE - ’T’ SERIES
Service repair no - 33.10.02
Remove
- Remove gearbox. See MANUAL GEARBOX - ’PG1’, Repairs.
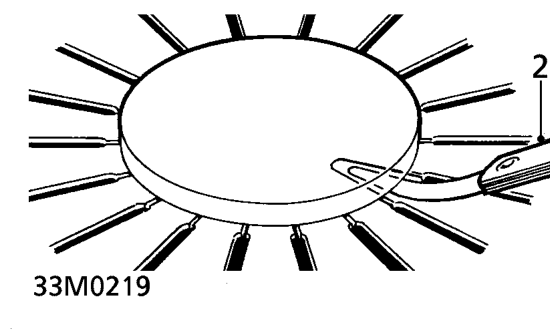
- Place a circular piece of flat plate across diaphragm fingers and insert feeler gauges between plate plate and fingers; measure finger clearance. Diaphragm finger clearance - service limit = 1.0 mm Renew pressure plate if clearance obtained is outside service limits.
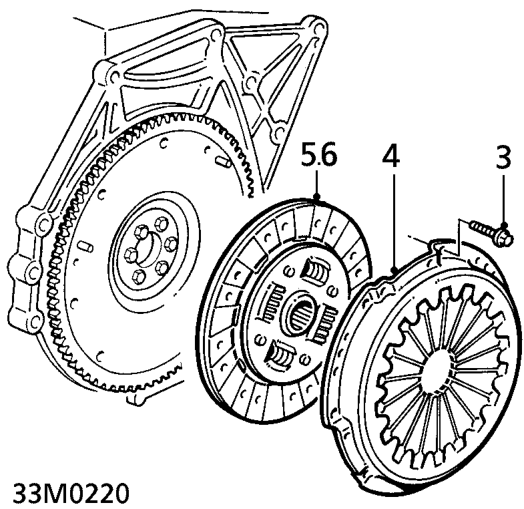
- Progressively slacken then remove 6 bolts securing pressure plate to flywheel.
- Remove pressure plate.
- Remove clutch plate.
- Inspect clutch linings for signs of wear or oil contamination. Check for broken or weak springs and signs of cracking of spring apertures; renew components as necessary.
Parts & tools for this job For 1995 Rover 400
- PARTClutch kitSearch: Rover 400 1995 clutch kit
- TOOLClutch alignment toolSearch: clutch alignment tool
- FLUIDGear oilSearch: Rover 400 manual gearbox oil
Links open Amazon search results in a new tab. As an Amazon Associate I earn from qualifying purchases.