
Clutch slave cylinder - ’t’ series
- Make
- Rover
- Model
- 400 Workshop Manual
- Year
- 1995–2000
- Section
- Repairs › Clutch slave cylinder - ’t’ series
ClutchClutch slave cylinder - ’t’ series · page 1 of 2
Refit
- Fit clutch master cylinder to bulkhead ensuring push rod yoke is correctly aligned with clutch pedal.
- Rotate master cylinder 45° clockwise, push flush against mounting plate, then rotate anti-clockwise to secure.
- Align master cylinder push rod to clutch pedal and fit clevis pin.
- Fit NEW spring clip securing clutch pedal clevis pin.
- Fit drivers side closing panel to fascia and secure with screws.
- Fit pocket to closing panel.
- Clean 2 ends of clutch hydraulic pipe.
- Connect 2 halves of clutch hydraulic pipe, ensure 2 halves of pipe are correctly engaged by trying to pull hydraulic pipes away from connector.
- Secure clutch hydraulic pipe to clip on harness.
- Fit closing panel to underside of fascia, align fixings, and secure with trim clip and scrivet.
- Fit engine control module. See ENGINE MANAGEMENT SYSTEM - MEMS, Repairs.
- Connect battery earth lead.
CLUTCH SLAVE CYLINDER - ’T’ SERIES
Service repair no - 33.35.01
Remove
- Remove air cleaner. See ENGINE MANAGEMENT SYSTEM - MEMS, Repairs.
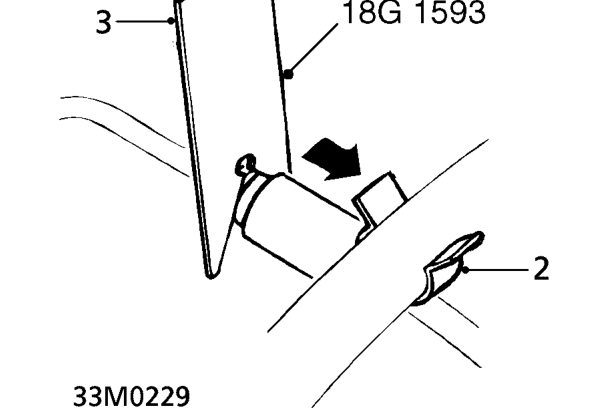
- Release clip securing clutch hydraulic pipe to harness.
- Using tool 18G 1593 disconnect quick release connector connecting 2 halves of clutch hydraulic pipe.
NOTE: The quick release connector has a valve in each end preventing loss of clutch fluid and removing the need for bleeding the clutch system.
- Release clutch hydraulic pipe from slave cylinder mounting bracket clip.
Parts & tools for this job For 1995 Rover 400
- PARTClutch kitSearch: Rover 400 1995 clutch kit
- TOOLClutch alignment toolSearch: clutch alignment tool
- FLUIDGear oilSearch: Rover 400 manual gearbox oil
Links open Amazon search results in a new tab. As an Amazon Associate I earn from qualifying purchases.