
Remove
- Make
- Rover
- Model
- Coupé, Cabriolet & Tourer 200/400 Coupé, Cabriolet & Tourer Workshop Manual
- Section
- Repairs › Remove
Engine 2.0 T16Remove
Service Repair No. 12.21.20
Remove
- Disconnect battery earth lead.
- Remove gearbox, see MANUAL GEARBOX 2.0 – Repairs.
- Remove clutch plate, see CLUTCH – Repairs.
- Remove flywheel.
- Drain engine oil see MAINTENANCE.
- Fit sump plug, replacing sealing washer if damaged, and tighten to 45 Nm.

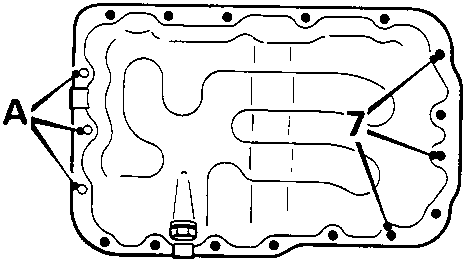
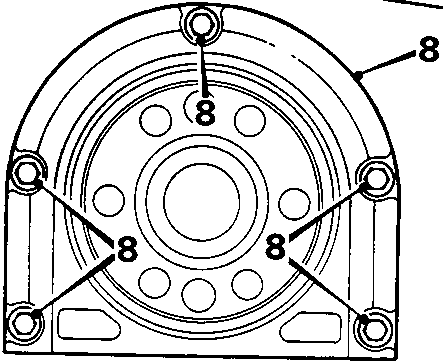
12M 0514
- Slacken 15 sump bolts by approximately 3 turns, allowing sump to drop away from rear oil seal housing.
CAUTION: Do not slacken 3 bolts A around oil pump housing.
- Remove 5 bolts securing oil seal housing and remove oil seal and housing.
Refit
- Clean seal seating area of block and accessible area of sump gasket. Sump gasket must be replaced if damaged.
- Lubricate oil seal and sealing surfaces with engine oil.
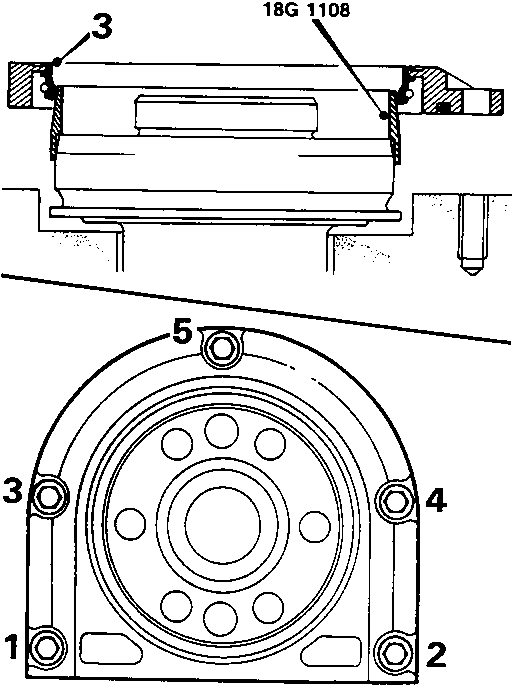
12M 0515
- Fit tool 18G 1108 over crankshaft boss and fit oil seal.
- Remove tool.
- Fit and tighten seal housing bolts to 10 Nm in sequence shown.
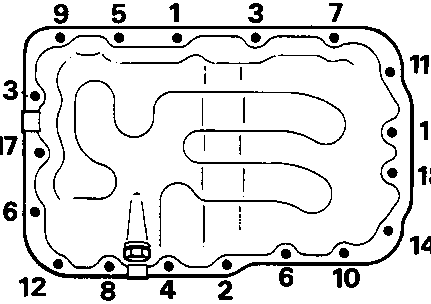
12M 0303
- Tighten sump bolts:
Stage 1; starting at position 1 working in a clockwise direction tighten to 3 Nm.
Stage 2; start at position 1 and working in an anti - clockwise direction tighten to 8 Nm.
Stage 3; working in sequence shown, tighten to 10 Nm. - Fit flywheel.
- Fit clutch, see CLUTCH – Repairs.
- Fit gearbox, see MANUAL GEARBOX 2.0 – Repairs.
- Fill engine with oil see INFORMATION – CAPACITIES, FLUIDS AND LUBRICANTS.
- Connect battery earth lead.
Parts & tools for this job For Rover Coupé, Cabriolet & Tourer
- PARTEngine gasket setSearch: Rover Coupé, Cabriolet & Tourer engine gasket set
- TOOLTorque wrenchSearch: 3/8 inch torque wrench
- TOOLFeeler gauge setSearch: feeler gauge set
Links open Amazon search results in a new tab. As an Amazon Associate I earn from qualifying purchases.