
Refit
- Make
- Rover
- Model
- Coupé, Cabriolet & Tourer 200/400 Coupé, Cabriolet & Tourer Workshop Manual
- Section
- Repairs › Refit
Engine 2.0 T16Refit · page 1 of 2
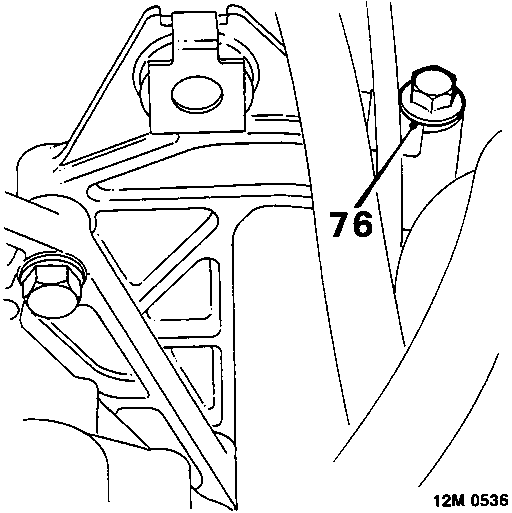
- Remove bolt securing engine rear mounting bracket to mounting rubber.
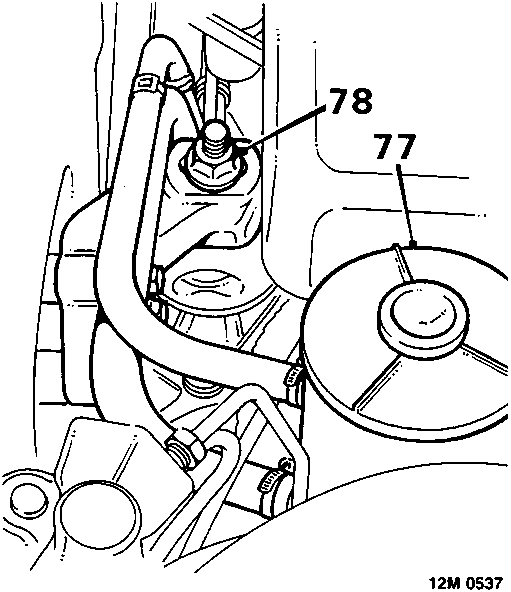
- Release power steering reservoir, move it aside.
- Remove nut securing engine R.H. mounting to bracket.
- Raise engine and gearbox, using assistance, tilt engine and lift clear of engine compartment.
Refit
- Using assistance, lower engine and gearbox into position ensuring engine mountings are aligned.
- Fit but do not tighten nut securing engine R.H. mounting to bracket.
- Align engine front and rear mounting brackets to mounting rubbers.
- Fit front and rear mounting bolts and tighten to 83 Nm.
- Tighten engine R.H. mounting nut to 83 Nm.
- Remove tools 18G 1598.
- Connect H.T. leads to spark plugs.
- Position H.T. leads. Fit and tighten bolts, spark plug lead retaining plate.
- Fit spark plug cover and tighten screws.
- Fit front L.H. tie rod, see SUSPENSION – Repairs.
- Position lower tie rod to sub – frame, fit but do not tighten bolt.
- Position lower tie rod bracket to gearbox, fit but do not tighten bolts.
- Tighten lower tie rod to sub – frame bolt to 83 Nm.
- Tighten lower tie rod bracket bolts to 83 Nm.
- Clean splines of drive shafts, fit a new circlip to end of each shaft.
- Smear both differential oil seals with engine oil.
- Engage drive shafts in differential and push fully home. Pull joint to ensure circlip is fully engaged and retains shaft.
CAUTION: Keep drive shafts horizontal to avoid damaging differential oil seals.
- Position steady bar and selector rod.
- Align holes in selector shaft and rod.
- Fit selector rod roll pin, fit retaining clip.
- Fit steady bar washers and bolt, tighten bolt to 60 Nm.
- Clean steering and suspension ball joints.
- Position L.H. lower ball joint to hub.
- Fit nut and tighten to 60 Nm, secure nut with new split pin.
- Repeat operations for lower ball joint on R.H. side.
- Connect L.H. track rod end ball joint to hub.
- Fit nut and tighten to 44 Nm, secure nut with new split pin.
- Repeat operations for track rod end ball joint on R.H. side.
- Position power steering pipes to sump brackets, fit bolts and tighten to 15 Nm.
- Fit oil filter element, see MAINTENANCE.
- Fit splash shield, tighten bolts.
- Fit exhaust front pipe, see MANIFOLD & EXHAUST – Repairs.
- Fit road wheel and tighten nuts to 100 Nm.
- Remove stand(s) and lower vehicle.
- Position tie rod to bulkhead, fit but do not tighten bolt.
- Position engine rear mounting plate, fit but do not tighten bolts.
- Position tie rod to engine rear mounting plate and mounting bracket, fit but do not tighten bolt.
- Tighten engine rear mounting plate bolts: M12 bolt to 83 Nm
M10 bolts to 45 Nm. - Tighten tie rod to bulkhead bolt to 45 Nm.
- Fit power steering reservoir to its bracket.
- Fit new 'O' ring, lubricated with power steering fluid, to power steering high pressure union.
Parts & tools for this job For Rover Coupé, Cabriolet & Tourer
- PARTEngine gasket setSearch: Rover Coupé, Cabriolet & Tourer engine gasket set
- TOOLTorque wrenchSearch: 3/8 inch torque wrench
- TOOLFeeler gauge setSearch: feeler gauge set
Links open Amazon search results in a new tab. As an Amazon Associate I earn from qualifying purchases.