
Connenting Rod - Toyota Hilux Generation 7 2005-2010 Workshop Manual
- Make
- Toyota
- Model
- Hilux Toyota Hilux Generation 7 2005-2010 Workshop Manual
- Section
- Connenting Rod - Toyota Hilux Generation 7 2005-2010 Workshop Manual
Connenting Rod
EM–163
2TR-FE ENGINE MECHANICAL – ENGINE UNIT
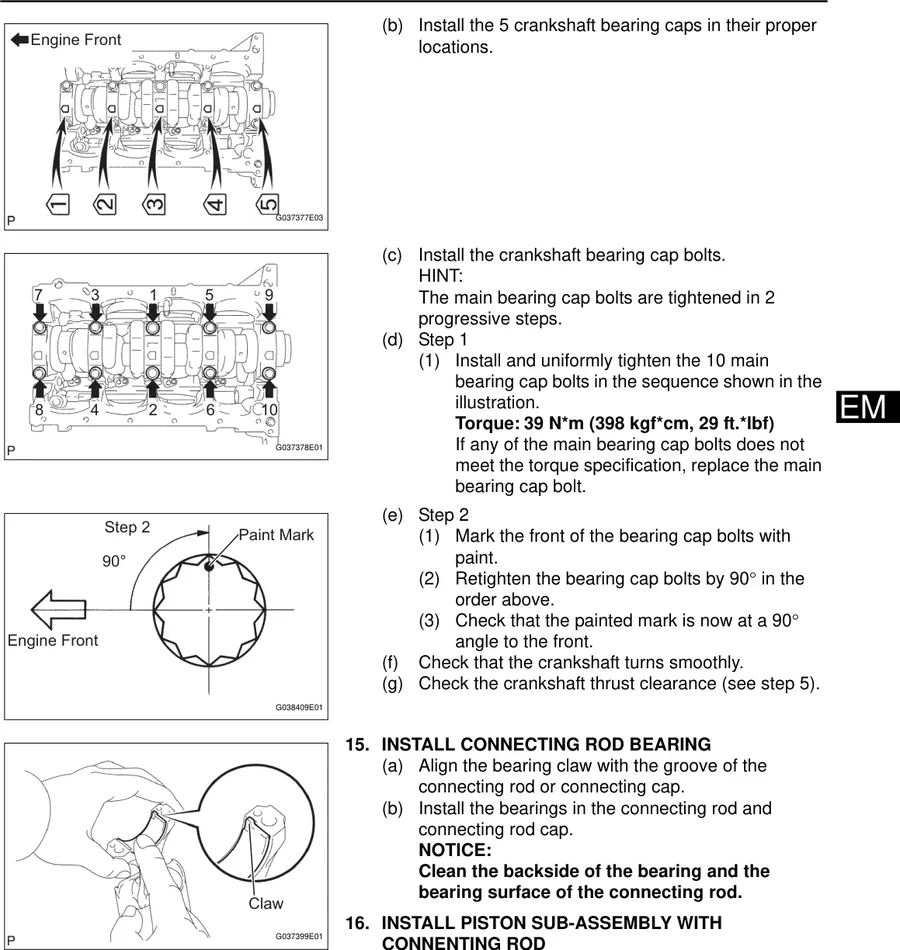
(b) Install the 5 crankshaft bearing caps in their proper Engine Front locations.
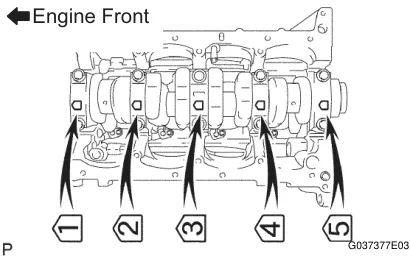
G037377E03 (c) Install the crankshaft bearing cap bolts.
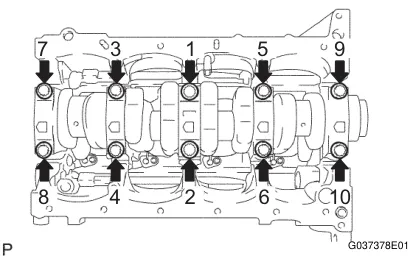
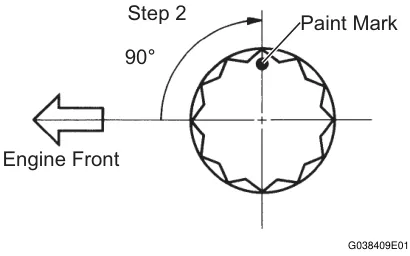
HINT: The main bearing cap bolts are tightened in 2 7 3 1 5 9 progressive steps. (d) Step 1 (1) Install and uniformly tighten the 10 main bearing cap bolts in the sequence shown in the EM illustration. 8 4 2 6 10 Torque: 39 N*m (398 kgf*cm, 29 ft.*lbf) If any of the main bearing cap bolts does not G037378E01 meet the torque specification, replace the main bearing cap bolt. (e) Step 2 Step 2 (1) Mark the front of the bearing cap bolts with Paint Mark paint. 90° Retighten the bearing cap bolts by 90° in the (2) order above. Check that the painted mark is now at a 90° (3) angle to the front. Engine Front (f) Check that the crankshaft turns smoothly. (g) Check the crankshaft thrust clearance (see step 5). G038409E01
15. INSTALL CONNECTING ROD BEARING
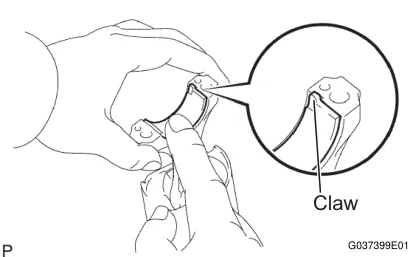
(a) Align the bearing claw with the groove of the connecting rod or connecting cap. (b) Install the bearings in the connecting rod and connecting rod cap.
NOTICE: Clean the backside of the bearing and the bearing surface of the connecting rod. Claw
16. INSTALL PISTON SUB-ASSEMBLY WITH
G037399E01
CONNENTING ROD
(a) Apply engine oil to the cylinder walls, the pistons, and the surfaces of connecting rod bearings.
Parts & tools for this job For Toyota Hilux
- TOOLTorque wrenchSearch: 3/8 inch torque wrench
- TOOLSocket setSearch: socket set metric
- BOOKHaynes manualSearch: Haynes manual Toyota Hilux
As an Amazon Associate we earn from qualifying purchases.