
A/C Compressor
- Make
- Aston Martin
- Model
- DB9 Factory Workshop Manual
- Year
- Issue 2, 2005
- Section
- Air Conditioning (A/C) System › A/C Compressor
12 Climate controlA/C Compressor
- Remove the clips (x2) that secure the evaporator temperature sensor element to the evaporator.
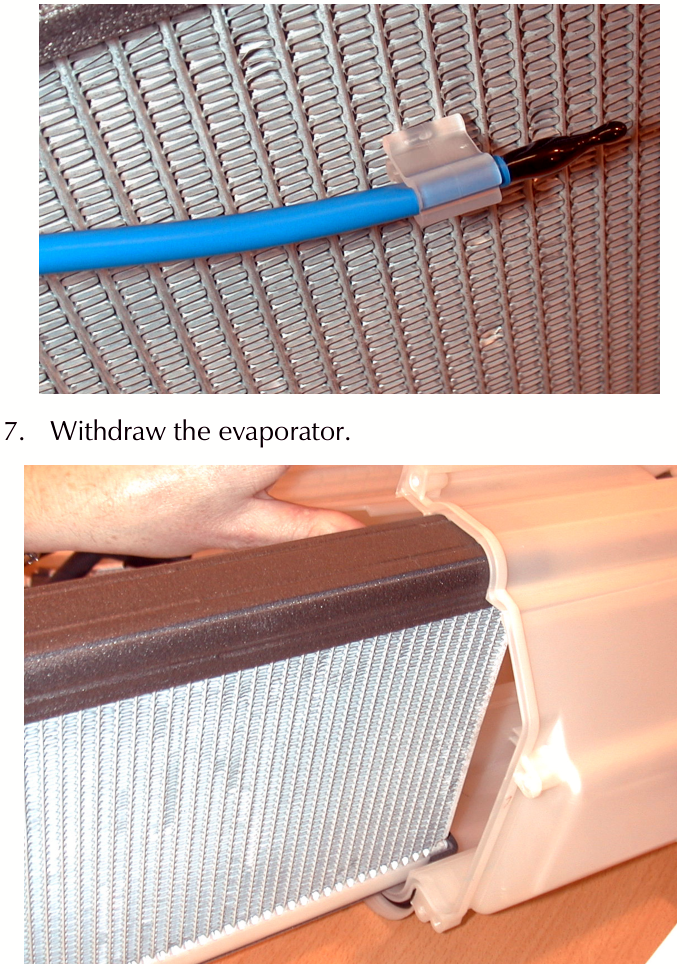
- Withdraw the evaporator.
A/C Compressor
| Repair Operation Time (ROT) | |
|---|---|
| Item | Code |
| A/C Compressor Renew | 12.03.AB |
Removal
- Disconnect the vehicle battery.
- Recover the refrigerant from the A/C system (Refer to ‘Recovery’, page 12-3-8).
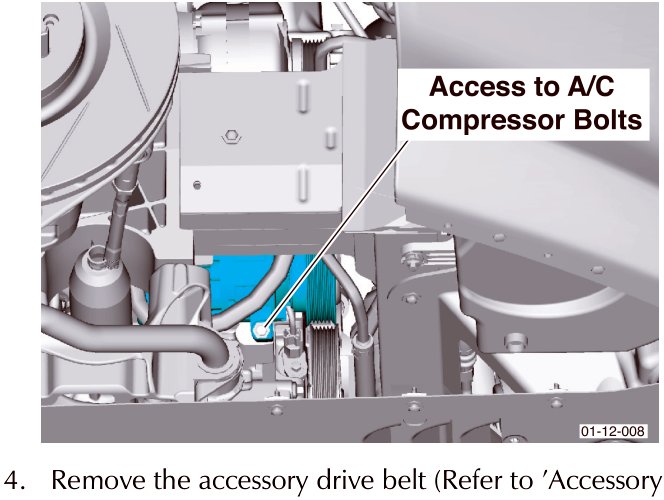
- Remove the road wheel and road wheel arch liner (for access to the A/C compressor securing bolts).
- Remove the accessory drive belt (Refer to ‘Accessory Drive System (03.05)’, page 3-6-1).
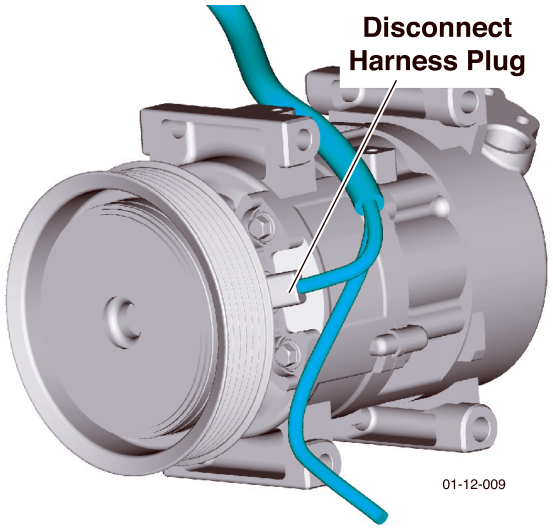
- Disconnect the wiring harness plug.
Installation
- Insert the evaporator (inlet / outlet first) into the half of the A/C unit which houses the expansion valve.
- Complete with new ‘O’ rings, install the expansion valve.
- Complete with new ‘O’ rings, install the A/C pipes clamp (screws x2).
- Install the clips (x2) that secure the evaporator temperature sensor element to the evaporator.
- Place the two halves of the A/C unit together.
Take care to correctly locate the vent flaps.
- Install clip (x1) and screws (x9) that secure the two halves of the A/C unit.
- Connect (glue) the filter gauze and foam where the two halves of the A/C unit meet.
- Install the in-vehicle temperature pipe to the A/C unit clips.
- Install the A/C unit to the IP (Refer to ‘A/C Unit’, page 12-3-11).
- Install the IP (Refer to ‘Instrument Panel (IP) (01.12)’, page 1-9-1).
- Carry out A/C system actuator check and functional check to ensure correct operation (Refer to ‘A/C System Testing’, page 12-3-9).
Parts & tools for this job For 2005 Aston Martin DB9
- TOOLA/C manifold gauge setSearch: AC manifold gauge set
- TOOLUV leak detection kitSearch: AC UV leak detection kit
- PARTCabin filterSearch: Aston Martin DB9 2005 cabin filter
Links open Amazon search results in a new tab. As an Amazon Associate I earn from qualifying purchases.