
Condenser
- Make
- Aston Martin
- Model
- DB9 Factory Workshop Manual
- Year
- Issue 2, 2005
- Section
- Air Conditioning (A/C) System › Condenser
12 Climate controlCondenser
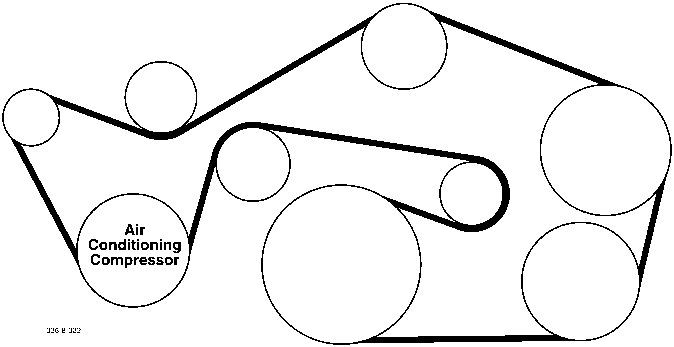
- Install the accessory drive belt (Refer to ‘Accessory Drive System (03.05)’, page 3-6-1).
- Connect the vehicle battery.
- Install the road wheel arch liner and road wheel (Refer to ‘Road Wheel Nut Torque Tightening’, page 4-5-7).
- Recharge the A/C system.
- Start the engine. Allow the engine cooling system to rise to normal running temperature.
- Carry out A/C system actuator check and functional check to ensure correct operation (Refer to ‘A/C System Testing’, page 12-3-9).
Condenser
| Repair Operation Time (ROT) | |
|---|---|
| Item | Code |
| A/C Condenser Renew | 12.03.BB |
Removal
- Disconnect the vehicle battery.
- Recover the A/C refrigerant (Refer to ‘Recovery’, page 12-3-8).
- Drain the engine coolant system (Refer to ‘Cooling System (03.03)’, page 3-4-1).
Caution
Ensure open ends are plugged immediately after disconnecting refrigeration parts. If moist air or foreign material enters the refrigeration cycle, cooling ability will be lowered and abnormal noise or other faults may occur.
- Remove the ‘slam’ panel.
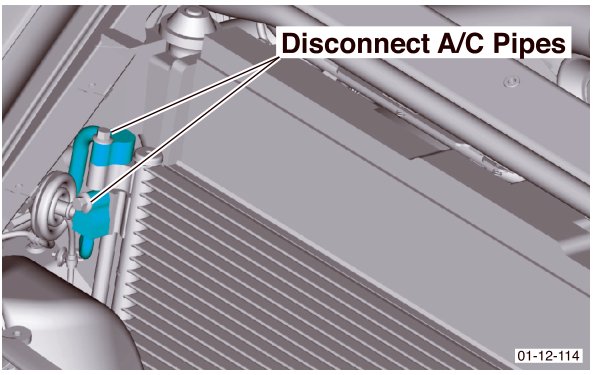
- Disconnect the A/C pipes. Discard the O-rings. Install suitable blanking plugs.
- Remove bolts (x2).
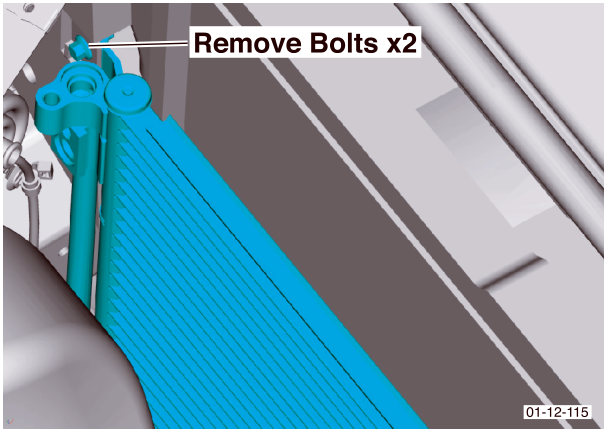
- Withdraw the condenser upwards.
Installation
If a new condenser is to be installed ensure the correct amount of A/C system oil is added.
- Insert the condenser, locate the bottom of the condenser into the anchor points (x2). Install bolts (x2).
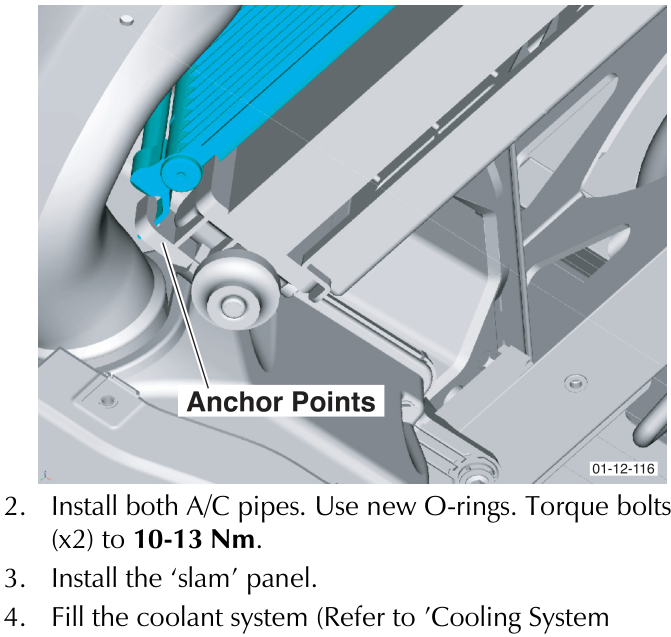
- Install both A/C pipes. Use new O-rings. Torque bolts (x2) to 10-13 Nm.
- Install the ‘slam’ panel.
- Fill the coolant system (Refer to ‘Cooling System (03.03)’, page 3-4-1) and charge the A/C system (Refer to ‘Charging’, page 12-3-8).
Parts & tools for this job For 2005 Aston Martin DB9
- TOOLA/C manifold gauge setSearch: AC manifold gauge set
- TOOLUV leak detection kitSearch: AC UV leak detection kit
- PARTCabin filterSearch: Aston Martin DB9 2005 cabin filter
Links open Amazon search results in a new tab. As an Amazon Associate I earn from qualifying purchases.