
Installation
- Make
- Aston Martin
- Model
- DB9 Factory Workshop Manual
- Year
- Issue 2, 2005
- Section
- Air Conditioning (A/C) System › Installation
12 Climate controlInstallation
- Remove the blower unit to A/C unit adaptor and pipe locator.
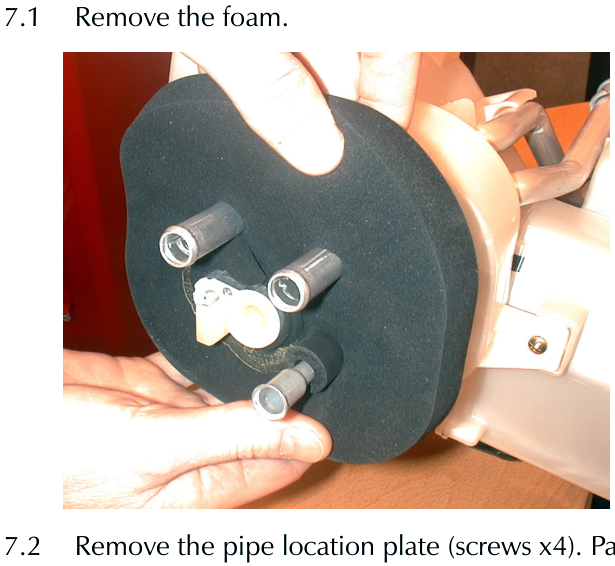
7.1 Remove the foam.
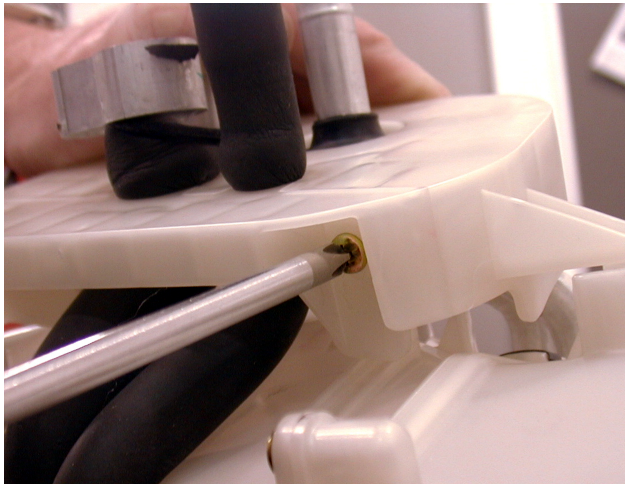
7.2 Remove the pipe location plate (screws x4). Part the pipe location plate and withdraw.
7.3 Remove the adaptor (screws x2), clip (x1) and disconnect one plastic locator.
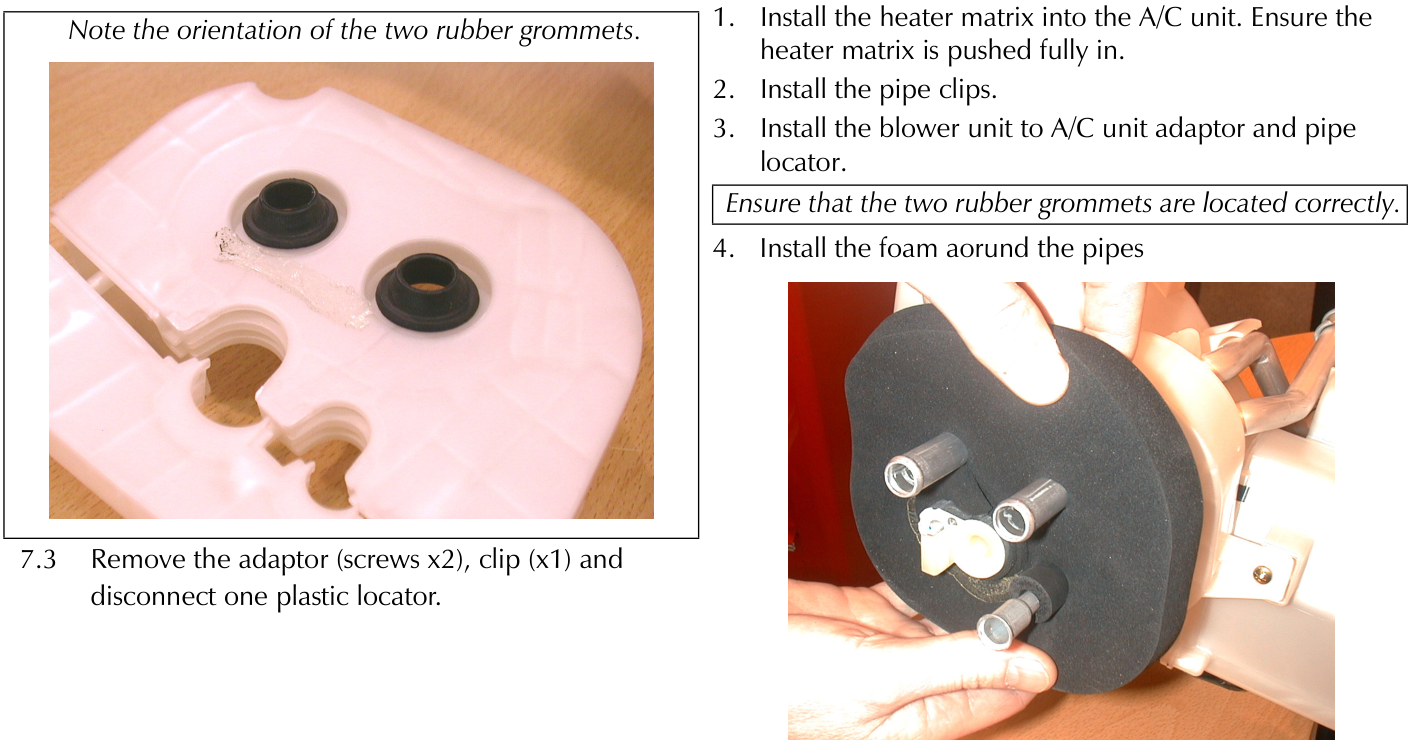
F4 Note the orientation of the two rubber grommets.
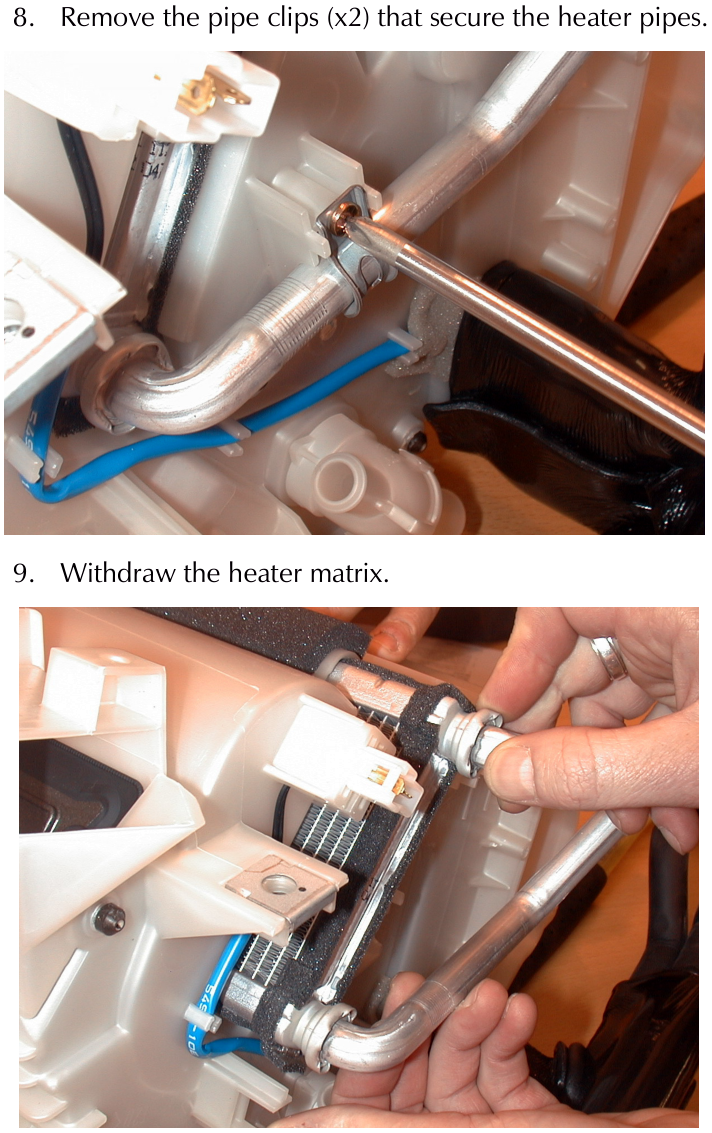
- Remove the pipe clips (x2) that secure the heater pipes.
- Withdraw the heater matrix.
Installation
- Install the heater matrix into the A/C unit. Ensure the heater matrix is pushed fully in.
- Install the pipe clips.
- Install the blower unit to A/C unit adaptor and pipe locator.
Ensure that the two rubber grommets are located correctly.
- Install the foam aorund the pipes
Parts & tools for this job For 2005 Aston Martin DB9
- TOOLA/C manifold gauge setSearch: AC manifold gauge set
- TOOLUV leak detection kitSearch: AC UV leak detection kit
- PARTCabin filterSearch: Aston Martin DB9 2005 cabin filter
Links open Amazon search results in a new tab. As an Amazon Associate I earn from qualifying purchases.