
Adhesive sticker on roof - r.r.
- Make
- Fiat
- Model
- 500 Factory Service Manual
- Year
- 2007–2024
- Section
- Mouldings and protection › Adhesive sticker on roof - r.r.
ADHESIVE STICKER ON ROOF - R.R.
Removing
The stickers should be removed and fitted at ambient temperature and the bodywork should be cleaned first.
1. Heat the sticker with a hot air blower.
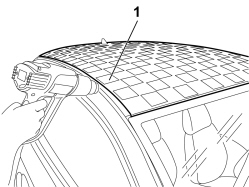
- Remove the sticker heated previously.
- Repeat the operation several times for all the stickers.
- Clean the residual adhesive using the special product - 3m Cleaner Spray.
Refitting
- Clean the entire roof properly using a cloth.
1. Rest the 7 stripes for the stickers on the roof positioning the stripe with the number 1 facing the left side of the vehicle and position the remaining stripes working towards the right in increasing numerical order.
- Check the suitability of all the stripes.
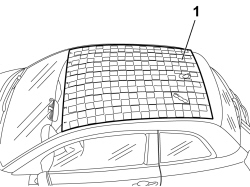
1. Align the front part of the adhesive about 10 mm from the edge of the roof for all 7 stripes.
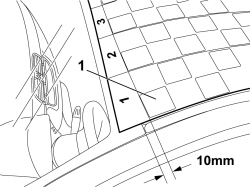
1. Check that the space between the various stripes in the middle area of the roof is even.
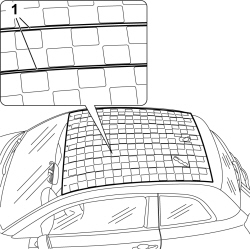
1. Secure the stripes on the roof with the help of adhesive tape starting from the rear part of the actual stripes.
During this operation check that the stripes stick perfectly to the roof, do not have any folds and are perfectly aligned with one another.
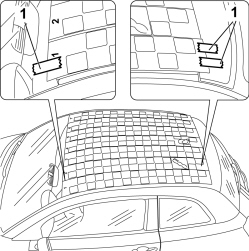
1. Secure the stripes to one another and to the roof at the front with the help of adhesive tape positioned transversely in relation to the stripes.
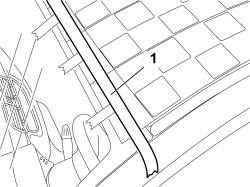
- Release the rear part of the stripe from the adhesive tape.
1. Partly remove the lower protective film.
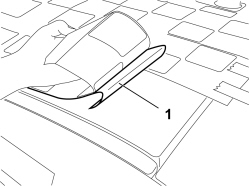
1. With the help of the buffer stick the sticker working gently from the back towards the front.
- Repeat this operation for all the stickers.
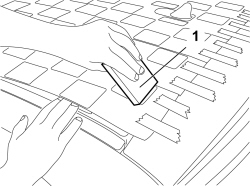
1. Remove the upper protective film for the sticker.
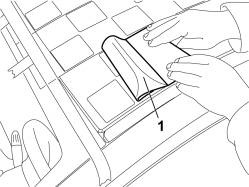
handle the stickers carefully: check for stretching, distortions or breaks.
- With the help of the special buffer, stretch all the stickers.
- Repeat the previous operations for the remaining stripes.
If there are bubbles in the stickers are they have been fitted, pierce them using a needle and stretch them again over the surrounding area using the special spatula.
Keep the vehicle under cover for at least one hour after fitting the stickers.
Avoid washing the vehicle for 24 hours after the stickers have been fitted.
Parts & tools for this job For 2007 Fiat 500
- TOOLTrim removal tool kitSearch: trim removal tool kit
- PARTTouch-up paintSearch: Fiat touch up paint
- PARTPanel clip assortmentSearch: Fiat panel clips assortment
Links open Amazon search results in a new tab. As an Amazon Associate I earn from qualifying purchases.